Spring Boot 3 集成 Thymeleaf
在现代的Web开发中,构建灵活、动态的用户界面是至关重要的。Spring Boot和Thymeleaf的结合为开发者提供了一种简单而强大的方式来创建动态的Web应用。本文将介绍如何在Spring Boot项目中集成Thymeleaf,并展示一些基本的使用方法。

什么是Thymeleaf?
Thymeleaf是一款用于Web和独立环境的现代化服务器端Java模板引擎。它能够处理HTML、XML、JavaScript、CSS甚至纯文本。Thymeleaf的语法简单易懂,它允许开发者在模板中嵌入表达式,以便动态地渲染数据。
官网地址:https://www.thymeleaf.org/
官方文档:https://www.thymeleaf.org/doc/tutorials/3.1/usingthymeleaf.html
github地址:https://github.com/thymeleaf
开始集成Thymeleaf
首先,确保你的Spring Boot项目已经建立。接下来,我们将添加Thymeleaf的依赖。在pom.xml文件中,添加以下依赖:
<dependency>
  <groupId>org.springframework.boot</groupId>
  <artifactId>spring-boot-starter-thymeleaf</artifactId>
</dependency>
这将引入Spring Boot Thymeleaf Starter,它包含了Thymeleaf的所有必要依赖。
配置Thymeleaf
在Spring Boot应用中,Thymeleaf的默认配置通常已经足够满足大多数需求。然而,你也可以通过在application.properties或application.yml文件中进行配置来修改默认设置。以下是一个基本的Thymeleaf配置示例:
spring:
  # 配置thymeleaf的相关信息
  thymeleaf:
    # 开启视图解析
    enabled: true
    #编码格式
    encoding: UTF-8
    #前缀配置
    prefix: classpath:/templates/
    # 后缀配置
    suffix: .html
    #是否使用缓存 开发环境时不设置缓存
    cache: false
    # 格式为 HTML 格式
    mode: HTML5
    # 配置类型
    servlet:
      content-type: text/html
创建Thymeleaf模板
在src/main/resources/templates/目录下创建Thymeleaf模板文件。例如,我们创建一个名为index.html的文件:
<!DOCTYPE html>
<html lang="en"  xmlns:th="http://www.thymeleaf.org">

<head>
    <meta charset="UTF-8">
    <title>修己</title>
</head>
<body>
<span th:text="${name}" style="font-size: 60px;font-weight: bold;color: #00C957;font-family: 楷体,cursive">xj</span>
</body>
</html>
修改 html 标签用于引入 thymeleaf 引擎,这样才可以在其他标签里使用 th:* 语法,声明如下:
<!DOCTYPE html>
<html lang="en" xmlns:th="http://www.thymeleaf.org">
创建Controller
现在,我们需要一个Controller来处理请求并提供数据给Thymeleaf模板。创建一个简单的Controller类:
import org.springframework.stereotype.Controller;
import org.springframework.ui.Model;
import org.springframework.web.bind.annotation.GetMapping;


@Controller
public class TestController {
    @GetMapping({"/","/index"})
    public String  listUser(Model model){
        model.addAttribute("name","修己");
        return "index";
    }
}
注:
我们前后端分离的项目在controller上一般都会使用@RestController注解,@RestController 注解是 @Controller 和 @ResponseBody 注解的结合,它的作用相当于在每个方法上都添加了 @ResponseBody,用于构建 RESTful Web服务。使用 @RestController 注解的类,每个方法的返回值都会被直接写入HTTP响应体中,而不会经过视图解析器进行渲染。默认情况下,返回的是JSON格式的数据,但可以通过其他注解配置以返回不同格式的数据。
@Controller 通常用于传统的MVC应用程序,其中控制器负责处理HTTP请求,并返回一个视图(HTML页面)或者通过视图解析器解析的模型数据。Thymeleaf通常与@Controller一起使用,因为Thymeleaf模板引擎负责渲染HTML视图。
运行应用
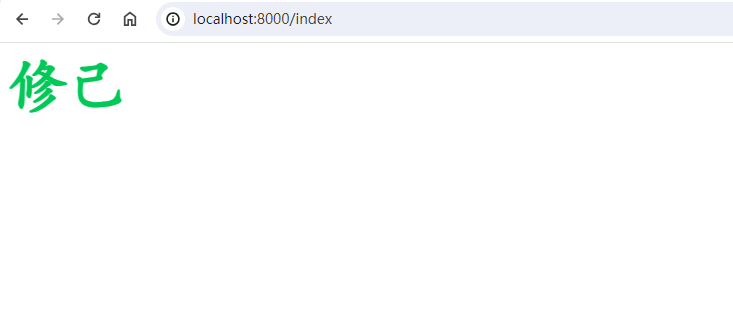
现在你可以运行你的Spring Boot应用程序。访问http://localhost:8000 或者 http://localhost:8000/index,你应该能够看到渲染后的页面,上面显示着动态设置的name。

语法
Thymeleaf 是一款现代化的服务器端Java模板引擎,专为Web应用开发而设计。其语法清晰、易读,广泛支持HTML、XML、JavaScript等多种模板类型。尽管我之前对Thymeleaf的页面开发经验有限,但最近在网络上发现了一篇介绍Thymeleaf基本语法和特性的博客。我觉得这篇博客内容非常有价值,于是决定将其分享给家人,以便更多人能够受益。如果你也对Thymeleaf感兴趣,可以在这里查看博客内容:https://fanlychie.github.io/post/thymeleaf.html 。
总结
通过集成Thymeleaf,我们能够在Spring Boot应用中创建动态且灵活的用户界面。Thymeleaf的简单语法和与Spring Boot的无缝集成使得开发者能够轻松构建功能丰富的Web应用。
本文来自互联网用户投稿,该文观点仅代表作者本人,不代表本站立场。本站仅提供信息存储空间服务,不拥有所有权,不承担相关法律责任。 如若内容造成侵权/违法违规/事实不符,请联系我的编程经验分享网邮箱:veading@qq.com进行投诉反馈,一经查实,立即删除!