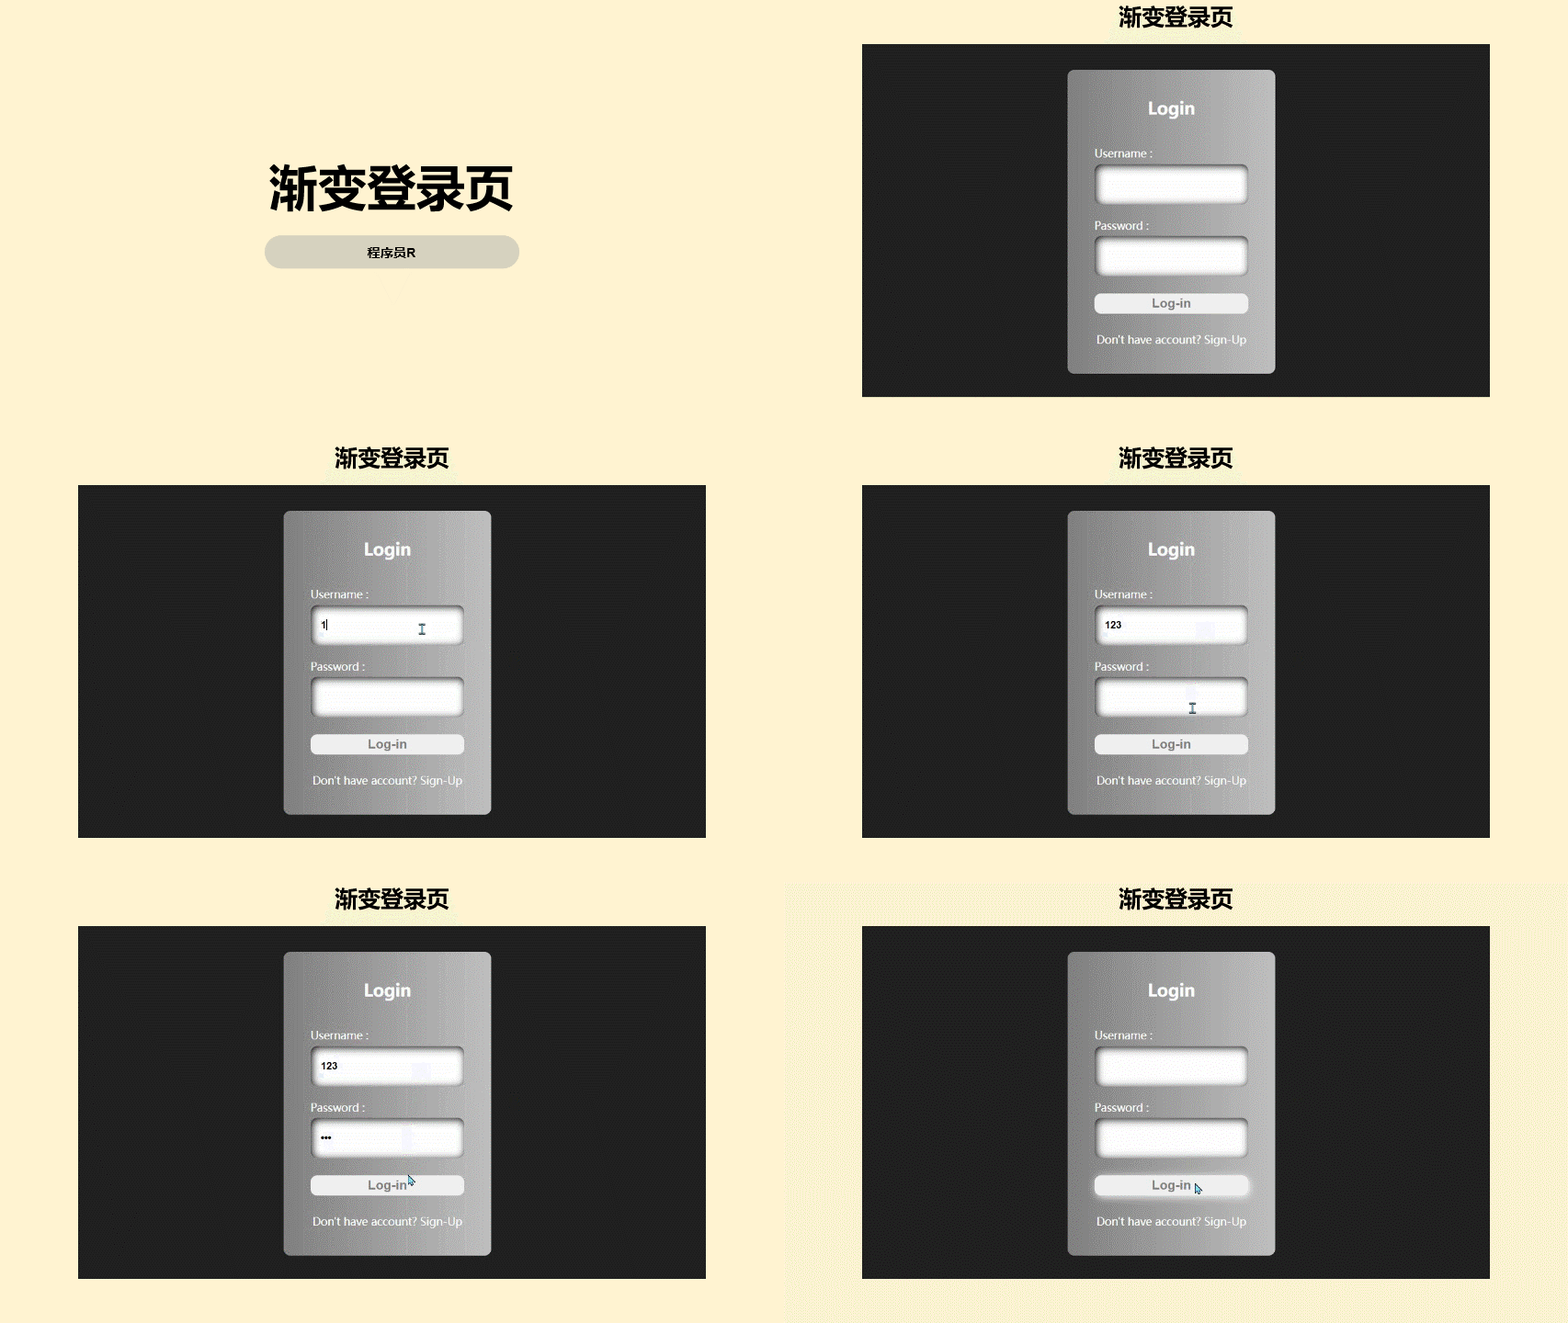
渐变登录页
2024-01-10 08:43:38
效果演示

实现了一个简单的登录页面的样式和交互效果。
Code
<div class="flex">
    <div class="login color">Login</div>
    <label class="color">Username :</label>
    <input type="text" class="input">
    <label class="color">Password :</label>
    <input type="password" class="input">
    <button class="">Log-in</button>
    <br>
    <div class="color align">Don't have account? <span class="span">Sign-Up</span></div>
</div>
body {
    height: 100vh;
    display: flex;
    justify-content: center;
    align-items: center;
    background-color: #212121;
}

.form {
    display: flex;
    flex-direction: column;
    gap: 10px;
    background: linear-gradient(to right, grey, silver);
    padding: 40px;
    border-radius: 10px;
}

.login {
    font-size: 25px;
    font-weight: bold;
    text-align: center;
    margin-bottom: 20px;
}

.flex {
    display: flex;
    flex-direction: column;
}

.form button {
    margin-top: 25px;
    margin-bottom: 6px;
    border-radius: 10px;
    border: none;
    padding-top: 4px;
    padding-bottom: 4px;
    font-size: 19px;
    font-weight: bold;
    color: grey;
}

.form label {
    margin-top: 20px;
    margin-bottom: 5px;
}

.form button:hover {
    box-shadow: 2px 2px 12px white;
}

.input {
    height: 30px;
    outline: none;
    padding: 15px;
    border-radius: 10px;
    border: none;
    font-weight: bold;
    font-size: 15px;
    box-shadow: 2px 2px 12px inset black;
}

.span:hover {
    font-weight: bold;
}

.color {
    color: white;
}

.align {
    text-align: center;
}
实现思路拆分
body {
  height: 100vh; /* 设置页面高度为视口高度 */
  display: flex; /* 设置页面为flex布局 */
  justify-content: center; /* 设置主轴居中对齐 */
  align-items: center; /* 设置交叉轴居中对齐 */
  background-color: #212121; /* 设置背景颜色为深灰色 */
}
这段代码设置了页面的基本样式,包括高度、布局方式、对齐方式和背景颜色。
.form {
  display: flex; /* 设置表单为flex布局 */
  flex-direction: column; /* 设置主轴为垂直方向 */
  gap: 10px; /* 设置表单元素之间的间距为10px */
  background: linear-gradient(to right, grey, silver); /* 设置表单背景为从左到右的渐变色 */
  padding: 40px; /* 设置表单内边距为40px */
  border-radius: 10px; /* 设置表单边框为圆角矩形 */
}
这段代码设置了表单的样式,包括布局方式、主轴方向、间距、背景、内边距和边框。
.login {
  font-size: 25px; /* 设置登录标题的字体大小为25px */
  font-weight: bold; /* 设置登录标题的字体粗细为bold */
  text-align: center; /* 设置登录标题居中对齐 */
  margin-bottom: 20px; /* 设置登录标题下方的间距为20px */
}
这段代码设置了登录标题的样式,包括字体大小、字体粗细、对齐方式和下方的间距。
.flex {
  display: flex; /* 设置容器为flex布局 */
  flex-direction: column; /* 设置主轴为垂直方向 */
}
这段代码设置了容器的样式,包括布局方式和主轴方向。
.form button {
  margin-top: 25px; /* 设置按钮上方的间距为25px */
  margin-bottom: 6px; /* 设置按钮下方的间距为6px */
  border-radius: 10px; /* 设置按钮的圆角半径为10px */
  border: none; /* 设置按钮没有边框 */
  padding-top: 4px; /* 设置按钮内边距上方的间距为4px */
  padding-bottom: 4px; /* 设置按钮内边距下方的间距为4px */
  font-size: 19px; /* 设置按钮字体大小为19px */
  font-weight: bold; /* 设置按钮字体粗细为bold */
  color: grey; /* 设置按钮字体颜色为灰色 */
}
这段代码设置了按钮的样式,包括上方和下方的间距、圆角半径、边框、内边距、字体大小、字体粗细和字体颜色。
.form label {
  margin-top: 20px; /* 设置标签上方的间距为20px */
  margin-bottom: 5px; /* 设置标签下方的间距为5px */
}
这段代码设置了标签的样式,包括上方和下方的间距。
.form button:hover {
  box-shadow: 2px 2px 12px white; /* 设置鼠标悬停在按钮上时的阴影效果 */
}
这段代码设置了鼠标悬停在按钮上的样式,包括阴影效果。
.input {
  height: 30px; /* 设置输入框高度为30px */
  outline: none; /* 设置输入框没有轮廓线 */
  padding: 15px; /* 设置输入框内边距为15px */
  border-radius: 10px; /* 设置输入框的圆角半径为10px */
  border: none; /* 设置输入框没有边框 */
  font-weight: bold; /* 设置输入框字体粗细为bold */
  font-size: 15px; /* 设置输入框字体大小为15px */
  box-shadow: 2px 2px 12px inset black; /* 设置输入框的阴影效果 */
}
这段代码设置了输入框的样式,包括高度、轮廓线、内边距、圆角半径、边框、字体粗细、字体大小和阴影效果。
.span:hover {
  font-weight: bold; /* 设置鼠标悬停在span上时的字体粗细为bold */
}
这段代码设置了鼠标悬停在span上的样式,包括字体粗细。
.color {
  color: white; /* 设置color类的文本颜色为白色 */
}
这段代码设置了color类的样式,包括文本颜色。
.align {
  text-align: center; /* 设置align类的文本居中对齐 */
}
这段代码设置了align类的样式,包括文本居中对齐。
文章来源:https://blog.csdn.net/weixin_72553980/article/details/135491678
本文来自互联网用户投稿,该文观点仅代表作者本人,不代表本站立场。本站仅提供信息存储空间服务,不拥有所有权,不承担相关法律责任。 如若内容造成侵权/违法违规/事实不符,请联系我的编程经验分享网邮箱:veading@qq.com进行投诉反馈,一经查实,立即删除!
本文来自互联网用户投稿,该文观点仅代表作者本人,不代表本站立场。本站仅提供信息存储空间服务,不拥有所有权,不承担相关法律责任。 如若内容造成侵权/违法违规/事实不符,请联系我的编程经验分享网邮箱:veading@qq.com进行投诉反馈,一经查实,立即删除!