HeartBeat监控springboot服务状态
2023-12-13 15:20:37
目录
一、环境准备
? ??部署模式:单节点部署。
? ??安装包:heartbeat安装包下载地址
二、安装部署
2.1 下载安装包到指定文件夹,并解压
# 进入安装目录
cd /opt/module
# 解压安装包
tar xf heartbeat-8.11.0.tar.gz
2.2 复制证书文件
# 进入配置文件目录
cd heartbeat-8.11.0/config
# 创建证书文件夹
mkdir certs
# 将es的证书文件复制到certs文件夹下
cp /opt/module/elasticsearch-8.11.0/config/certs/* certs/
2.3 编辑配置文件
vim heartbeat.ymlheartbeat.config.monitors:
# Directory + glob pattern to search for configuration files
path: ${path.config}/monitors.d/*.yml
# If enabled, heartbeat will periodically check the config.monitors path for changes
reload.enabled: false
# How often to check for changes
reload.period: 5s
# Configure monitors inline
heartbeat.monitors:
- type: http
# Set enabled to true (or delete the following line) to enable this monitor
enabled: true
# ID used to uniquely identify this monitor in Elasticsearch even if the config changes
id: springboot-demo-test
# Human readable display name for this service in Uptime UI and elsewhere
name: springboot-demo-test
# List of URLs to query
urls: ["http://localhost:8080/test/hello"]
# Configure task schedule
schedule: '@every 10s'
check.response.status: [200]
ipv4: true
ipv6: true
mode: any
# Total test connection and data exchange timeout
#timeout: 16s
# Name of corresponding APM service, if Elastic APM is in use for the monitored service.
#service.name: my-apm-service-name
# Experimental: Set this to true to run heartbeat monitors exactly once at startup
#heartbeat.run_once: true
# ======================= Elasticsearch template setting =======================
setup.template.settings:
index.number_of_shards: 1
index.codec: best_compression
setup.template.name: "heartbeat"
setup.template.pattern: "heartbeat-*"
setup.ilm.enabled: false
# =================================== Kibana ===================================
# Starting with Beats version 6.0.0, the dashboards are loaded via the Kibana API.
# This requires a Kibana endpoint configuration.
setup.kibana:
# Kibana Host
# Scheme and port can be left out and will be set to the default (http and 5601)
# In case you specify and additional path, the scheme is required: http://localhost:5601/path
# IPv6 addresses should always be defined as: https://[2001:db8::1]:5601
#host: "localhost:5601"
host: "192.168.122.118:5601"
# ---------------------------- Elasticsearch Output ----------------------------
output.elasticsearch:
# Array of hosts to connect to.
hosts: ["https://192.168.122.118:9200","https://192.168.122.119:9200","https://192.168.122.120:9200"]
protocol: "https"
username: "elastic"
password: "elastic"
ssl.certificate_authorities: ["/opt/module/metricbeat-8.11.0/certs/elasticsearch-ca.pem"]
ssl.certificate: "/opt/module/metricbeat-8.11.0/certs/instance.crt"
ssl.key: "/opt/module/metricbeat-8.11.0/certs/instance.key"
# Protocol - either `http` (default) or `https`.
#protocol: "https"
# Authentication credentials - either API key or username/password.
#api_key: "id:api_key"
#username: "elastic"
#password: "changeme"
# ================================= Processors =================================
processors:
- add_observer_metadata:2.4 设置模板
# 设置模板
./heartbeat setup
2.5 启动服务
# 编写启动命令文件
echo "nohup ./heartbeat -e  > ./heartbeat.log 2>&1 &" > start.sh
# 启动服务
./start.sh
# 查看日志
tail -200f /opt/module/heartbeat-8.11.0/heartbeat.log
2.6 检查es是否收到数据
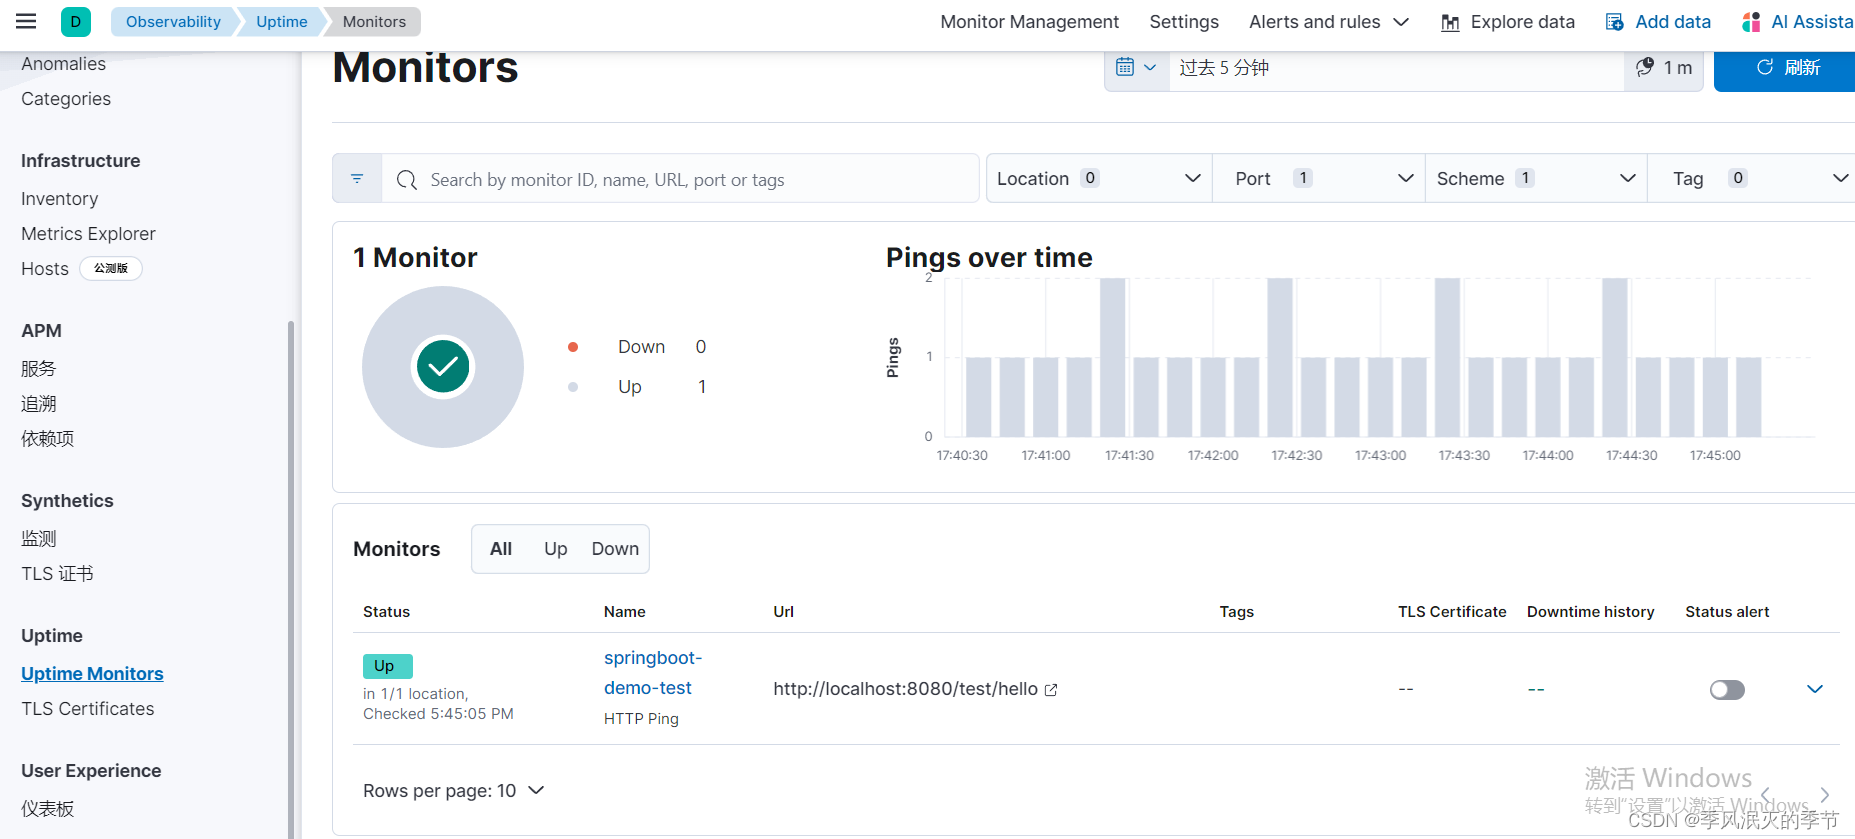
?登入kibana ,进入observability,添加 uptime,检查 heartbeat 状态。正常后即可在observability >uptime看到监控的实例

文章来源:https://blog.csdn.net/lmj3732018/article/details/134926046
本文来自互联网用户投稿,该文观点仅代表作者本人,不代表本站立场。本站仅提供信息存储空间服务,不拥有所有权,不承担相关法律责任。 如若内容造成侵权/违法违规/事实不符,请联系我的编程经验分享网邮箱:veading@qq.com进行投诉反馈,一经查实,立即删除!
本文来自互联网用户投稿,该文观点仅代表作者本人,不代表本站立场。本站仅提供信息存储空间服务,不拥有所有权,不承担相关法律责任。 如若内容造成侵权/违法违规/事实不符,请联系我的编程经验分享网邮箱:veading@qq.com进行投诉反馈,一经查实,立即删除!