Web前端-JavaScript(Dom基础)
文章目录
1.1 DOM 介绍
1.1.1 DOM简介
? 文档对象模型(Document Object Model,简称DOM),是W3C组织推荐的处理可扩展标记语言的标准编程接口。
? W3C 已经定义了一系列的 DOM 接口,通过这些 DOM 接口可以改变网页的内容、结构和样式。
? DOM是W3C组织制定的一套处理 html和xml文档的规范,所有的浏览器都遵循了这套标准。
1.1.2 DOM树
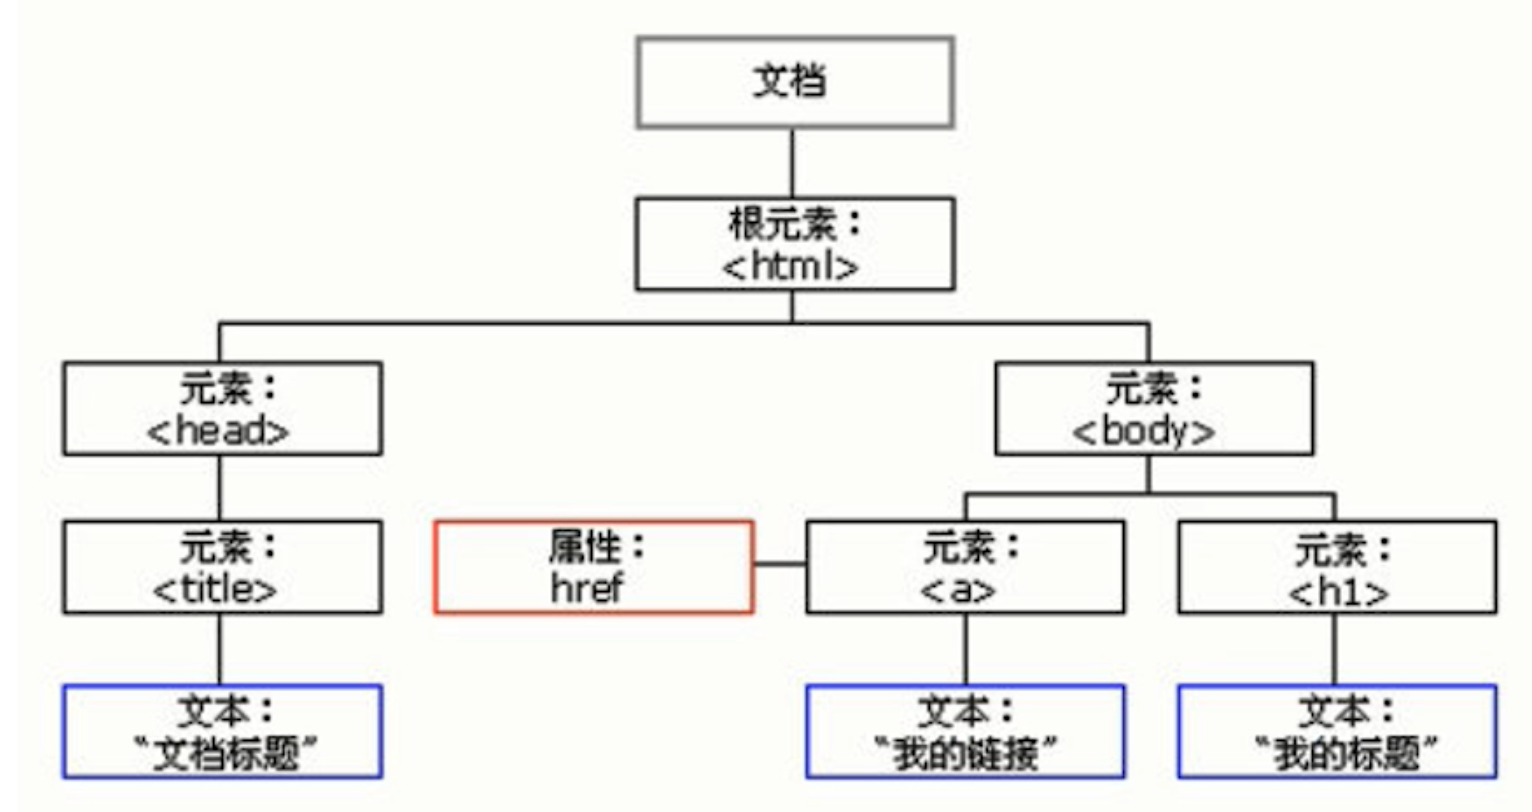
DOM树 又称为文档树模型,把文档映射成树形结构,通过节点对象对其处理,处理的结果可以加入到当前的页面
- 文档:一个页面就是一个文档,表示的是整个 html文档,DOM中使用document表示
- 节点:网页中的所有内容,在文档树中都是节点(标签、属性、文本、注释等),用node表示
- 标签节点:表示的是 html 中的标签,又叫元素节点,简称元素,用element表示
- 属性节点,表示的是 html 标签中的属性
- 文本节点,表示的是 html 标签中的内容文本
- 注释节点,表示的是 html 文档中的注释
- DOM把以上内容都看做是对象
1.2. 获取元素
- 为什么要获取页面元素
- 因为要操作页面上的元素
1.2.1 根据ID获取元素
- 语法:document.getElementById(id)
- 作用:根据ID获取元素对象
- 参数:id值,区分大小写的字符串
- 返回值:元素对象 或 null
案例代码
<body>
  <div id="time">2019-9-9</div>
</body>
<script>
  var timer = document.getElementById('time');
  console.log(timer);//<div id="time">2019-9-9</div>
  console.log(typeof timer);//object
  console.dir(timer);//返回对象中属性和方法
</script>
1.2.2 根据标签名获取元素
- 语法:document.getElementsByTagName(‘标签名’)
- 作用:根据标签名获取元素对象
- 参数:标签名
- 返回值:元素对象集合(伪数组,数组元素是元素对象)
案例代码
<body>
  <ul>
    <li>知否知否,应是等你好久11</li>
    <li>知否知否,应是等你好久12</li>
    <li>知否知否,应是等你好久13</li>
  </ul>
  <ol id="ol">
    <li>生僻字1</li>
    <li>生僻字2</li>
    <li>生僻字3</li>
  </ol>

  <script>
    //会获取页面所有的li标签
    var lis = document.getElementsByTagName('li');
    console.log(lis);//返回的是一个伪数组
    console.log(lis[7]);

    var ol = document.getElementById('ol');
    var li = ol.getElementsByTagName('li');
    console.log(li);
    for (var i = 0; i < li.length; i++) {
      console.log(li[i].innerText);
    }
  </script>
</body>
1.2.3 其它方式获取元素
-
根据类名返回元素对象集合:document.getElementsByClassName(‘类名’);
-
根据指定选择器返回第一个元素对象:document.querySelector(‘选择器’);
-
根据指定选择器返回:document.querySelectorAll(‘选择器’);
注意:querySelector和querySelectorAll选择器需要加符号,如:document.querySelector(‘#id’)
案例代码
<body>
  <div class="box">盒子1</div>
  <div class="box">盒子2</div>

  <div id="nav">
    <ul>
      <li>首页</li>
      <li>产品</li>
    </ul>
  </div>

  <script>
    // 1. getElementsByClassName 根据类名获得某些元素集合
    var boxs = document.getElementsByClassName('box');
    console.log(boxs);

    // 2. querySelector 返回指定选择器的第一个元素对象
    var firstBox = document.querySelector('.box');
    console.log(firstBox);
    var nav = document.querySelector('#nav');
    console.log(nav);
    var li = document.querySelector('li');
    console.log(li);

    // // 3. querySelectorAll()返回指定选择器的所有元素对象集合
    var allBox = document.querySelectorAll('.box');
    console.log(allBox);
    var lis = document.querySelectorAll('li');
    console.log(lis);
  </script>
</body>
1.2.4 获取特殊元素
-
获取body元素:document.body
-
获取html元素:document.documentElement
<body>
  <script>

    // 获取body;
    console.log(document.body);
    console.dir(document.body);

    // 获取根元素
    console.log(document.documentElement);
  </script>
</body>
1.3 事件基础
1.3.1 事件概述
- 事件是可以被 JavaScript 侦测到的行为。
- 例如,我们可以在用户点击某按钮时产生一个事件,然后去执行某些操作。
1.3.2 事件三要素
- 事件源(谁):触发事件的元素
- 事件类型(什么事件): 例如 click 点击事件
- 事件处理程序(做啥):事件触发后要执行的代码(函数形式),事件处理函数
案例代码
<body>
  <button id="btn">唐伯虎</button>
  <script>
    var btn = document.getElementById('btn');

    btn.onclick = function () {
      alert('点秋香');
    };
  </script>
</body>
1.3.3 执行事件步骤
- 获取事件源
- 注册事件
- 添加事件处理程序 (函数)
<body>
  <div class="box"></div>

  <script>
    //1.获取事件源
    var box = document.querySelector('.box');

    //2.注册事件
    //box.onclick

    //3.添加事件处理程序
    box.onclick = function () {
      alert('未来可期');
    }
  </script>
</body>
1.3.4 鼠标事件
| 鼠标事件 | 触发条件 |
|---|---|
| onclick | 鼠标点击左键触发 |
| onmouseover | 鼠标经过触发 |
| onmouseout | 鼠标离开触发 |
| onmousemove | 鼠标点击移动触发 |
| onmouseup | 鼠标抬起触发 |
| onmousedown | 鼠标按下触发 |
| onfocus | 获得鼠标焦点触发 |
| onblur | 失去鼠标焦点触发 |
<body>
  <div class="box"></div>
  <input type="text">登入
  <script>
    var box = document.querySelector('.box');
    box.onclick = function () {
      console.log("onclick");
    }
    box.onmouseover = function () {
      console.log("onmouseover");
    }
    box.onmouseout = function () {
      console.log("onmouseout");
    }
    box.onmousemove = function () {
      console.log("onmousemove");
    }
    box.onmouseup = function () {
      console.log("onmouseup");
    }
    box.onmousedown = function () {
      console.log("onmousedown");
    }

    var input = document.querySelector('input');
    input.onfocus = function () {
      console.log("onfocus");
    }
    input.onblur = function () {
      console.log("onblur");
    }
  </script>
</body>
1.4 操作元素
操作元素来改变元素里面的内容、属性等。
1.4.1 操作元素内容
- element.innerText:从起始位置到终止位置的内容,会去除html标签,同是空格和换行也会去掉
- element.innerHTML:从起始位置到终止位置的全部内容,包括html标签,同是保留空格和换行
<body>
  <p>
    我是文字
  </p>

  <script>
    var p = document.getElementsByTagName('p')
    console.log(p[0].innerText)
    p[0].innerText = '我是p标签'
    console.log(p[0].innerText)
  </script>
</body>
innerText和innerHTML的区别
- 获取内容时的区别:
- innerText会去除空格和换行,而innerHTML会保留空格和换行
- 设置内容时的区别:
- innerText不会识别html,而innerHTML会识别
<body>
  <button>按钮</button>
  <p><span>我是一段文字,我很好看!</span></p>
  <script>
    var btn = document.getElementsByTagName('button');
    var p = document.getElementsByTagName('p');

    btn[0].onclick = function () {
      console.log(p[0].innerText);
      console.log(p[0].innerHTML);
      p[0].innerHTML = '<h1>我很好看!</h1>';
      // p[0].innerText = '<h1>我很好看!</h1>';
      console.log(p[0].innerText);
      console.log(p[0].innerHTML);

    };
  </script>
</body>
显示当前时间练习
<head>
  <meta charset="UTF-8" />
  <title>Document</title>
  <style>
    div,
    p {
      width: 300px;
      height: 30px;
      line-height: 30px;
      color: #fff;
      background-color: pink;
    }
  </style>
</head>

<body>
  <button>显示当前系统时间</button>
  <p>点击时候显示当前时间</p>
  <script>

    var btn = document.getElementsByTagName('button');
    var p = document.getElementsByTagName('p');
 		var div = document.getElementById('div');
		div.innerText = getTime();


    btn[0].onclick = function () {
      p[0].innerText = getTime();
    }

    function getTime() {
      var date = new Date();
      var year = date.getFullYear();
      var month = date.getMonth() + 1;
      var day = date.getDate();
      var time = "当前时间是" + year + '年' + month + "月" + day + "日"
      return time
    }
  </script>
</body>

</html>
1.4.2 属性操作
- src
- href
- id
- alt
- title
语法:
-
获取属性值
元素对象.属性名
-
设置属性值
元素对象.属性名 = 值
<body>
  <img src="images/s.gif" alt="图片丢失了" title="这是图片" />
  <div>
    <a href="http://www.baidu.com">上午好</a>
  </div>
  <script>
    // 1.获取事件源
    var img = document.querySelector('img');
    var a = document.querySelector('a');
    console.log(img.src);
    console.log(img.alt);
    console.log(img.title);
    console.log(a.href);

    img.src = 'images/x.gif';
    img.alt = '图片丢失了1';
    img.title = '这是图片1';
    a.href = 'http://www.163.com';
    a.innerText = '下午好!';
  </script>
</body>
1.4.3 表单元素属性操作
- type
- value
- checked
- selected
- disabled
语法:
- 获取属性的值
- 元素对象.属性名
- 设置属性的值
- 元素对象.属性名 = 值
- 表单元素中有一些属性如:disabled、checked、selected,这些属性值是布尔类型
<body>
  <input type="checkbox" value="1234" checked>
  <select>
    <option value="1" disabled>上海</option>
    <option value="2" selected>深圳</option>
  </select>

  <script>
    var input = document.querySelector('input');
    console.log(input.type);
    console.log(input.value);
    console.log(input.checked);

    var option = document.querySelectorAll('option');
    console.log(option[0].disabled);
    console.log(option[1].value);
    console.log(option[1].selected);

  </script>
</body>
1.4.4 案例一
仿京东显示隐藏密码
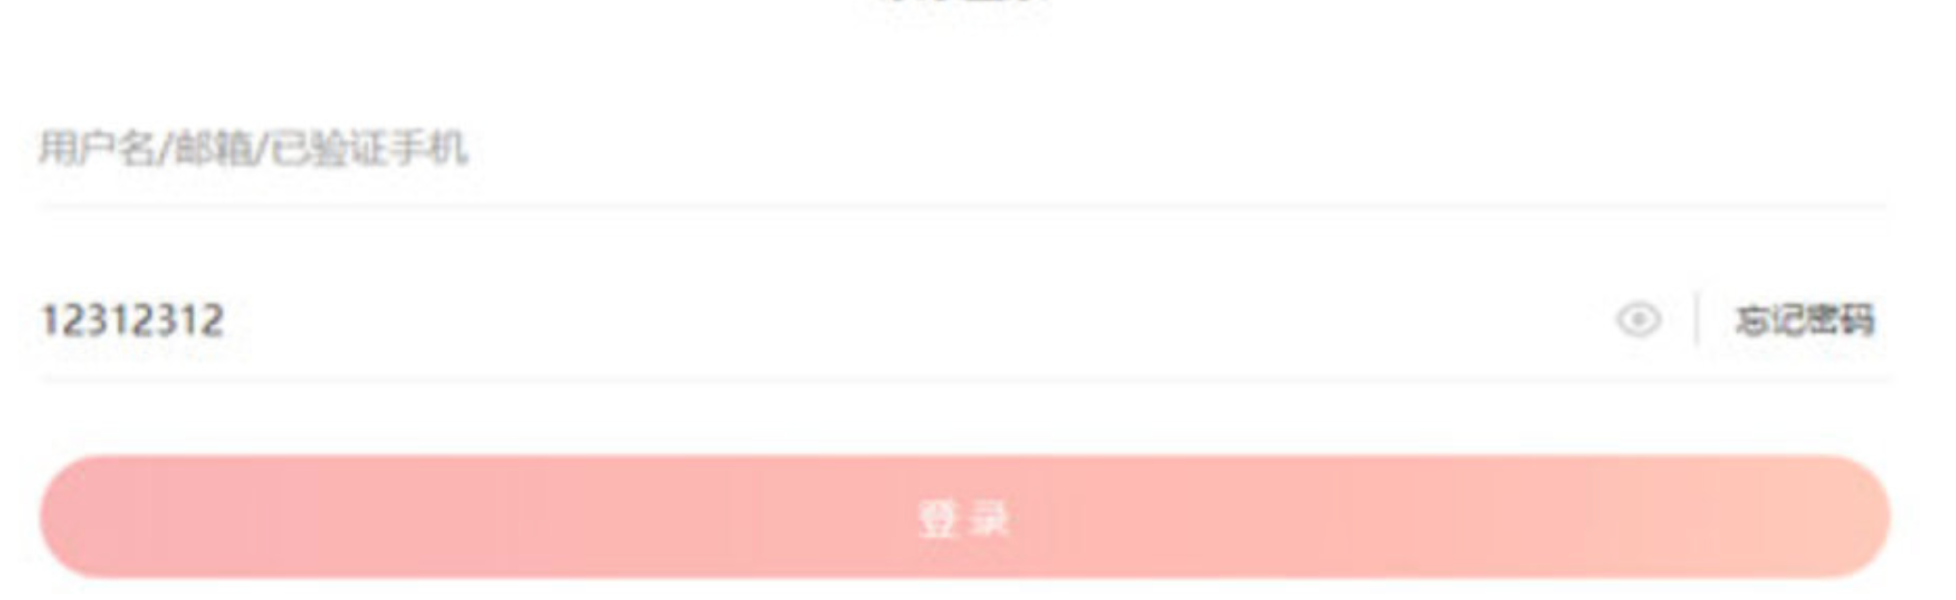
核心思路:
- 点击眼睛按钮,把密码框类型改为文本框就可以看见里面的密码
- 一个按钮2个状态,点击一次,切换为文本框,在点击一次切换为密码框
- 可以利用一个flag变量,判断flag的值,
- 如果是true就切换为文本框,flag设置为false
- 如果是false就切换为密码框,flag设置为true
<head>
  <meta charset="UTF-8" />
  <title>Document</title>
  <style>
    .box {
      position: relative;
      width: 400px;
      border-bottom: 1px solid #ccc;
      margin: 100px auto;
    }

    .box #password {
      width: 370px;
      height: 30px;
      border: 0;
      outline: none;
    }

    .box img {
      position: absolute;
      top: 2px;
      right: 2px;
      width: 24px;
    }
  </style>
</head>

<body>
  <div class="box">
    <img src="images/close.png" id="eye" />
    <input type="password" id="password" />
  </div>

  <script>
    var eye = document.getElementById('eye');
    var password = document.getElementById('password');
    var flag = true;
    eye.onclick = function () {
      if (flag) {
        eye.src = "images/open.png";
        password.type = 'text'
        flag = false
      }
      else {
        eye.src = "images/close.png";
        password.type = 'password'
        flag = true
      }
    }
  </script>
</body>
</html>
1.4.5 样式属性操作
我们可以通过 JS 修改元素的大小、颜色、等样式。
-
常用方式
- 行内样式操作:element.style
- 类名样式操作:element.className
-
操作style属性
- 语法:元素对象.style.样式属性 = 值;
<body> <div> 我是一个div </div> <script> var div = document.querySelector('div'); div.style.width = '600px'; div.style.height = '400px'; div.style.backgroundColor = 'red'; div.style.fontSize = Math.random() * 60 + 'px'; document.body.style.backgroundColor = 'orange'; </script> </body> -
操作className属性
- 语法:元素对象.className = 值;
<body>
  <div class="first">文本</div>
  <script>
    var div = document.querySelector('div');
    div.onclick = function () {
      //新类名 会覆盖原来的类名
      div.className = 'change';
      //添加新类名,保留原有类名
      this.className = 'first change';
    }
  </script>
</body>
注意:
- class是个保留字,因此使用className来操作元素类名属性
- className会直接更改元素的类名,会覆盖原先类名
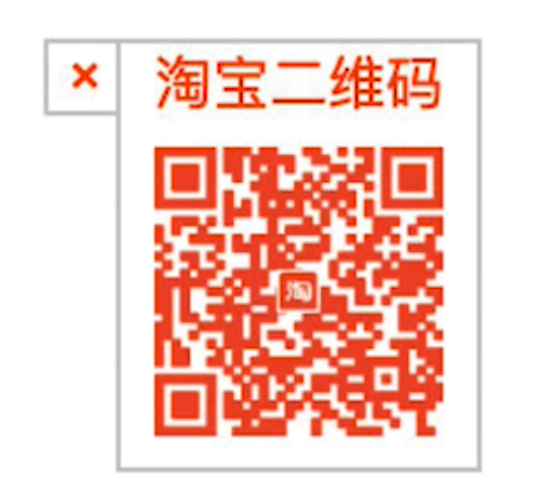
1.4.6 案例二
淘宝点击关闭二维码
思路
-
利用样式的显示和隐藏完成,display:none 隐藏元素,display: block 显示元素
<body>
  <div class="box">
    淘宝二维码
    <img src="images/tao.png" />
    <div class="close-btn">×</div>
  </div>

  <script>
    var btn = document.getElementsByClassName('close-btn');
    var img = document.querySelector('.box');

    btn[0].onclick = function () {
      img.style.display = 'none';
    };
  </script>
</body>
1.4.7 案例三
显示隐藏文本框内容:当鼠标点击文本框时,里面默认文字隐藏,当鼠标离开文本框时,里面文字显示。
思路
-
需要两个事件,获取鼠标焦点onfocus、失去鼠标焦点onblur
-
如果获取焦点,判断表单里面内容是否是默认文字,如果是默认文本,就清空表单内容
-
如果失去焦点,判断表单里面内容是否为空,如果是空,则表单内容改为默认文本,
<body>
  <input type="text" value="手机" id="txt" />
  <script>
    var txt = document.getElementById('txt');

    txt.onfocus = function () {
      console.log('获取焦点')
      if (txt.value == '手机') {
        txt.value = '';
        txt.style.color = 'black';
      }
    };

    txt.onblur = function () {
      console.log('未获取焦点')
      if (txt.value == '') {
        txt.value = '手机';
        txt.style.color = '#999';
      }
    };
  </script>
</body>
1.5 排他操作

如果有同一组元素,我们想要某一个元素实现某种样式, 需要用到循环的排他思想算法:
- 所有元素全部清除样式(一定要先 干掉所有人)
- 给当前元素设置样式 (最后 复活自己)
<body>
  <button>按钮1</button>
  <button>按钮2</button>
  <button>按钮3</button>
  <button>按钮4</button>
  <button>按钮5</button>
  <script>
    var btns = document.querySelectorAll('button');

    //给每一个按钮注册了点击事件
    for (var i = 0; i < btns.length; i++) {
      btns[i].onclick = function () {

        //1.先将所有的高亮颜色清空   干掉了所有人
        for (var j = 0; j < btns.length; j++) {
          btns[j].style.backgroundColor = '';
        }

        //2.单独给自己添加上高亮效果    复活我自己
        this.style.backgroundColor = 'orange';
      };
    }
    //this 代表当前对象  ---->点击那个按钮,哪个按钮就是this
  </script>
</body>
本文来自互联网用户投稿,该文观点仅代表作者本人,不代表本站立场。本站仅提供信息存储空间服务,不拥有所有权,不承担相关法律责任。 如若内容造成侵权/违法违规/事实不符,请联系我的编程经验分享网邮箱:veading@qq.com进行投诉反馈,一经查实,立即删除!