背景?
???? 在项目过程中,有时候你需要调用非C#编写的DLL文件,尤其在使用一些第三方通讯组件的时候,通过C#来开发应用软件时,就需要利用DllImport特性进行方法调用。本篇文章将引导你快速理解这个调用的过程。
步骤
1. 创建一个CSharpInvokeCPP的解决方案:
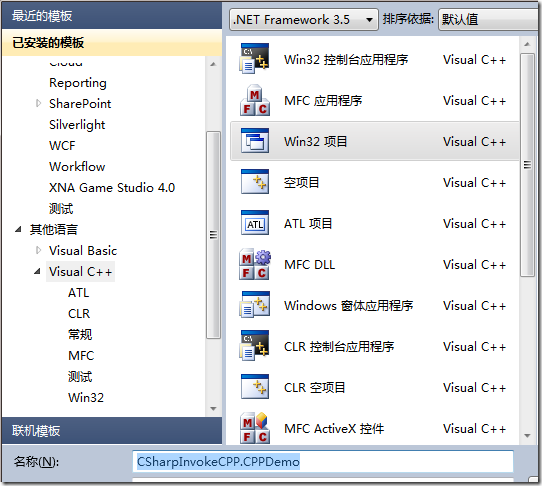
2. 创建一个C++的动态库项目:
3. 在应用程序设置中,选择“DLL”,其他按照默认选项:
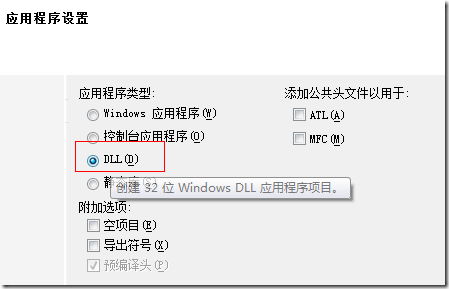
最后点击完成,得到如图所示项目:
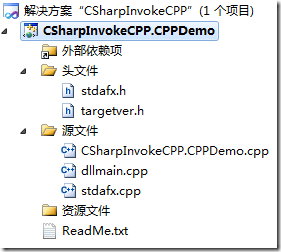
????? 我们可以看到这里有一些文件,其中dllmain.cpp作为定义DLL应用程序的入口点,它的作用跟exe文件有个main或者WinMain入口函数是一样的,它就是作为DLL的一个入口函数,实际上它是个可选的文件。它是在静态链接时或动态链接时调用LoadLibrary和FreeLibrary时都会被调用。详细内容可以参考(DllMain详解-CSDN博客)。
4. 现在我们打开CSharpInvokeCPP.CPPDemo.cpp文件:
现在我们加入以下内容:
| 1 2 3 4 5 6 7 8 9 10 11 12 13 14 15 16 17 18 19 20 21 | // CSharpInvokeCPP.CPPDemo.cpp : 定义 DLL 应用程序的导出函数。
//
#include "stdafx.h"
extern?"C"?__declspec(dllexport)?int?Add(int?x,?int?y)
{
????return?x + y;
}
extern?"C"?__declspec(dllexport)?int?Sub(int?x,?int?y)
{
????return?x - y;
}
extern?"C"?__declspec(dllexport)?int?Multiply(int?x,?int?y)
{
????return?x * y;
}
extern?"C"?__declspec(dllexport)?int?Divide(int?x,?int?y)
{
????return?x / y;
}
|
????? extern "C" 包含双重含义,从字面上即可得到:首先,被它修饰的目标是“extern”的;其次,被它修饰的目标是“C”的。而被extern "C"修饰的变量和函数是按照C语言方式编译和连接的。
????? __declspec(dllexport)的目的是为了将对应的函数放入到DLL动态库中。
????? extern "C" __declspec(dllexport)加起来的目的是为了使用DllImport调用非托管C++的DLL文件。因为使用DllImport只能调用由C语言函数做成的DLL。
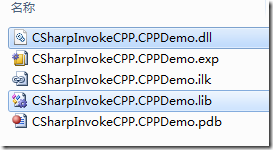
5. 编译项目程序,最后在Debug目录生成CSharpInvokeCPP.CPPDemo.dll和CSharpInvokeCPP.CPPDemo.lib
我们用反编译工具PE Explorer查看下该DLL里面的方法:
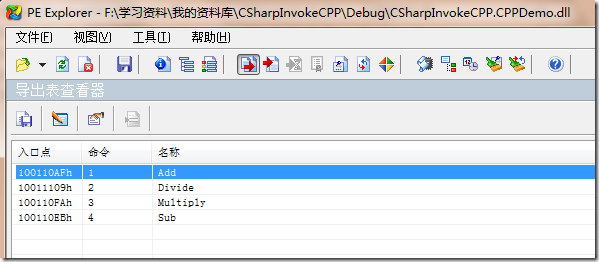
可以发现对外的公共函数上包含这四种“加减乘除”方法。
6. 现在来演示下如何利用C#项目来调用非托管C++的DLL,首先创建C#控制台应用程序:

7. 在CSharpInvokeCSharp.CSharpDemo项目上新建一个CPPDLL类,编写以下代码:
| 1 2 3 4 5 6 7 8 9 10 11 12 13 14 | public?class?CPPDLL
{
????[DllImport("CSharpInvokeCPP.CPPDemo.dll")]
????public?static?extern?int?Add(int?x,?int?y);
????[DllImport("CSharpInvokeCPP.CPPDemo.dll")]
????public?static?extern?int?Sub(int?x,?int?y);
????[DllImport("CSharpInvokeCPP.CPPDemo.dll")]
????public?static?extern?int?Multiply(int?x,?int?y);
????[DllImport("CSharpInvokeCPP.CPPDemo.dll")]
????public?static?extern?int?Divide(int?x,?int?y);
}
|
DllImport作为C#中对C++的DLL类的导入入口特征,并通过static extern对extern “C”进行对应。
8. 另外,记得把CPPDemo中生成的DLL文件拷贝到CSharpDemo的bin目录下,你也可以通过设置【项目属性】->【配置属性】->【常规】中的输出目录:
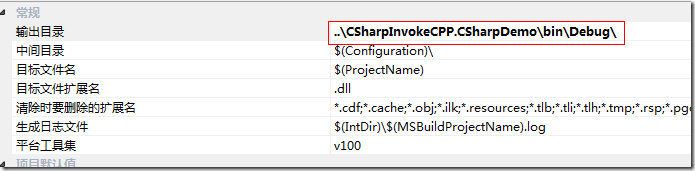
这样编译项目后,生成的文件就自动输出到CSharpDemo中了。
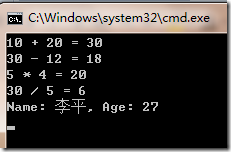
9. 然后在Main入口编写测试代码:
| 1 2 3 4 5 6 7 8 9 10 11 12 13 14 15 16 | static?void?Main(string[] args)
{
????int?result = CPPDLL.Add(10, 20);
????Console.WriteLine("10 + 20 = {0}", result);
????result = CPPDLL.Sub(30, 12);
????Console.WriteLine("30 - 12 = {0}", result);
????result = CPPDLL.Multiply(5, 4);
????Console.WriteLine("5 * 4 = {0}", result);
????result = CPPDLL.Divide(30, 5);
????Console.WriteLine("30 / 5 = {0}", result);
????Console.ReadLine();
}
|
运行结果:

方法得到调用。
10. 以上的方法只能通过静态方法对于C++中的函数进行调用。那么怎样通过静态方法去调用C++中一个类对象中的方法呢?现在我在CPPDemo项目中添加一个头文件userinfo.h:
| 1 2 3 4 5 6 7 8 9 10 11 12 13 14 | class?UserInfo {
private:
????char* m_Name;
????int?m_Age;
public:
????UserInfo(char* name,?int?age)
????{
????????m_Name = name;
????????m_Age = age;
????}
????virtual?~UserInfo(){ }
????int?GetAge() {?return?m_Age; }
????char* GetName() {?return?m_Name; }
};
|
在CSharpInvokeCPP.CPPDemo.cpp中,添加一些代码:
| 1 2 3 4 5 6 7 8 9 10 11 12 13 14 15 16 17 18 19 20 | #include "malloc.h"
#include "userinfo.h"
typedef?struct?{
????char?name[32];
????int?age;
} User;?
UserInfo* userInfo;
extern?"C"?__declspec(dllexport) User* Create(char* name,?int?age)???
{??
????User* user = (User*)malloc(sizeof(User));
????userInfo =?new?UserInfo(name, age);
????strcpy(user->name, userInfo->GetName());?
????user->age = userInfo->GetAge();
????return?user;
}
|
这里声明一个结构,包括name和age,这个结构是用于和C#方面的结构作个映射。
注意:代码中的User*是个指针,返回也是一个对象指针,这样做为了防止方法作用域结束后的局部变量的释放。
strcpy是个复制char数组的函数。
11. 在CSharpDemo项目中CPPDLL类中补充代码:
| 1 2 3 4 5 6 7 8 9 10 11 | [DllImport("CSharpInvokeCPP.CPPDemo.dll")]
public?static?extern?IntPtr Create(string?name,?int?age);
[StructLayout(LayoutKind.Sequential)]
public?struct?User
{
????[MarshalAs(UnmanagedType.ByValTStr, SizeConst = 32)]
????public?string?Name;
????public?int?Age;
}
|
其中这里的结构User就和C++中的User对应。
12. 在Program.cs中补充代码:
| 1 2 3 | IntPtr ptr = CPPDLL.Create("李平", 27);
<strong><font color="#ff0000">CPPDLL.User user = (CPPDLL.User)Marshal.PtrToStructure(ptr,?typeof(CPPDLL.User));</font></strong>
Console.WriteLine("Name: {0}, Age: {1}", user.Name, user.Age);
|
注意:红色字体部分,这里结构指针首先转换成IntPtr句柄,然后通过Marshal.PtrToStructrue转换成你所需要的结构。
运行结果: