docker安装esrally教程
2024-01-03 12:44:14
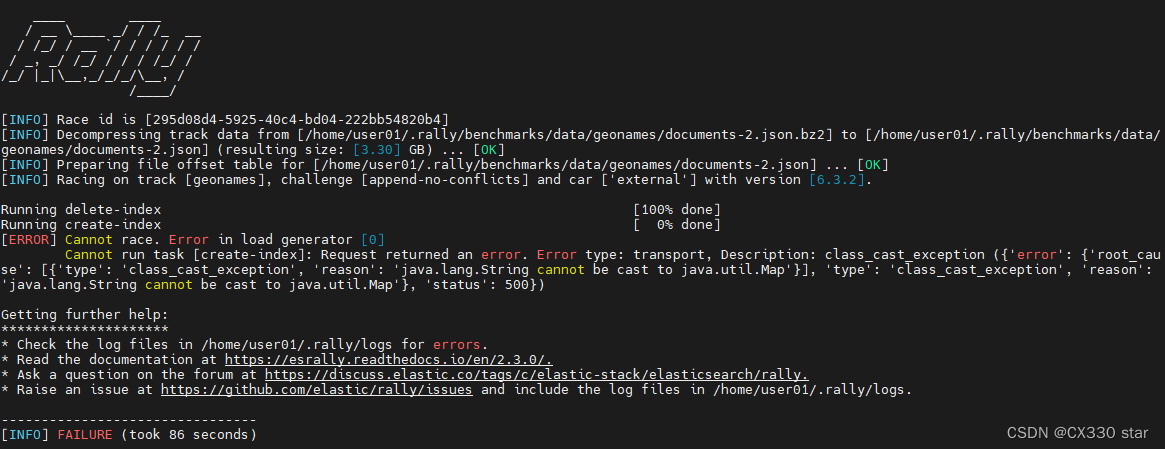
本来用源码安装,首先要安装git,python,jdk,还要配环境特别繁琐,好不容易安装好后运行报如下错误,在官网和github搜不到解决方案,无奈之下只能用docker安装。
[ERROR] Cannot race. Error in load generator [0]
        Cannot run task [create-index]: Request returned an error. Error type: transport, Description: class_cast_exception ({'error': {'root_cause': [{'type': 'class_cast_exception', 'reason': 'java.lang.String cannot be cast to java.util.Map'}], 'type': 'class_cast_exception', 'reason': 'java.lang.String cannot be cast to java.util.Map'}, 'status': 500})

下面是我从知乎上搜到的安装教程改良后的步骤(原来的步骤不完全,也有很多问题,自行修改后总结):
esrally用docker安装教程
参考:docker安装esrally
1.安装docker–随便搜都有,也可参考上方链接,此文只阐述安装esrally
2.下载镜像
链接:https://pan.baidu.com/s/1FNs7dLbtE3aDZFbMlI_INQ提取码:o2gh
3.加载镜像
docker load -i tensorflow_image.docker
4.创建相关目录
mkdir -p /home/test/rally/benchmarks/data/rally-tutorial/
mkdir -p /home/test/rally/benchmarks/data/single/
5.建立相关文件
1)在/home/test/rally/benchmarks/data/single/下新建一个index.json文件
{
  "settings": {
    "index.number_of_replicas": 0
  },
  "mappings": {
    "docs": {
      "dynamic": "strict",
      "properties": {
        "geonameid": {
          "type": "long"
        },
        "name": {
          "type": "text"
        },
        "latitude": {
          "type": "double"
        },
        "longitude": {
          "type": "double"
        },
        "country_code": {
          "type": "text"
        },
        "population": {
          "type": "long"
        }
      }
    }
  }
}
2)同样目录下建立track.json文件–(注:这里原文文件有问题运行报错,建议用我这里的文件)
{
  "version": 2,
  "description": "Tutorial benchmark for Rally",
  "data-url": "http://benchmarks.elasticsearch.org.s3.amazonaws.com/corpora/geonames",
  "indices": [
    {
      "name": "geonames",
      "body": "index.json",
      "types": [ "docs" ]
    }
  ],
  "corpora": [
    {
      "name": "rally-tutorial",
      "base-url": "https://rally-tracks.elastic.co/geonames",
      "documents": [
        {
          "source-file": "documents-2.json.bz2",
          "document-count": 11396503,
          "compressed-bytes": 265208777,
          "uncompressed-bytes": 3547613828
        }
      ]
    }
  ],
  "schedule": [
    {
      "operation": {
        "operation-type": "delete-index"
      }
    },
    {
      "operation": {
        "operation-type": "create-index"
      }
    },
    {
      "operation": {
        "operation-type": "cluster-health",
        "request-params": {
          "wait_for_status": "green"
        },
        "retry-until-success": true
      }
    },
    {
      "operation": {
        "operation-type": "bulk",
        "bulk-size": 5000
      },
      "warmup-time-period": 120,
      "clients": 8
    },
    {
      "operation": {
        "operation-type": "force-merge"
      }
    },
    {
      "operation": {
        "name": "query-match-all",
        "operation-type": "search",
        "body": {
          "query": {
            "match_all": {}
          }
        }
      },
      "clients": 8,
      "warmup-iterations": 1000,
      "iterations": 1000,
      "target-throughput": 100
    }
  ]
}
6.下载数据集
cd /home/test/rally/benchmarks/data/single/
curl -o documents-2.json.bz2 http://benchmarks.elasticsearch.org.s3.amazonaws.com/corpora/geonames/documents-2.json.bz2
(直接访问http这个网址下载了再传到linux也可以)
7.测试运行
chmod -R 777 /home/test/rally/
(必须授权不然docker运行会报错,后续还需要授权一次)
docker run -v /home/test/rally/:/rally/.rally/ elastic/rally list tracks --track-path=/rally/.rally/benchmarks/data/single
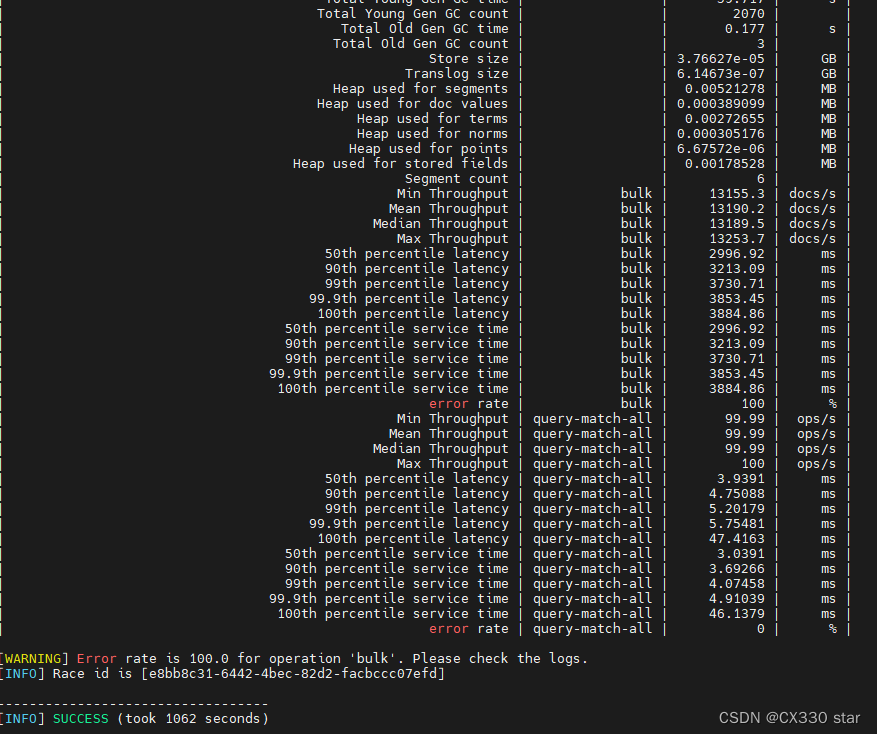
正常情况下运行出来如图

8.正式运行
cp /home/test/rally/benchmarks/data/single/* /home/test/rally/benchmarks/data/rally-tutorial/
(这一步应该是将测试和真实数据分开,重新拷贝一份)
docker run --privileged -v /home/test/rally/:/rally/.rally/ elastic/rally race --pipeline=benchmark-only --target-hosts=ip:9200 --track-path=/rally/.rally/benchmarks/data/rally-tutorial --client-options="basic_auth_user:'**',basic_auth_password:'**'" --offline
这一步会通过documents-2.json.bz2生成documents-2.json和documents-2.json.offset文件,这两个文件运行是没有权限的,所以可能会报错需要重新授权,如果报错继续执行
chmod -R 777 /home/test/rally/benchmarks/data/rally-tutorial/
再次执行docker正式运行命令,没问题能够启动

它这个测试集有点少所以测试项很少,正在研究更多测试项中。。。
文章来源:https://blog.csdn.net/weixin_43909848/article/details/135359478
本文来自互联网用户投稿,该文观点仅代表作者本人,不代表本站立场。本站仅提供信息存储空间服务,不拥有所有权,不承担相关法律责任。 如若内容造成侵权/违法违规/事实不符,请联系我的编程经验分享网邮箱:veading@qq.com进行投诉反馈,一经查实,立即删除!
本文来自互联网用户投稿,该文观点仅代表作者本人,不代表本站立场。本站仅提供信息存储空间服务,不拥有所有权,不承担相关法律责任。 如若内容造成侵权/违法违规/事实不符,请联系我的编程经验分享网邮箱:veading@qq.com进行投诉反馈,一经查实,立即删除!