pytorch之torch基础学习
1、torch学习
torch.ones学习
torch.ones(*size, *, out=None, dtype=None, layout=torch.strided, device=None, requires_grad=False)
Returns a tensor filled with the scalar value 1, with the shape defined by the variable argument size.
返回一个用标量值1填充的张量,用size参数变量定义shape大小。
Parameters
Size (int…)-一个定义输出张量形状的整数序列。可以是可变数量的参数,也可以是像列表或元组这样的集合。
Keyword Arguments
out (Tensor, optional) – the output tensor.
dtype (torch.dtype, optional) – the desired data type of returned tensor. Default: if None, uses a global default (see torch.set_default_tensor_type()).
layout (torch.layout, optional) – the desired layout of returned Tensor. Default: torch.strided.
device (torch.device, optional) – the desired device of returned tensor. Default: if None, uses the current device for the default tensor type (see torch.set_default_tensor_type()). device will be the CPU for CPU tensor types and the current CUDA device for CUDA tensor types.
requires_grad (bool, optional) – If autograd should record operations on the returned tensor. Default: False.
example
torch.ones(2, 3)

torch.ones(5)
torch.empty
返回一个充满未初始化数据的张量。张量的形状由可变参数大小定义。
torch.empty(*size, *, out=None, dtype=None, layout=torch.strided, device=None, requires_grad=False, pin_memory=False, memory_format=torch.contiguous_format)

torch.randa
返回一个张量,其中充满来自均值为0,方差为1的正态分布(也称为标准正态分布)的随机数。
torch.randn(*size, *, generator=None, out=None, dtype=None, layout=torch.strided, device=None, requires_grad=False, pin_memory=False)

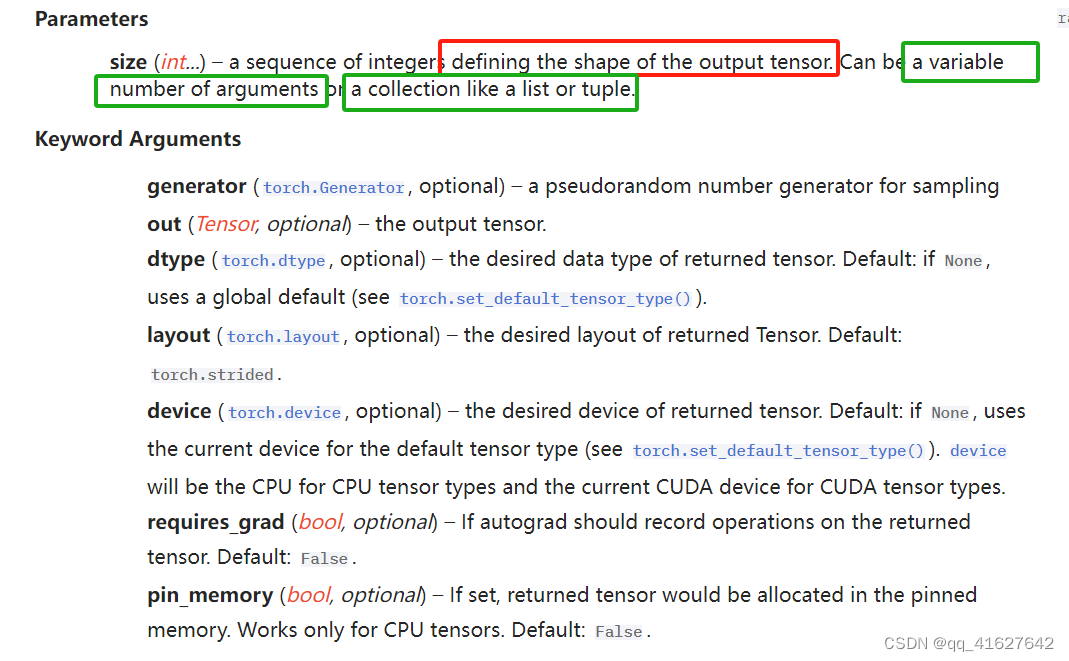

torch.multinomial
torch.multinomial(input, num_samples, replacement=False, *, generator=None, out=None)
返回一个张量,其中每行包含num_samples索引,从张量输入的相应行中的多项概率分布中采样。
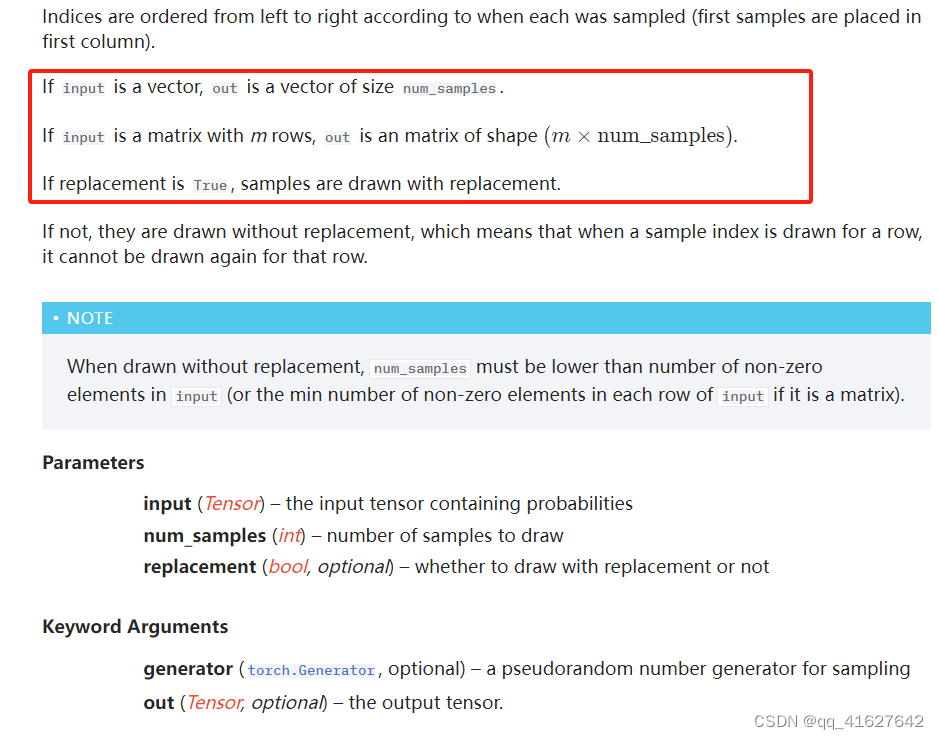

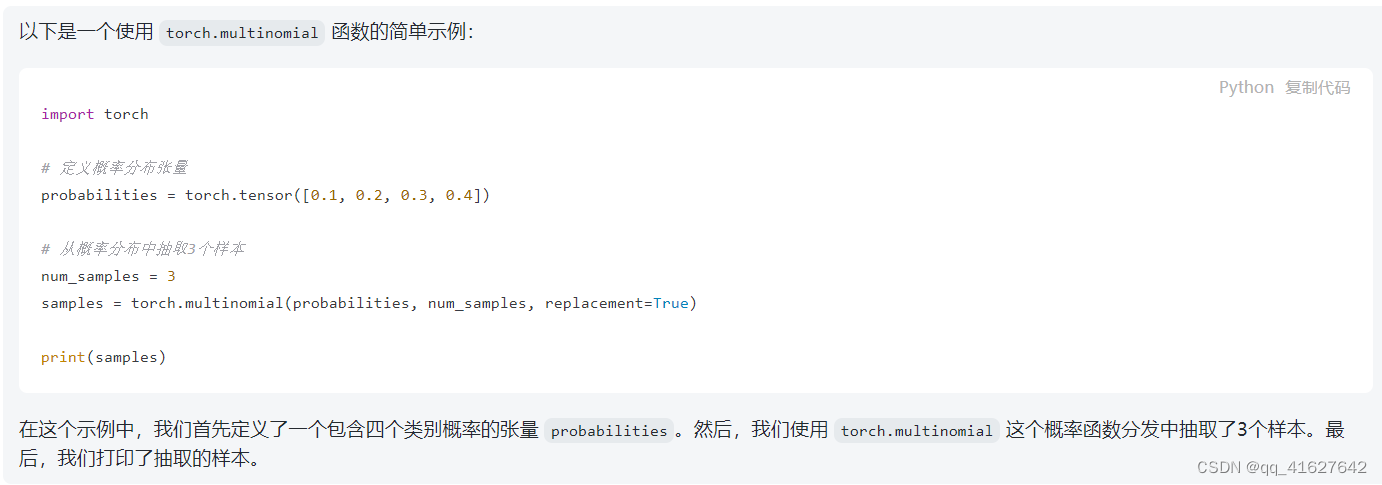

torch.multinomial返回的张量包含了根据给定的概率分布进行抽样后得到的样本的索引。
torch.cat
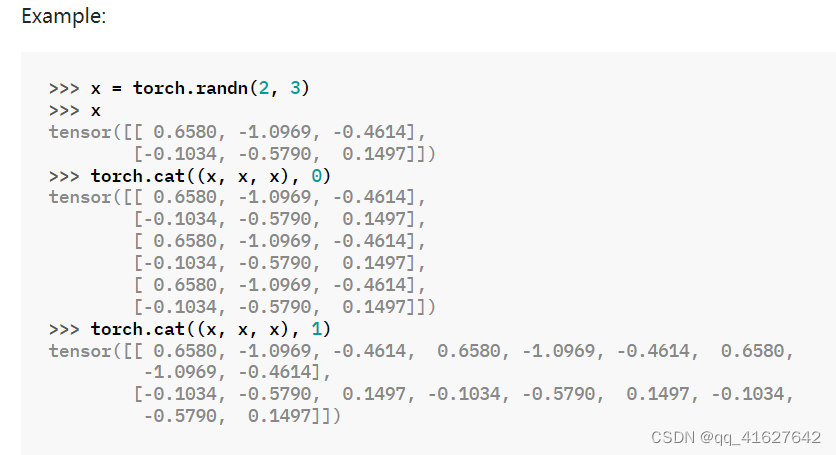
torch.cat(tensors, dim=0, *, out=None)
在给定维数中连接给定序列的seq张量。所有张量要么具有相同的形状(连接维度除外),要么为空。
Parameters
tensors (sequence of Tensors) – any python sequence of tensors of the same type. Non-empty tensors provided must have the same shape, except in the cat dimension.
dim (int, optional) – the dimension over which the tensors are concatenated
x = torch.randn(2, 3)
x
torch.cat((x, x, x), 0)
torch.cat((x, x, x), 1)
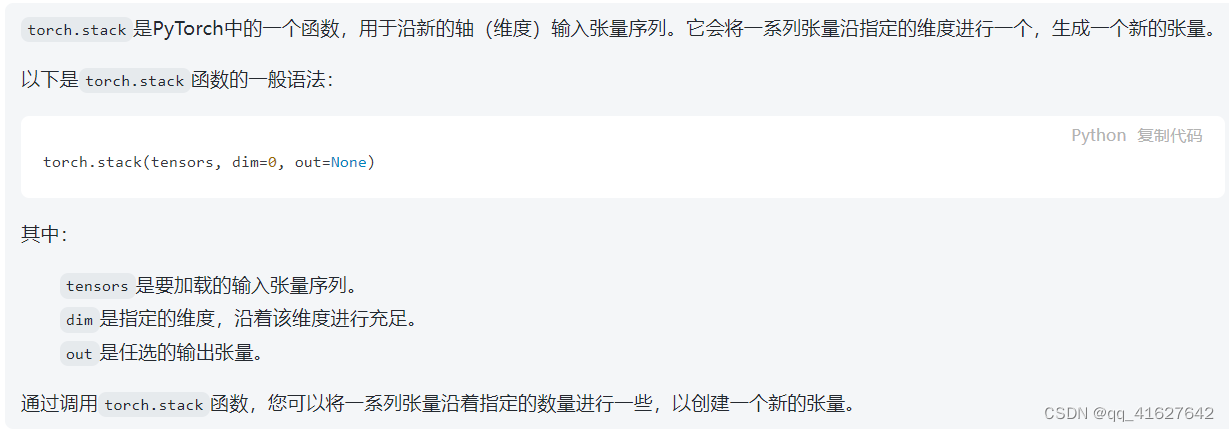
torch.stack
沿着一个新的维度连接一个张量序列。
torch.stack(tensors, dim=0, *, out=None)

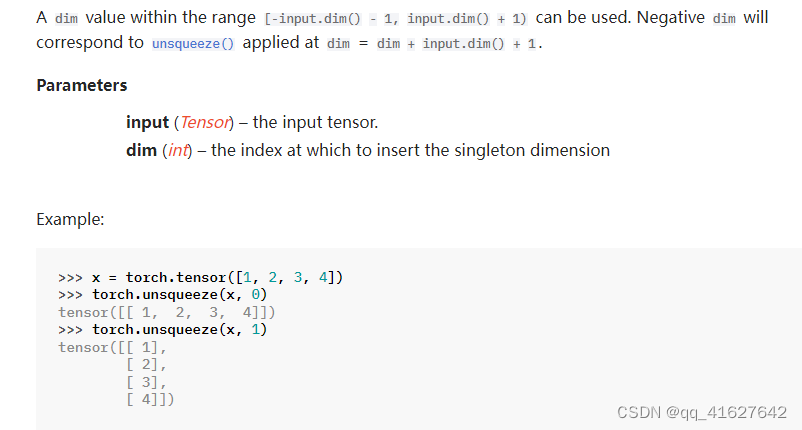
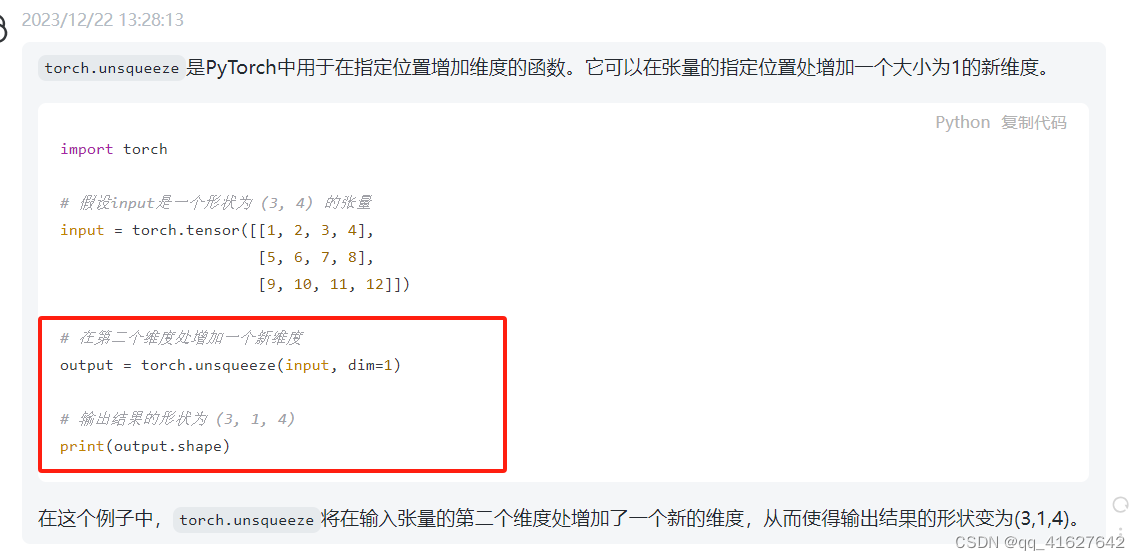
torch.unsqueeze
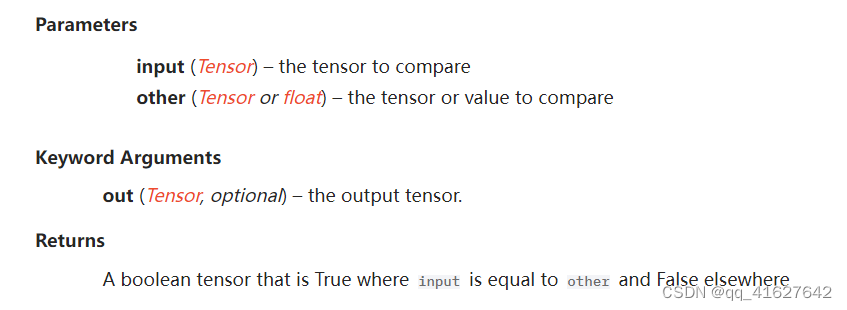
torch.eq
第二个参数可以是一个数字或一个张量,其形状可以通过第一个参数广播。
torch.eq(input, other, *, out=None)

torch.max
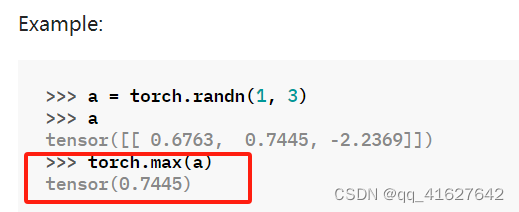
torch.max(input)
返回张量中所有元素的最大值input
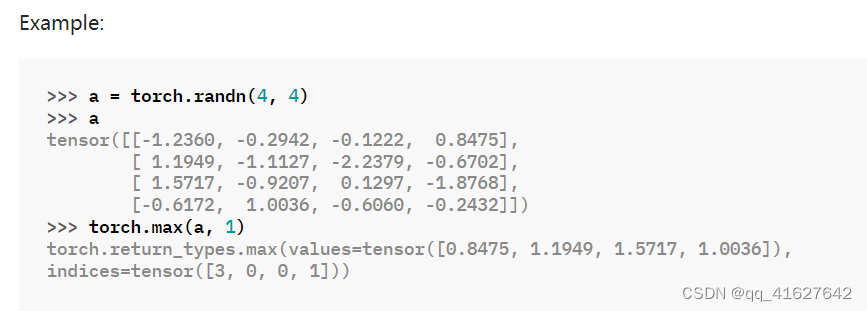
torch.max(input, dim, keepdim=False, *, out=None)
返回一个命名元组(values, indexes),其中values是给定维度dim中输入张量的每一行的最大值。而indexes是找到的每个最大值的索引位置(argmax)。
torch.sum
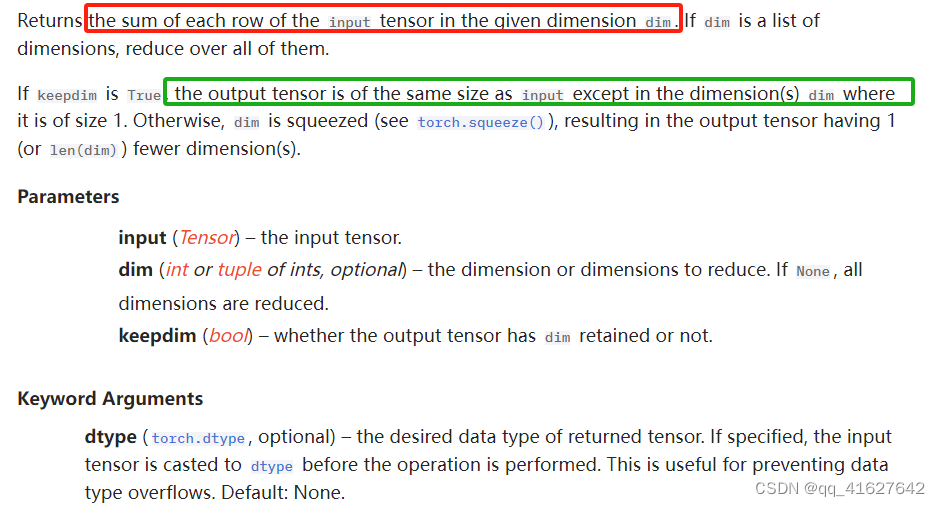
Returns the sum of all elements in the input tensor.
torch.sum(input, *, dtype=None)

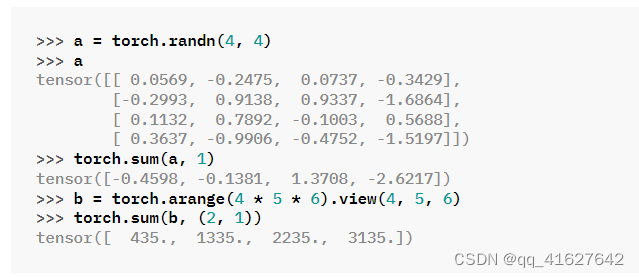
torch.sum(input, dim, keepdim=False, *, dtype=None)
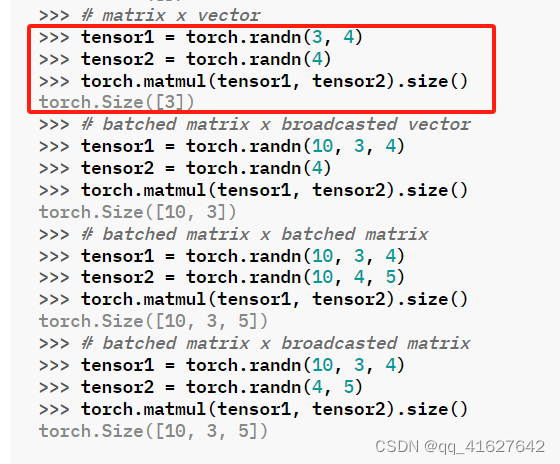
torch.matmul
两个张量的矩阵乘积。
该行为取决于张量的维数,如下所示:
如果两个张量都是一维,则返回点积(标量)。
如果两个参数都是二维的,则返回矩阵乘积。
如果第一个参数是一维,第二个参数是二维,则为了矩阵乘法的目的,在其维度前添加 1。矩阵相乘后,前面的维度将被删除。
如果第一个参数是二维的,第二个参数是一维的,则返回矩阵向量乘积。
torch.matmul(input, other, *, out=None)

torch.exp
torch.triu
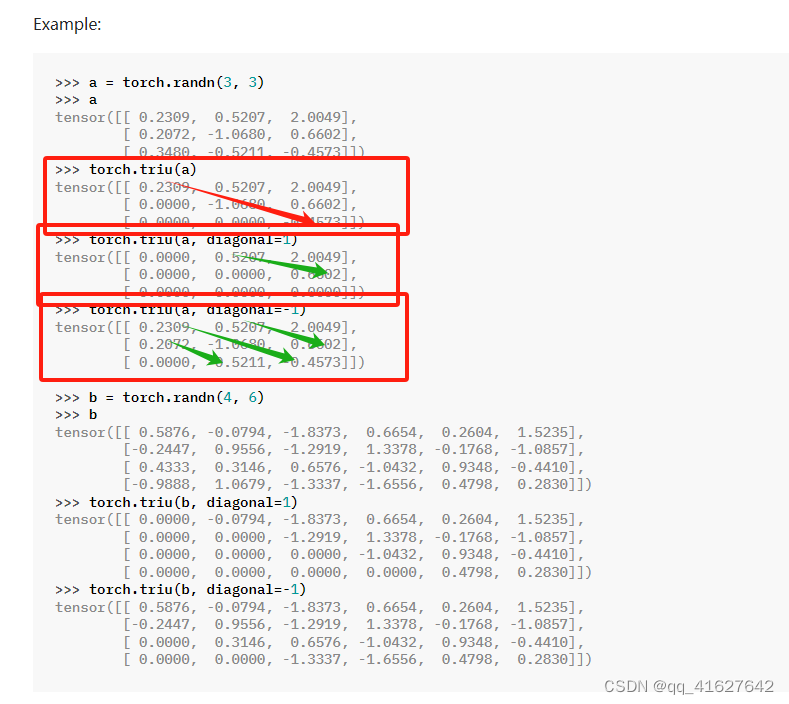
PyTorch 中的函数torch.triu返回矩阵或一批矩阵的上三角部分。该操作将主对角线下方的所有元素(包括对角线本身)设置为零。
torch.triu(input, diagonal=0, *, out=None)
参数diagonal控制要考虑哪个对角线。如果diagonal =0,则保留主对角线上及以上的所有元素。正值包含了主对角线以上的对角线,类似地,负值包括主对角线以下的对角线。
scores.masked_fill
masked_fill是PyTorch中的一个函数,用于根据掩码条件填充张量中的部分元素。它接受两个参数:mask和value。mask是一个布尔张量,指示需要填充哪些位置,value是要填充的值。被掩码为True的位置将被填充为value。
if mask is not None:
        scores = scores.masked_fill(mask == 0, -1e9)
2、torch.nn学习
torch.nn.Parameter
CLASS torch.nn.parameter.Parameter(data=None, requires_grad=True)
一种被认为是模块参数的张量。参数是张量的子类,当与Module s一起使用时,它们有一个非常特殊的属性——当它们被分配为Module属性时,它们会自动添加到它的参数列表中,并且会出现在Parameters迭代器中。赋值张量没有这样的效果。这是因为人们可能想要在模型中缓存一些临时状态,比如RNN的最后一个隐藏状态。如果没有Parameter这样的类,这些临时也会被注册。
Parameters
data (Tensor) – parameter tensor.
requires_grad (bool, optional) – if the parameter requires gradient. Note that the torch.no_grad() context does NOT affect the default behavior of Parameter creation–the Parameter will still have requires_grad=True in no_grad mode. See Locally disabling gradient computation for more details. Default: True
nn.Parameter类的clamp_方法可用于限制张量的值范围。您可以使用该方法将nn.Parameter包含在指定的范围内的张量限制。以下是一个示例:
import torch
import torch.nn as nn

# 创建一个 nn.Parameter 对象
param = nn.Parameter(torch.randn(3, 4))

# 使用 clamp_ 方法限制张量的值范围
param.data.clamp_(min=-1, max=1)
nn.Parameter并没有内置的expand方法。但是,你可以直接使用 PyTorch 中的张量方法expand来扩展nn.Parameter包含的张量。以下是一个示例:
import torch
import torch.nn as nn

# 创建一个 nn.Parameter 对象
param = nn.Parameter(torch.randn(3, 4))

# 使用 expand 方法扩展张量的形状
expanded_param = param.expand(3, 6)  # 将张量扩展为 3x6 的形状
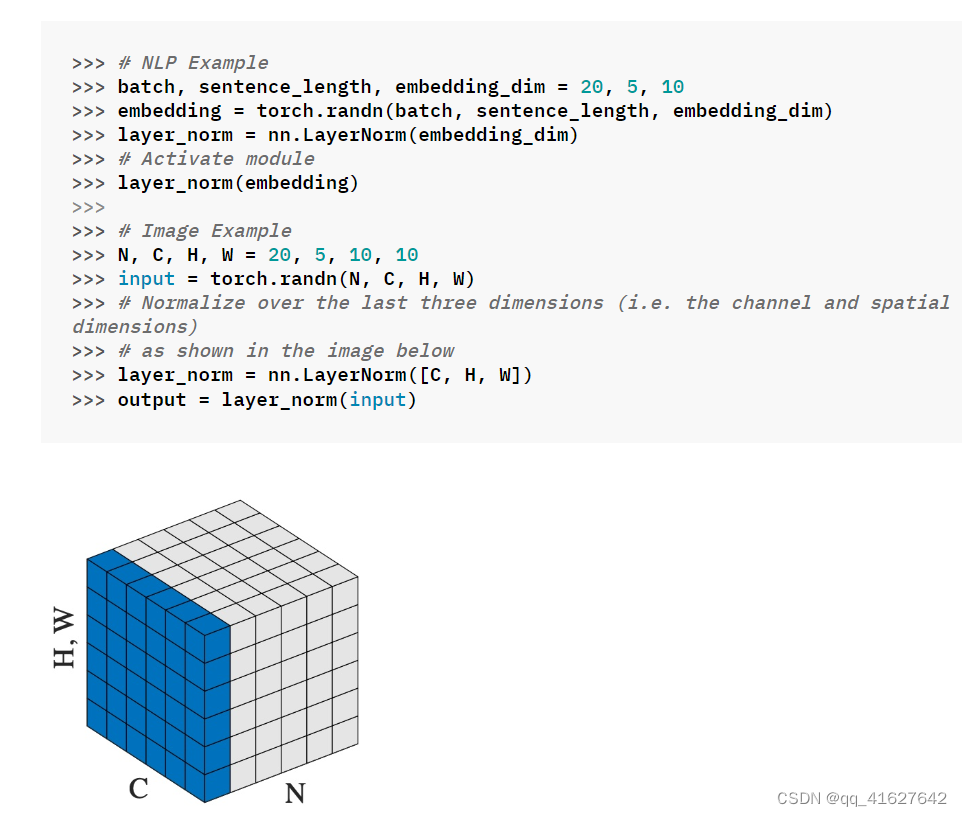
nn.LayerNorm(归一化层)
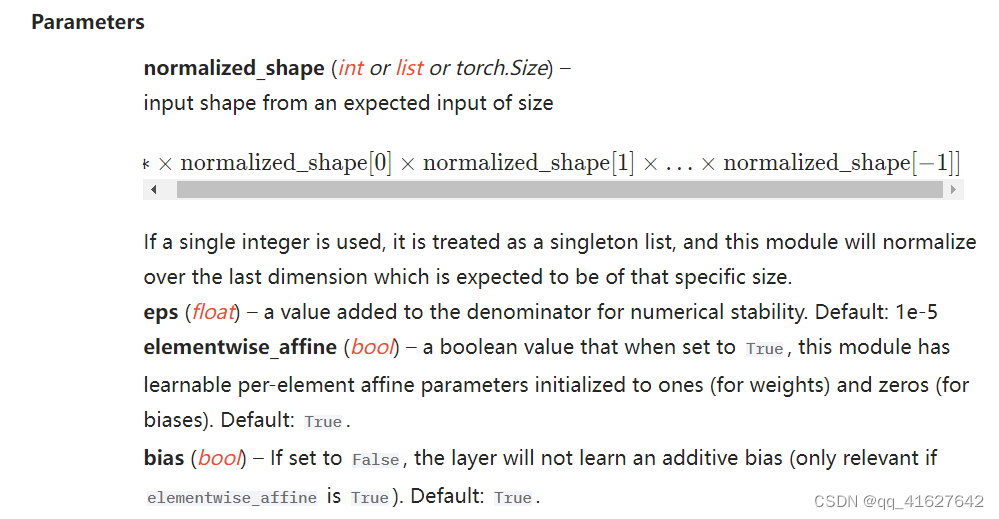
CLASStorch.nn.LayerNorm(normalized_shape, eps=1e-05, elementwise_affine=True, bias=True, device=None, dtype=None)

在最后D个维度上计算平均值和标准差,其中D是normalized_shape的维度。
例如,如果normalized_shape为(3,5)(一个二维形状),则在输入的最后两个维度(即输入计算。input.mean((-2, -1))。当elementwise_affine为True时,Y和?是normalized_shape的可学习仿射变换参数。标准偏差通过有偏估计器计算,torch.var(input, unbiased=False).。

torch.nn.Dropout
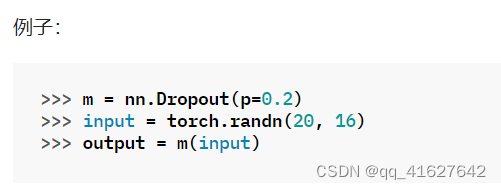
torch.nn.Dropout(p=0.5, inplace=False)
在训练期间,使用伯努利分布中的样本以概率p将输入张量的某些元素随机归零。每个通道将在每次前向时独立清零。
这已被证明是一种有效的正则化和防止神经元共同适应的技术。从而防止模型对特定输入单元过度依赖,初步来减少过度。
nn.Linear(Linear Layers)
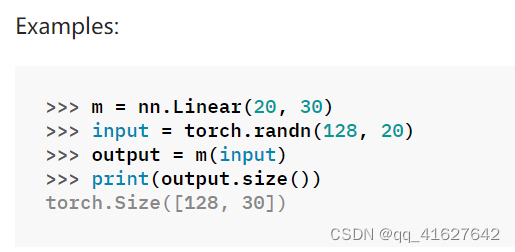
CLASS torch.nn.Linear(in_features, out_features, bias=True, device=None, dtype=None)


nn.GELU(非线性激活(加权和、非线性))
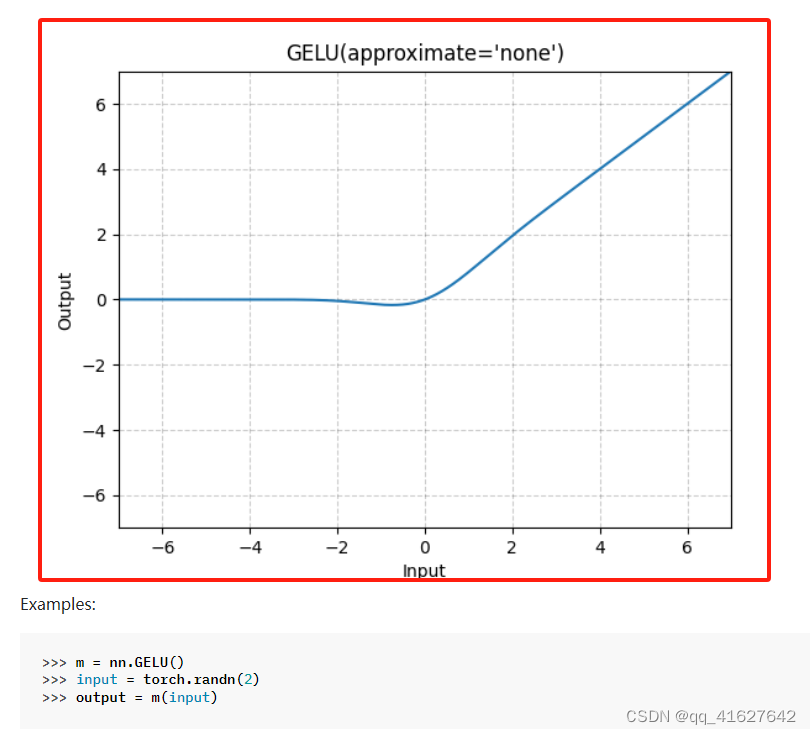
CLASS torch.nn.GELU(approximate='none')
应用高斯误差线性单位函数:


nn.Embedding稀疏层
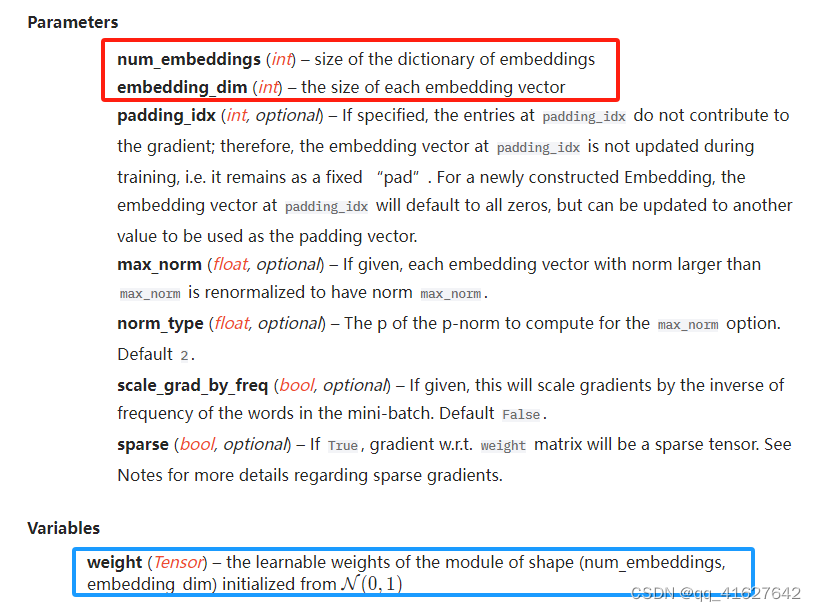
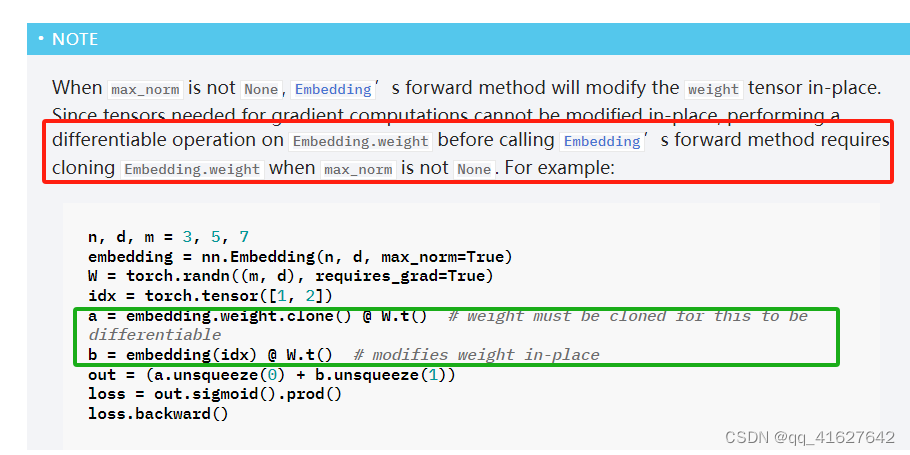
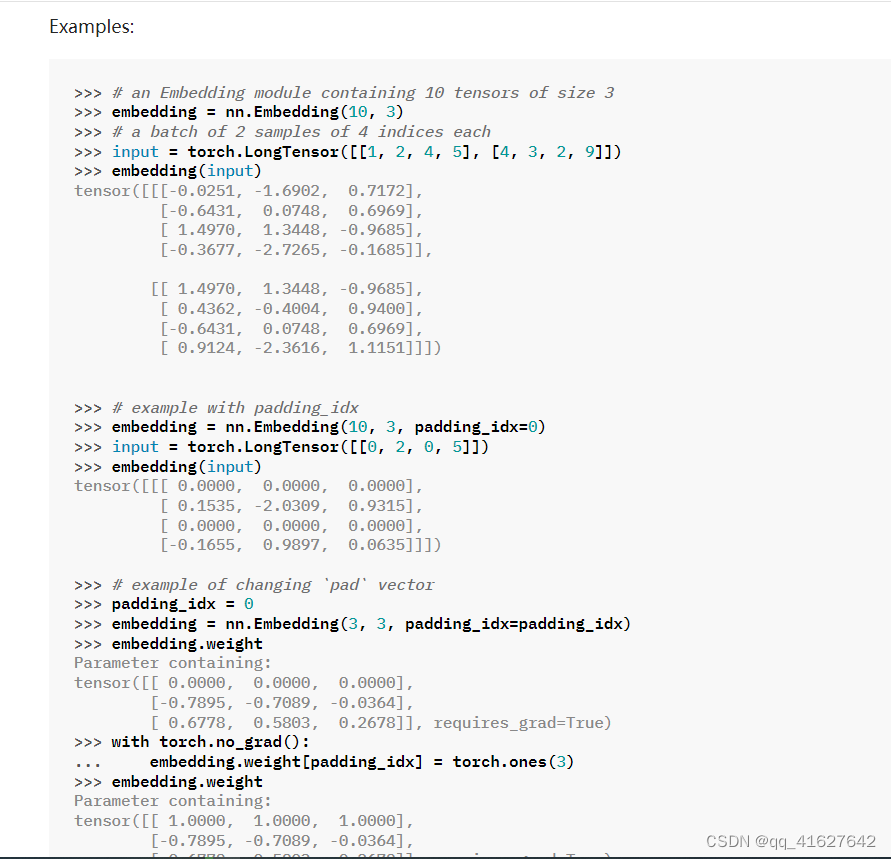
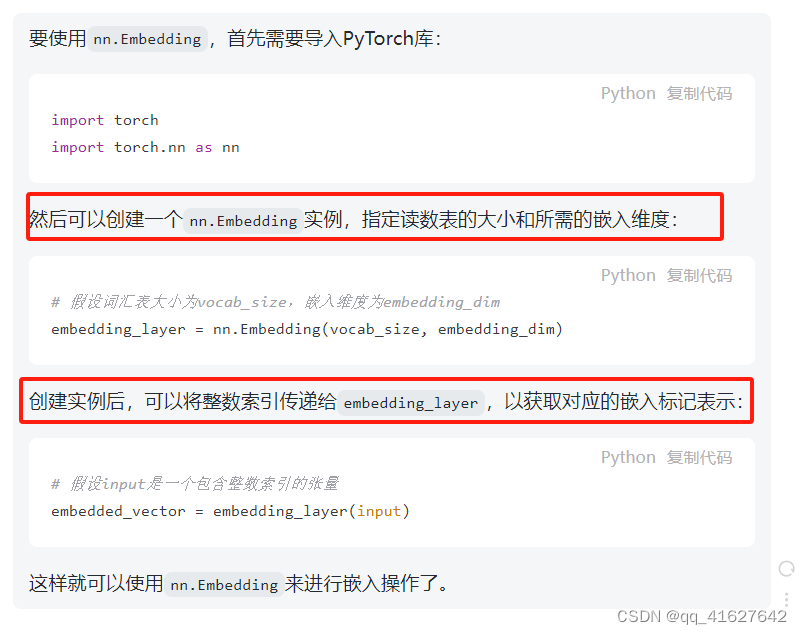
一个简单的查找表,存储固定字典和大小的嵌入。该模块通常用于存储词嵌入并使用索引检索它们。模块的输入是索引列表,输出是相应的词嵌入。
CLASS torch.nn.Embedding(num_embeddings, embedding_dim, padding_idx=None, max_norm=None, norm_type=2.0, scale_grad_by_freq=False, sparse=False, _weight=None, _freeze=False, device=None, dtype=None

torch.nn.ModuleList
将子模块保存在列表中。
ModuleList可以像常规 Python 列表一样进行索引,但它包含的模块已正确注册,并且对所有方法都可见 Module。
参数
modules ( iterable ,可选) – 要添加的可迭代模块
class MyModule(nn.Module):
    def __init__(self):
        super().__init__()
        self.linears = nn.ModuleList([nn.Linear(10, 10) for i in range(10)])

    def forward(self, x):
        # ModuleList can act as an iterable, or be indexed using ints
        for i, l in enumerate(self.linears):
            x = self.linears[i // 2](x) + l(x)
        return x
torch.nn.Sequential
torch.nn.Sequential(arg: OrderedDict[str, Module])
一个顺序容器。模块将按照它们在构造函数中传递的顺序添加到其中。或者,OrderedDict可以传入一个 of 模块。 的forward()方法Sequential接受任何输入并将其转发到它包含的第一个模块。然后,它将输出按顺序“链接”到每个后续模块的输入,最后返回最后一个模块的输出。
一个顺序容器。模块将按照它们在构造的任何函数中传递的顺序被添加到其中。或者,也可以创建一个OrderedDict来作为模块的方法接受输入Sequential,forward()将其转发给它包含的第一个模块。然后,它将输出按顺序“链接”到每个后续模块的输入,最后返回最后一个模块的输出。
Sequential和torch.nn.ModuleList都是用于构建神经网络模型的工具,但它们之间有一些区别:
顺序:
Sequential是一个顺序容器,用于按照传递给构造函数的顺序模块添加。
通过Sequential可以轻松地按顺序设置神经网络层,然后抽取每个层的命名或手动定义forward方法。
适合连续的、线性的神经网络结构,在简单的前向传播中非常方便。
模块列表:
ModuleList是一个存储允许子模块的列表。它用户将子模块作为列表元素进行组织,更适合用于存储复杂、运用的模块或层结构。
与Sequential不同,需要手动编写forward方法以明确指定每个模块的连接方式。
适合更高灵活性的模型结构,允许更复杂的模块组织和连接方式。
总之,Sequential更适合简单的线性结构,而ModuleList更适合需要更灵活和复杂性的模型组织。
# Using Sequential to create a small model. When `model` is run,
# input will first be passed to `Conv2d(1,20,5)`. The output of
# `Conv2d(1,20,5)` will be used as the input to the first
# `ReLU`; the output of the first `ReLU` will become the input
# for `Conv2d(20,64,5)`. Finally, the output of
# `Conv2d(20,64,5)` will be used as input to the second `ReLU`
model = nn.Sequential(
          nn.Conv2d(1,20,5),
          nn.ReLU(),
          nn.Conv2d(20,64,5),
          nn.ReLU()
        )

# Using Sequential with OrderedDict. This is functionally the
# same as the above code
model = nn.Sequential(OrderedDict([
          ('conv1', nn.Conv2d(1,20,5)),
          ('relu1', nn.ReLU()),
          ('conv2', nn.Conv2d(20,64,5)),
          ('relu2', nn.ReLU())
        ]))
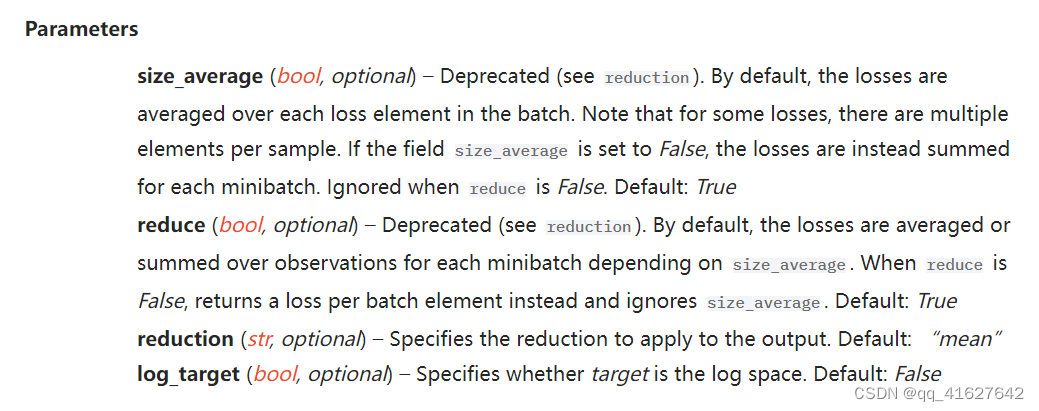
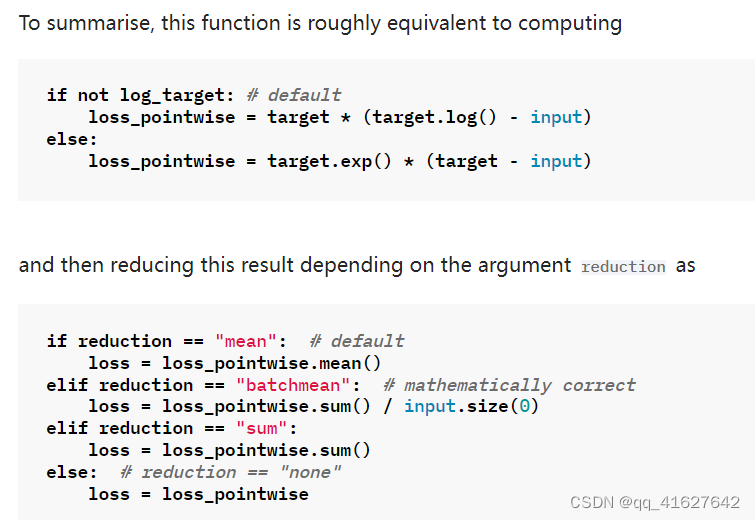
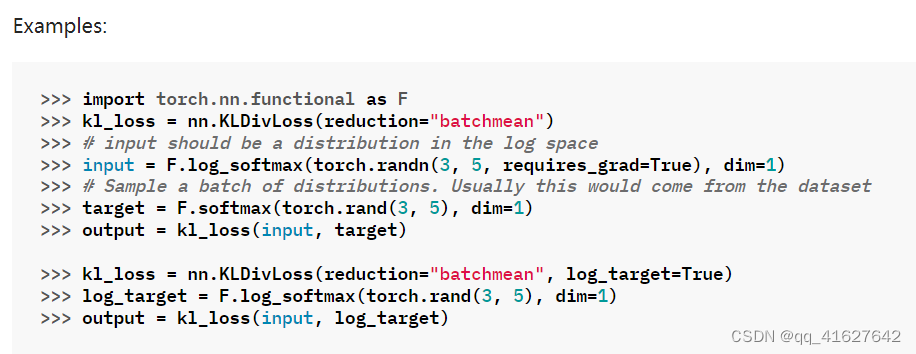
nn.KLDivLoss

3、torch.nn.functional学习
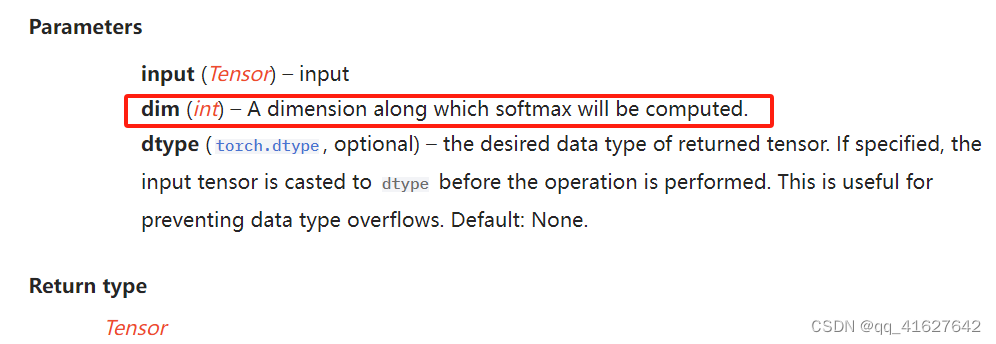
torch.nn.functional.softmax(非线性激活(其他))
torch.nn.functional.softmax(input, dim=None, _stacklevel=3, dtype=None)

它将应用于沿dim的所有切片,并将重新缩放它们,使元素位于[0,1]范围内并求和为1。

torch.nn.LogSoftmax(非线性激活(其他))
torch.nn.LogSoftmax(dim=None)


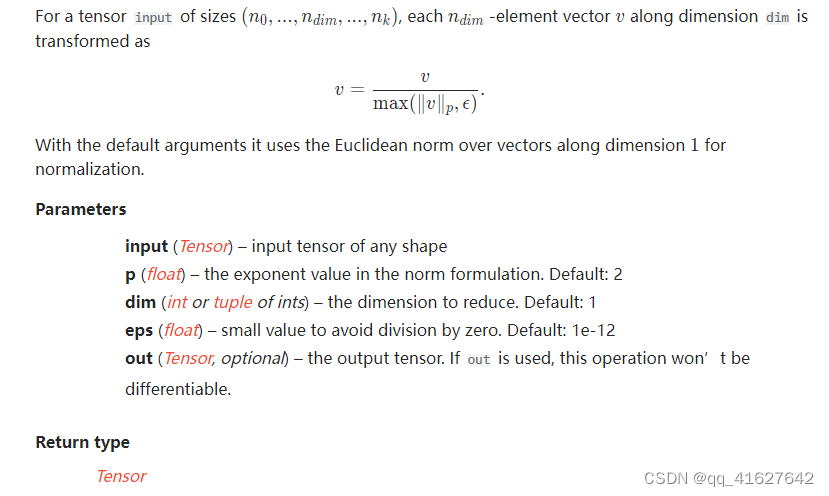
torch.nn.functional.normalize
torch.nn.functional.normalize(input, p=2.0, dim=1, eps=1e-12, out=None)
对指定维度的输入执行Lp归一化。
torch.nn.functional.cross_entropy
该准则计算输入logits与目标之间的交叉熵损失。
torch.nn.functional.cross_entropy(input, target, weight=None, size_average=None, ignore_index=-100, reduce=None, reduction='mean', label_smoothing=0.0)
torch.nn.init学习
该模块中的所有函数都旨在用于初始化神经网络参数,因此它们都在torch.no_grad()模式下运行,并且不会被 autograd 考虑。
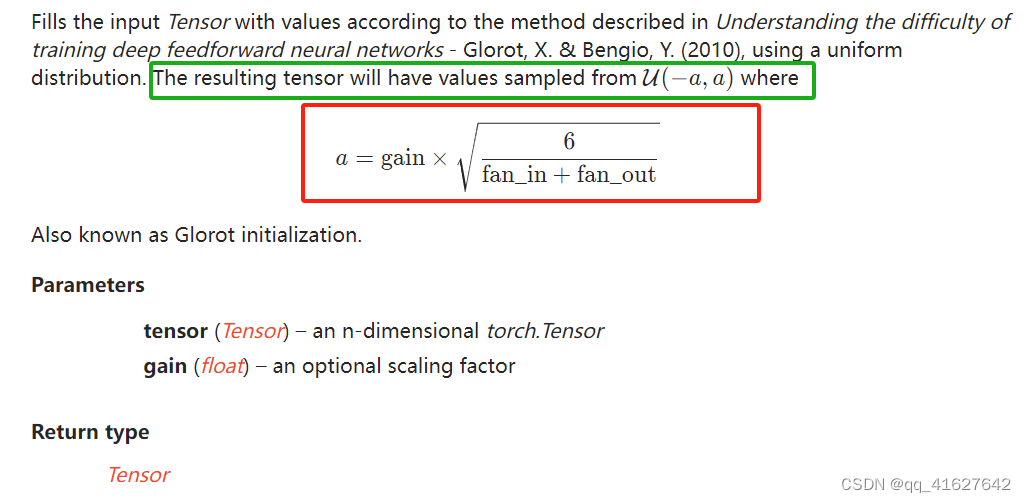
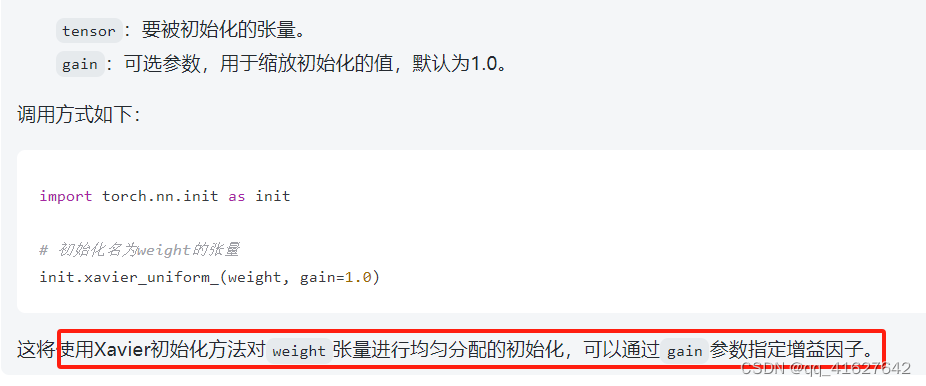
该方法将输入张量可按照均匀分配进行初始化,并根据指定的增益因子调整权重重。
torch.nn.init.xavier_uniform_(tensor, gain=1.0)

4、torch.optim
torch.optim是一个实现各种优化算法的包。大多数常用的方法都已经支持,并且接口足够通用,因此将来也可以轻松集成更复杂的方法。
如何使用优化器


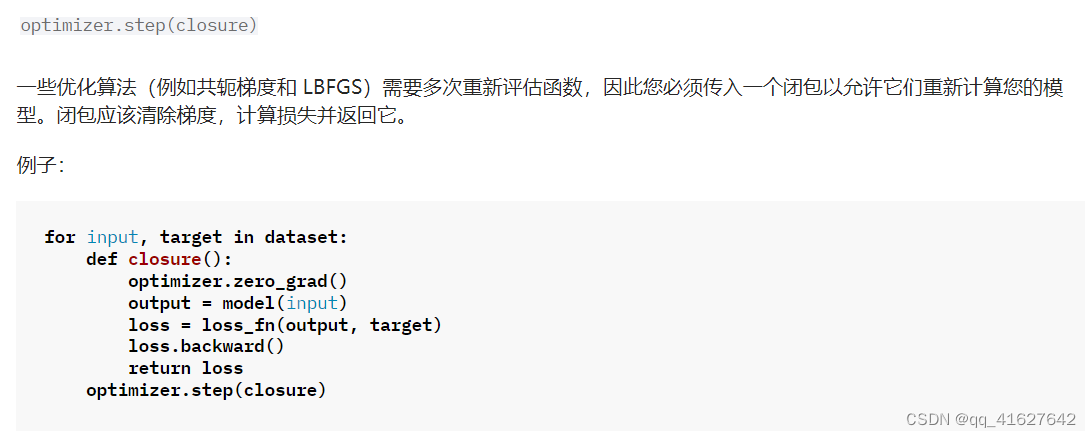
这意味着model.base的参数将使用默认的学习率1e-2, model.classifier的参数将使用1e-3学习率,所有参数将使用动量0.9 。
Base class
所有优化器的基类。
CLASStorch.optim.Optimizer(params, defaults)
Optimizer.add_param_group
将参数组添加到Optimizerparam_groups中。
Optimizer.add_param_group(param_group)
这在微调预训练网络时非常有用,因为冻结层可以进行训练并Optimizer随着训练的进行而添加到网络中。
参数
param_group ( dict ) – 指定应优化哪些张量以及特定于组的优化选项。
Optimizer.load_state_dict
Optimizer.load_state_dict:此方法用于从提供的state_dict加载优化器的状态。包含state_dict有关优化器内部状态的信息,例如参数和缓冲区的值。此方法允许您从之前保存的 state_dict 恢复优化器的状态。
Optimizer.load_state_dict(state_dict)
Parameters
state_dict (dict) – optimizer state. Should be an object returned from a call to state_dict().
Optimizer.state_dict
以dict的形式返回优化器的状态。
它包含两个条目:
state:保存当前优化状态的 Dict。其内容
优化器类之间存在差异,但存在一些共同特征。例如,状态是按参数保存的,但参数本身不保存。state是一个将参数 ids 映射到 Dict 的字典,其中状态对应于每个参数。
param_groups:包含所有参数组的列表,其中每个
参数组是一个字典。每个参数组包含特定于优化器的元数据,例如学习率和权重衰减,以及组中参数的参数 ID 列表。
{
    'state': {
        0: {'momentum_buffer': tensor(...), ...},
        1: {'momentum_buffer': tensor(...), ...},
        2: {'momentum_buffer': tensor(...), ...},
        3: {'momentum_buffer': tensor(...), ...}
    },
    'param_groups': [
        {
            'lr': 0.01,
            'weight_decay': 0,
            ...
            'params': [0]
        },
        {
            'lr': 0.001,
            'weight_decay': 0.5,
            ...
            'params': [1, 2, 3]
        }
    ]
}
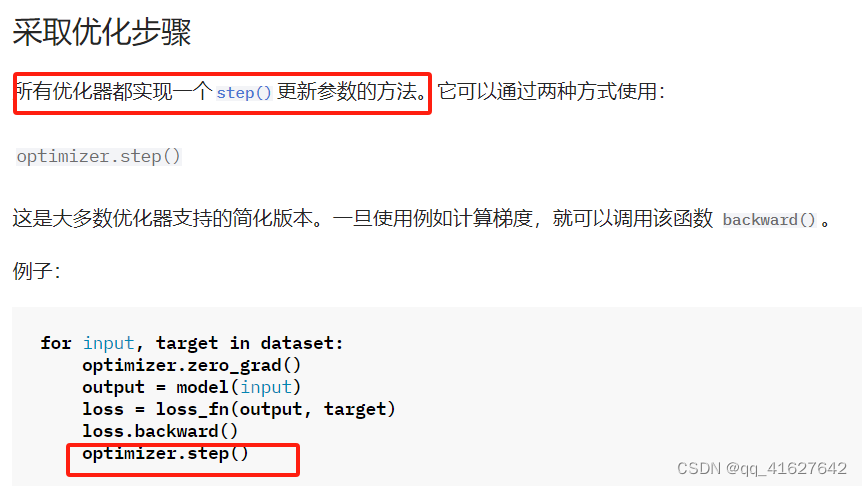
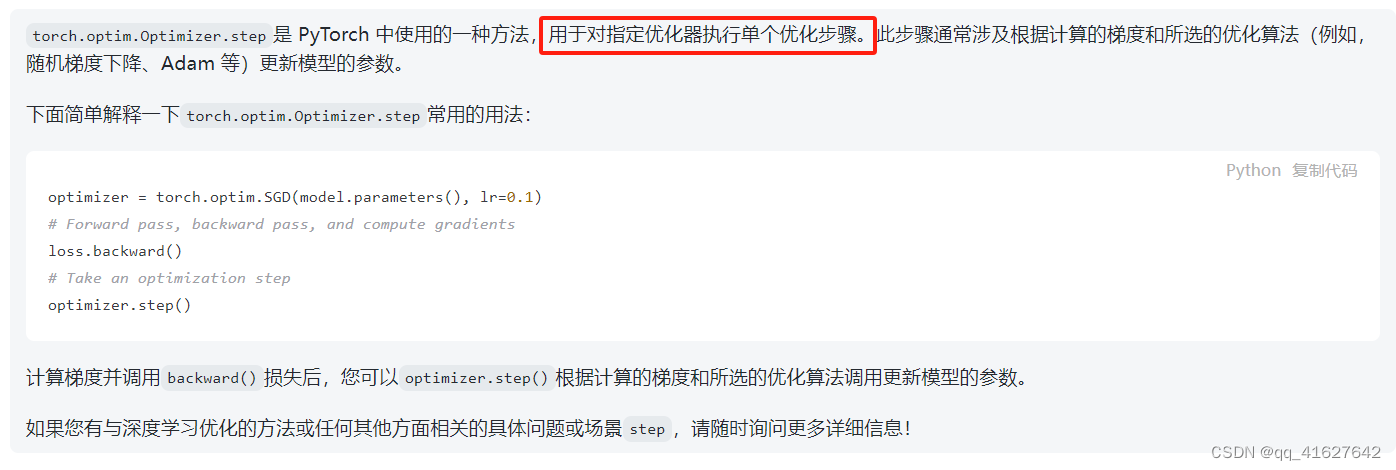
Optimizer.step
Optimizer.zero_grad
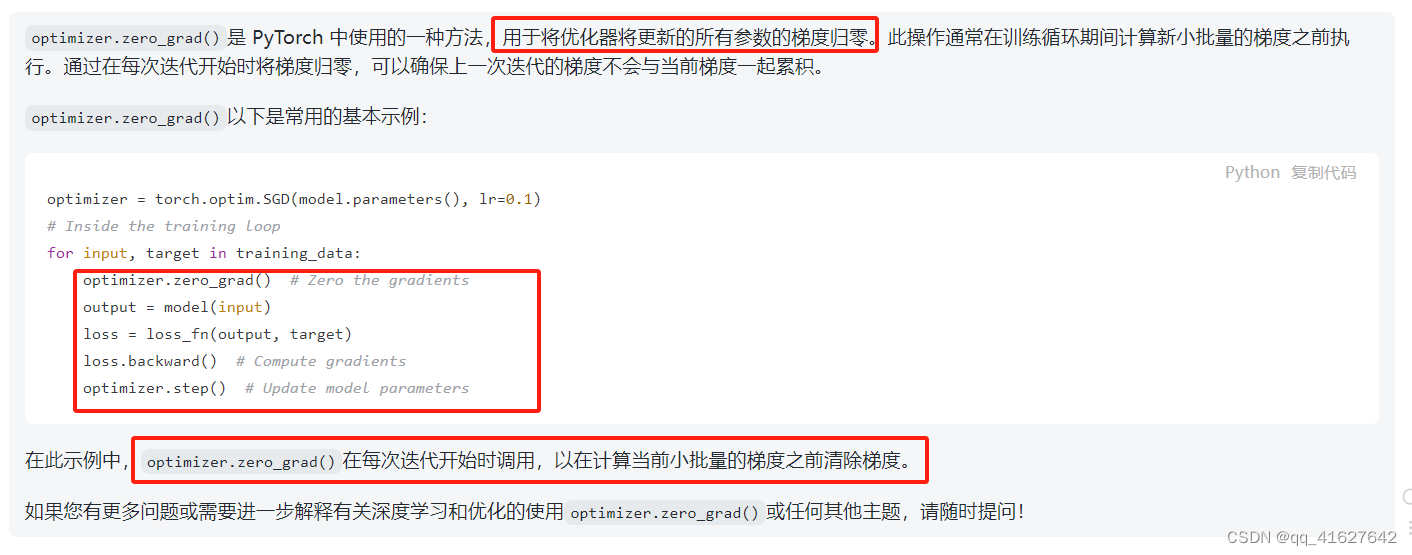
重置所有优化的梯度torch.Tensor
Optimizer.zero_grad(set_to_none=True)
Algorithms
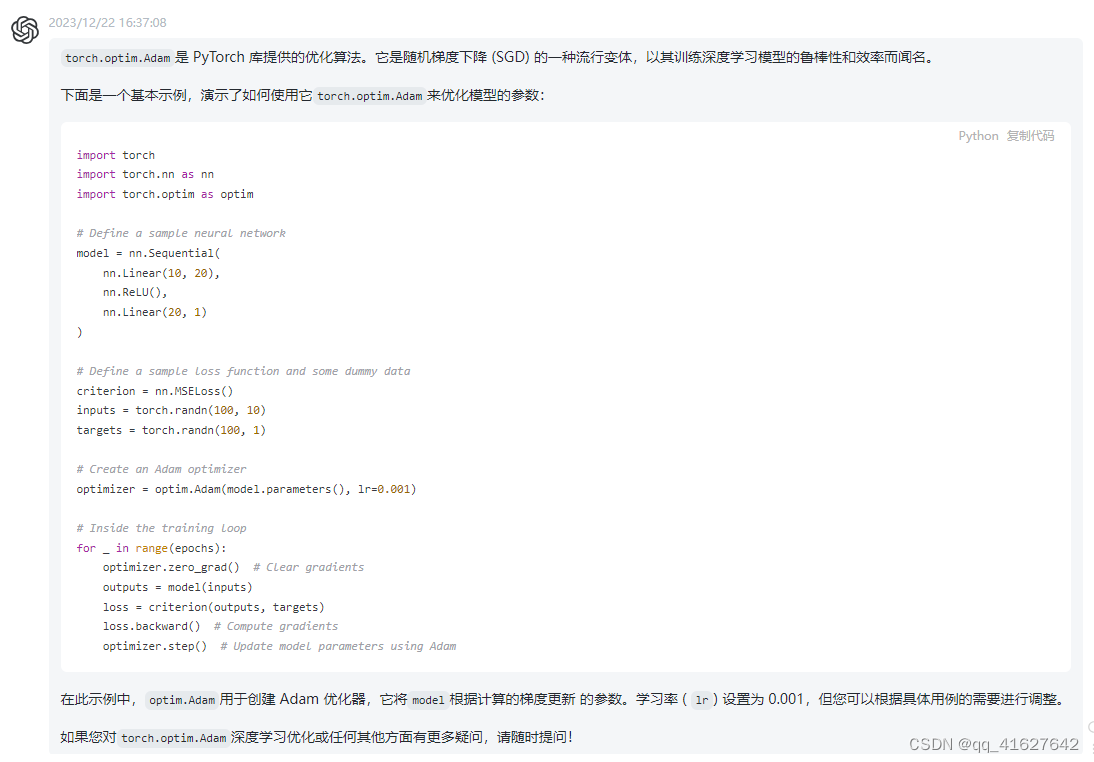
1、torch.optim.Adam
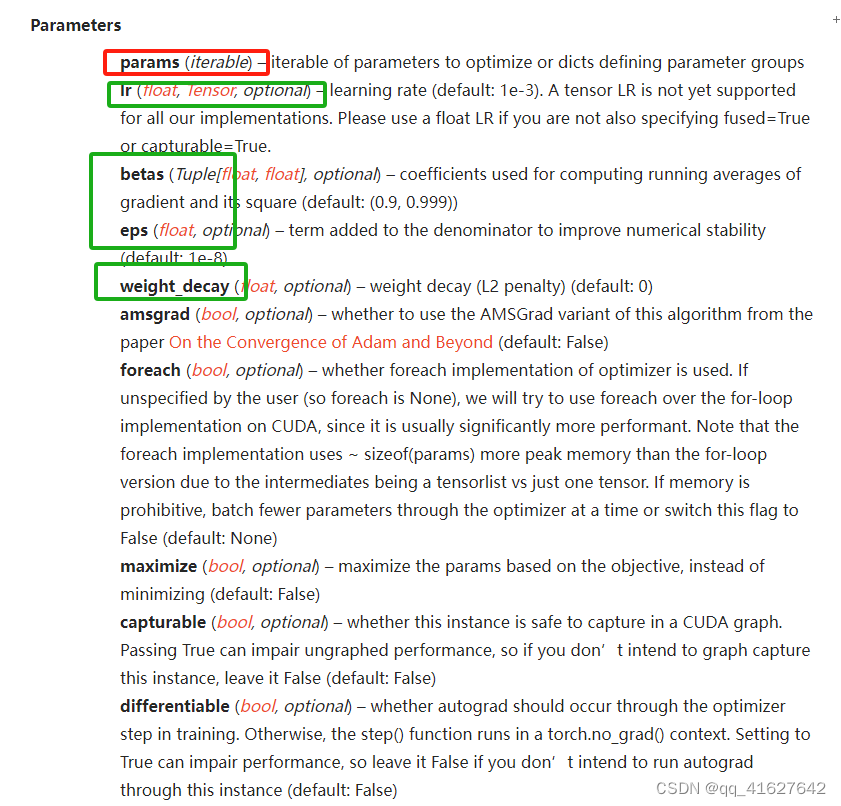
CLASS torch.optim.Adam(params, lr=0.001, betas=(0.9, 0.999), eps=1e-08, weight_decay=0, amsgrad=False, *, foreach=None, maximize=False, capturable=False, differentiable=False, fused=None)
如何调整学习率
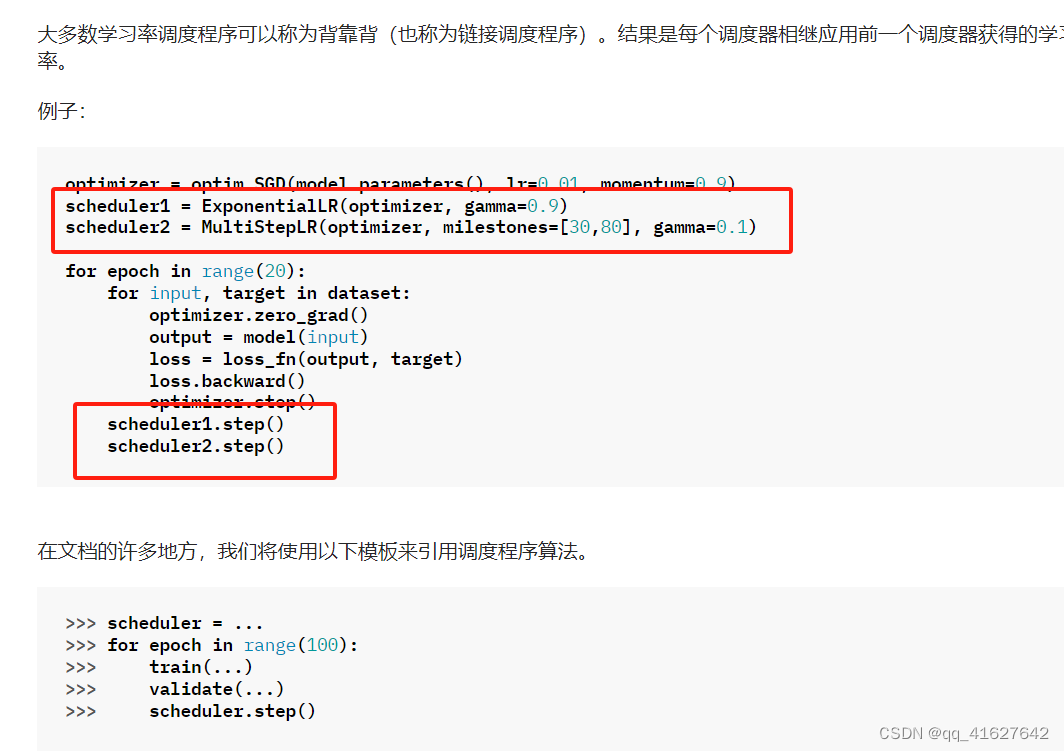
torch.optim.lr_scheduler提供了几种根据时期数调整学习率的方法。torch.optim.lr_scheduler.ReduceLROnPlateau 允许基于一些验证测量动态降低学习率。
学习率调度应在优化器更新后应用;例如,您应该这样编写代码:
optimizer = optim.SGD(model.parameters(), lr=0.01, momentum=0.9)
scheduler = ExponentialLR(optimizer, gamma=0.9)

for epoch in range(20):
    for input, target in dataset:
        optimizer.zero_grad()
        output = model(input)
        loss = loss_fn(output, target)
        loss.backward()
        optimizer.step()
    scheduler.step()
lr_scheduler.LambdaLR
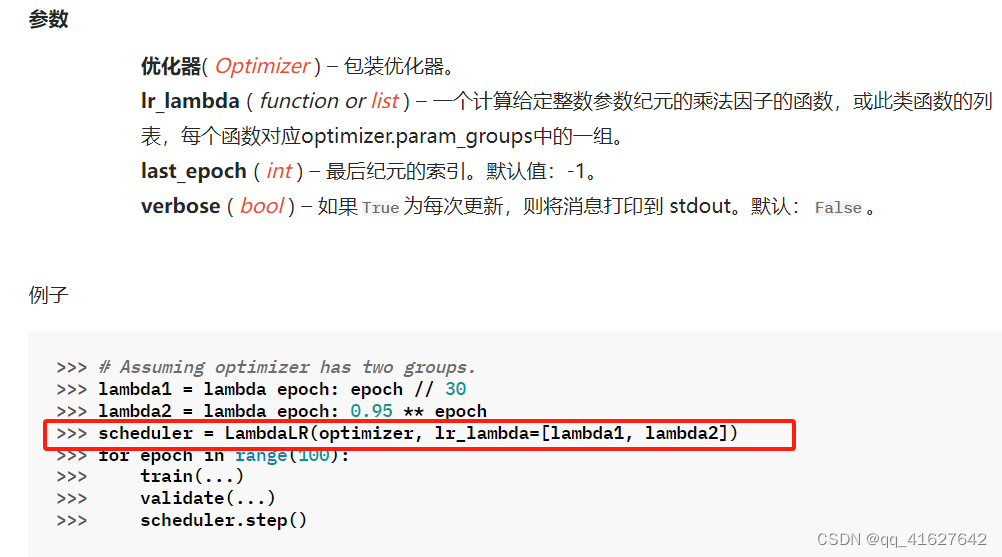
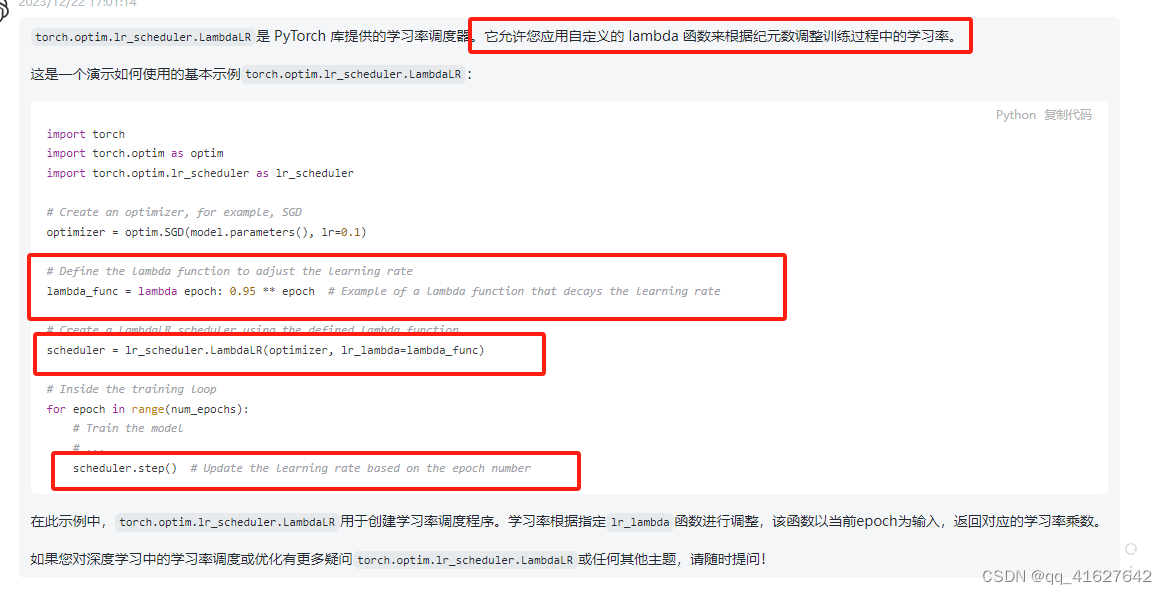
将每个参数组的学习率设置为初始 lr 乘以给定函数。当last_epoch=-1时,将初始lr设置为lr。
torch.optim.lr_scheduler.LambdaLR(optimizer, lr_lambda, last_epoch=-1, verbose=False)
本文来自互联网用户投稿,该文观点仅代表作者本人,不代表本站立场。本站仅提供信息存储空间服务,不拥有所有权,不承担相关法律责任。 如若内容造成侵权/违法违规/事实不符,请联系我的编程经验分享网邮箱:veading@qq.com进行投诉反馈,一经查实,立即删除!