第二章 Django URL路由系统
2023-12-15 15:25:15
第一章 Django 基本使用
第二章 Django URL路由系统
第三章 Django 视图系统
第四章 Django 模板系统
第五章 Django 数据模型系统(基本使用)
第六章 Django 数据模型系统(多表操作)
第七章 Django 用户认证与会话技术
第八章 Django CSRF防护
文章目录
URL路由系统基本使用
URL路由系统介绍
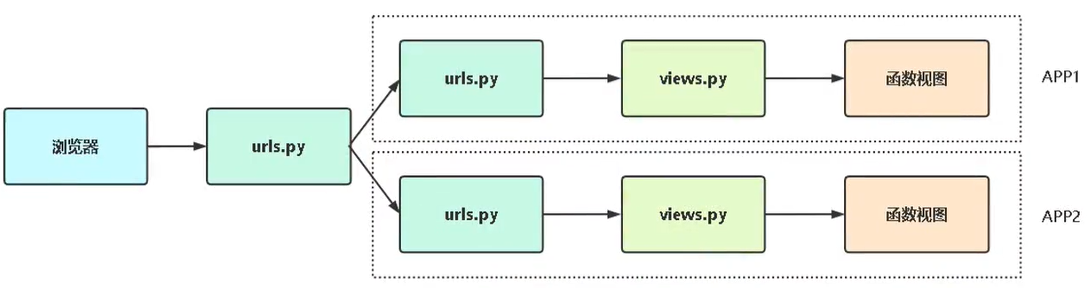
路由系统就是URL路径和视图函数的一个对应关系,也可以称为转发器
URL配置
URL路由系统格式
# devops/urls.py
urlpatterns = [
    path(regex,view,kwargs=None,name=None)
]
urlpatterns:一个列表,每一个path()函数是一个元素,对应一个视图regex:一个字符串或者正则表达式,匹配URLview:对应一个函数视图或者类视图(as_view()的结果),必须返回一个HttpResponse对象,Django将这个对象转换成一个HTTP响应kwargs:可选,字典形式数据传递给对应视图name:可选,URL名称
例子
from django.urls import path
from myapp import views as t

urlpatterns = [
    path('logs',t.logs,name="logs"), # /logs访问
]
URL路由分发
URL路由分发好处:urls配置解耦,方便管理
示例
主配置文件
# devops/urls.py
from django.urls import path,include

urlpatterns = [
    path('myapp/',include('myapp.urls')), # /logs访问
]
分发配置文件
# devops/myapp/urls.py
from django.urls import path
from myapp import views
urlpatterns = [
    path('logs',views.logs)
]
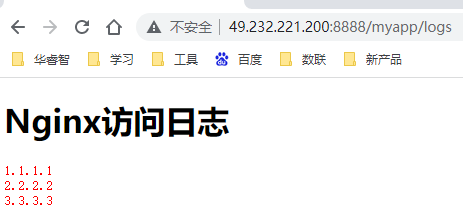
访问格式
49.232.221.200是我本机的IP,你们这里替换成自己的
http://49.232.221.200:8888/myapp/logs
URL正则匹配
年月日正则
"""
格式:yyyymmddHHMMSS

年:\d{4}   yyyyy
月:0[1-9]|1[0-2] mm
日:0[1-9]|[1-2][0-9]|3[0-1] dd
时:0[0-9]|1[0-9]|2[0-3]   HH
分:[0-5][0-9]  MM
秒:[0-5][0-9]  SS
"""
示例
注意
分组匹配内容会传递到函数视图位置参数
正则匹配是从左到右,URL匹配是从上到下,如果匹配就返回
$ 是精确匹配
路由
devops/urls.py
"""
文章归档案例:
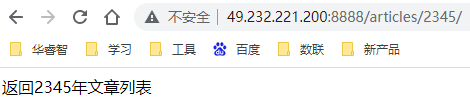
http://ip:port/articles/2022 # 返回2022年文章列表
http://ip:port/articles/2022/11 # 返回2022年11月文章列表
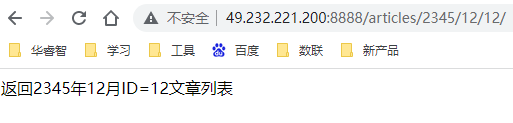
http://ip:port/articles/2022/11/123 # 查看ID为123的文章
"""
from django.urls import path,re_path
from myapp import views0
urlpatterns = [
re_path('^articles/([0-9]{4})/$',views.articles_year),
re_path('^articles/([0-9]{4})/(0[1-9]|1[0-2])/$',views.articles_month),
re_path('^articles/([0-9]{4})/(0[1-9]|1[0-2])/([0-9]+)/$',views.articles_id),
]
视图
# devops/myapp/views.py
from django.shortcuts import render,HttpResponse
def articles_year(request,year):
    return HttpResponse("返回%s年文章列表" %year)

def articles_month(request,year,month):
    return HttpResponse("返回%s年%s月文章列表" %(year,month))

def articles_id(request,year,month,id):
    return HttpResponse("返回%s年%s月ID=%s文章列表" %(year,month,id))
验证

URL名称解析
命名分组语法
(?P<name>pattem)
name是名称pattern是匹配的正则表达式
示例
路由
# devops/urls.py
"""
文章归档案例:
http://ip:port/articles/2022        # 返回2022年文章列表
http://ip:port/articles/2022/11     # 返回2022年11月文章列表
http://ip:port/articles/2022/11/123 # 查看ID为123的文章
"""
from django.urls import path,include,re_path
from myapp import views

urlpatterns = [
    path('myapp/',include('myapp.urls')), # /logs访问
    re_path('^articles/(?P<year>[0-9]{4})/$',views.articles_year),
    re_path('^articles/(?P<year>[0-9]{4})/(?P<month>0[1-9]|1[0-2])/$',views.articles_month),
    re_path('^articles/(?P<year>[0-9]{4})/(?P<month>|0[1-9]|1[0-2])/(?P<id>[0-9]+)/$',views.articles_id),
]
视图
# devops/myapp/views.py
def articles_year(request,year):
    return HttpResponse("返回%s年文章列表" %year)

def articles_month(request,month,year):
    return HttpResponse("返回%s年%s月文章列表" %(year,month))

def articles_id(request,year,id,month):
    return HttpResponse("返回%s年%s月ID=%s文章列表" %(year,month,id))
URL名称
在前端代码里经常指定URL,例如超链接,提交表单等,这是用URL反查就方便多了
之前
<a href="/hello">您好</a>
之后
<a href="{% url 'hello' %}">您好</a>
示例
路由
# devops/urls.py
from django.urls import path
from myapp import views

urlpatterns = [
    path('hello/',views.hello), # /logs访问
    path('hhh/',views.hhh,name='zhi'), # /logs访问
    path('logs/',views.logs), # /logs访问
]
视图
from django.shortcuts import render,HttpResponse
# Create your views here.
def logs(request):
import os
cur = os.path.dirname(os.path.abspath(__file__))
with open(cur + '/access.log',encoding='utf8') as f:
# with open('/data/devops/myapp/access.log',encoding='utf8') as f:
result = f.read()
return render(request,'logs.html',{'result': result })
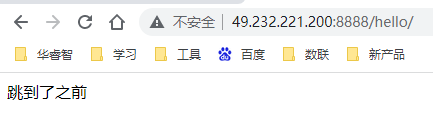
def hello(request):
return HttpResponse("跳到了之前")
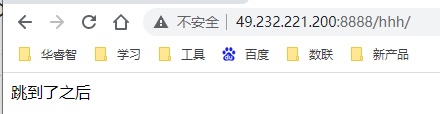
def hhh(request):
return HttpResponse("跳到了之后")
模板
# tenplates/logs.html
<!DOCTYPE html>
<html lang="en">
<head>
<meta charset="UTF-8">
<title>日志</title>
</head>
<body>
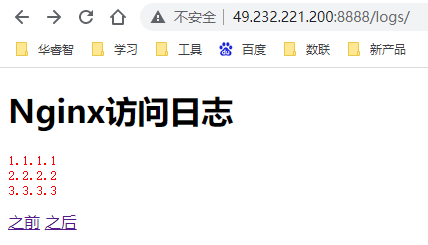
<h1>Nginx访问日志</h1>
<pre style="color: red">{{ result }}</pre>
<a href="/hello">之前</a>
<a href="{% url 'zhi' %}">之后</a>
</body>
</html>
验证
点击之前
点击之后
文章来源:https://blog.csdn.net/weixin_42434700/article/details/134937720
本文来自互联网用户投稿,该文观点仅代表作者本人,不代表本站立场。本站仅提供信息存储空间服务,不拥有所有权,不承担相关法律责任。 如若内容造成侵权/违法违规/事实不符,请联系我的编程经验分享网邮箱:veading@qq.com进行投诉反馈,一经查实,立即删除!
本文来自互联网用户投稿,该文观点仅代表作者本人,不代表本站立场。本站仅提供信息存储空间服务,不拥有所有权,不承担相关法律责任。 如若内容造成侵权/违法违规/事实不符,请联系我的编程经验分享网邮箱:veading@qq.com进行投诉反馈,一经查实,立即删除!