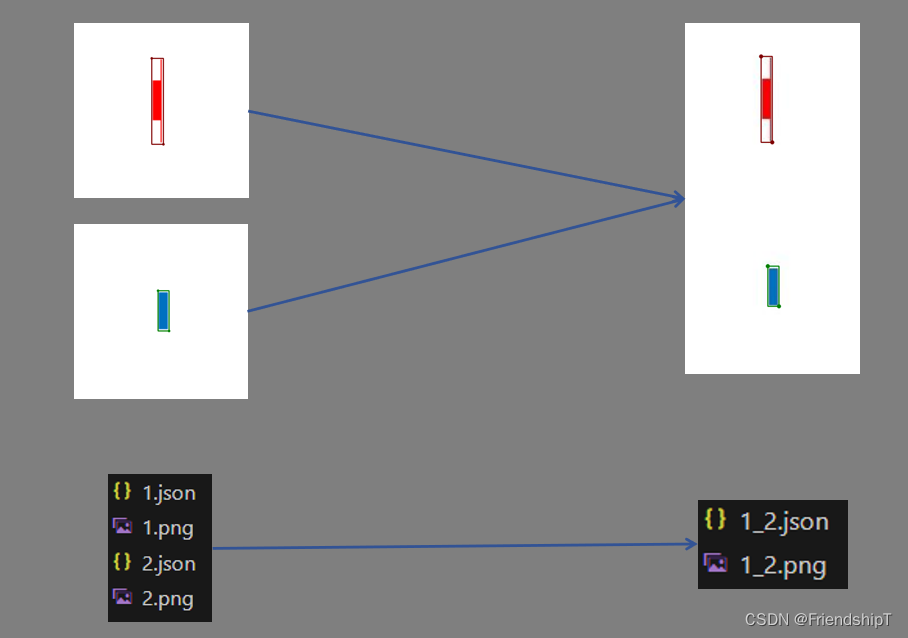
Python将已标注的两张图片进行上下拼接并修改、合并其对应的Labelme标注文件(v2.0)
2023-12-16 04:53:13

前言
- 此版代码,相较于Python将已标注的两张图片进行上下拼接并修改、合并其对应的Labelme标注文件,将文件夹批量处理图片和json文件考虑进去,而不是单个图片和json文件。
- 由于本人水平有限,难免出现错漏,敬请批评改正。
- 更多精彩内容,可点击进入Python日常小操作专栏、OpenCV-Python小应用专栏、YOLO系列专栏、自然语言处理专栏或我的个人主页查看
- YOLOv8 Ultralytics:使用Ultralytics框架训练RT-DETR实时目标检测模型
- 基于DETR的人脸伪装检测
- YOLOv7训练自己的数据集(口罩检测)
- YOLOv8训练自己的数据集(足球检测)
- YOLOv5:TensorRT加速YOLOv5模型推理
- YOLOv5:IoU、GIoU、DIoU、CIoU、EIoU
- 玩转Jetson Nano(五):TensorRT加速YOLOv5目标检测
- YOLOv5:添加SE、CBAM、CoordAtt、ECA注意力机制
- YOLOv5:yolov5s.yaml配置文件解读、增加小目标检测层
- Python将COCO格式实例分割数据集转换为YOLO格式实例分割数据集
- YOLOv5:使用7.0版本训练自己的实例分割模型(车辆、行人、路标、车道线等实例分割)
- 使用Kaggle GPU资源免费体验Stable Diffusion开源项目
前提条件
- 熟悉Python
相关介绍
- Python是一种跨平台的计算机程序设计语言。是一个高层次的结合了解释性、编译性、互动性和面向对象的脚本语言。最初被设计用于编写自动化脚本(shell),随着版本的不断更新和语言新功能的添加,越多被用于独立的、大型项目的开发。
- PyTorch 是一个深度学习框架,封装好了很多网络和深度学习相关的工具方便我们调用,而不用我们一个个去单独写了。它分为 CPU 和 GPU 版本,其他框架还有 TensorFlow、Caffe 等。PyTorch 是由 Facebook 人工智能研究院(FAIR)基于 Torch 推出的,它是一个基于 Python 的可续计算包,提供两个高级功能:1、具有强大的 GPU 加速的张量计算(如 NumPy);2、构建深度神经网络时的自动微分机制。
- YOLOv5是一种单阶段目标检测算法,该算法在YOLOv4的基础上添加了一些新的改进思路,使其速度与精度都得到了极大的性能提升。它是一个在COCO数据集上预训练的物体检测架构和模型系列,代表了Ultralytics对未来视觉AI方法的开源研究,其中包含了经过数千小时的研究和开发而形成的经验教训和最佳实践。
- Labelme是一款图像标注工具,由麻省理工(MIT)的计算机科学和人工智能实验室(CSAIL)研发。它是用Python和PyQT编写的,开源且免费。Labelme支持Windows、Linux和Mac等操作系统。
- 这款工具提供了直观的图形界面,允许用户在图像上标注多种类型的目标,例如矩形框、多边形、线条等,甚至包括更复杂的形状。标注结果以JSON格式保存,便于后续处理和分析。这些标注信息可以用于目标检测、图像分割、图像分类等任务。
- 总的来说,Labelme是一款强大且易用的图像标注工具,可以满足不同的图像处理需求。
- Labelme标注json文件是一种用于存储标注信息的文件格式,它包含了以下几个主要的字段:
version: Labelme的版本号,例如"4.5.6"。flags: 一些全局的标志,例如是否是分割任务,是否有多边形,等等。shapes: 一个列表,每个元素是一个字典,表示一个标注对象。每个字典包含了以下几个字段:
label: 标注对象的类别名称,例如"dog"。points: 一个列表,每个元素是一个坐标对,表示标注对象的边界点,例如[[10, 20], [30, 40]]。group_id: 标注对象的分组编号,用于表示属于同一组的对象,例如1。shape_type: 标注对象的形状类型,例如"polygon",“rectangle”,“circle”,等等。flags: 一些针对该标注对象的标志,例如是否是难例,是否被遮挡,等等。lineColor: 标注对象的边界线颜色,例如[0, 255, 0, 128]。fillColor: 标注对象的填充颜色,例如[255, 0, 0, 128]。imagePath: 图像文件的相对路径,例如"img_001.jpg"。imageData: 图像文件的二进制数据,经过base64编码后的字符串,例如"iVBORw0KGgoAAAANSUhEUgAA…"。imageHeight: 图像的高度,例如600。imageWidth: 图像的宽度,例如800。
以下是一个Labelme标注json文件的示例:
{
  "version": "4.5.6",
  "flags": {},
  "shapes": [
    {
      "label": "dog",
      "points": [
        [
          121.0,
          233.0
        ],
        [
          223.0,
          232.0
        ],
        [
          246.0,
          334.0
        ],
        [
          121.0,
          337.0
        ]
      ],
      "group_id": null,
      "shape_type": "polygon",
      "flags": {}
    }
  ],
  "lineColor": [
    0,
    255,
    0,
    128
  ],
  "fillColor": [
    255,
    0,
    0,
    128
  ],
  "imagePath": "img_001.jpg",
  "imageData": "iVBORw0KGgoAAAANSUhEUgAA...",
  "imageHeight": 600,
  "imageWidth": 800
}
实验环境
- Python 3.x (面向对象的高级语言)
上下拼接图片并修改、合并其对应的Labelme标注文件
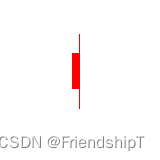
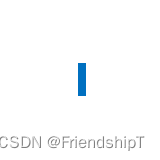
- 背景:将标注好的数据集,上下拼接图片,以扩充数据集图片的形状大小,更好的输入进去网络,训练模型。
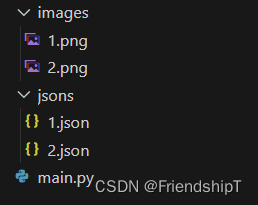
- 目录结构示例
- images:要拼接的图片所在的文件夹。
- jsons:图片对应Labelme标注Json文件所在的文件夹。

{
  "version": "5.1.1",
  "flags": {},
  "shapes": [
    {
      "label": "0",
      "points": [
        [
          71.08019639934534,
          33.10965630114566
        ],
        [
          81.55482815057283,
          110.68739770867431
        ]
      ],
      "group_id": null,
      "shape_type": "rectangle",
      "flags": {}
    }
  ],
  "imagePath": "1.png",
  "imageData": null,
  "imageHeight": 160,
  "imageWidth": 160
}

{
  "version": "5.1.1",
  "flags": {},
  "shapes": [
    {
      "label": "1",
      "points": [
        [
          77.29950900163666,
          61.58756137479541
        ],
        [
          87.11947626841243,
          97.59410801963993
        ]
      ],
      "group_id": null,
      "shape_type": "rectangle",
      "flags": {}
    }
  ],
  "imagePath": "2.png",
  "imageData": null,
  "imageHeight": 160,
  "imageWidth": 160
}
代码实现
- 此版代码,相较于Python将已标注的两张图片进行上下拼接并修改、合并其对应的Labelme标注文件,将文件夹批量处理图片和json文件考虑进去,而不是单个图片和json文件。
import os
import cv2
import json
import math

def xyxy2xywh(rect):
    '''
    (x1,y1,x2,y2) -> (x,y,w,h)
    '''
    return [rect[0],rect[1],rect[2]-rect[0],rect[3]-rect[1]]

def xywh2xyxy(rect):
    '''
    (x,y,w,h) -> (x1,y1,x2,y2)
    '''
    return [rect[0],rect[1],rect[0]+rect[2],rect[1]+rect[3]]


def is_RecA_RecB_interSect(RecA, RecB): # Rec = [xmin,ymin,xmax,ymax]
    # 获取交集区域的[xmin,ymin,xmax,ymax]
    x_A_and_B_min = max(RecA[0], RecB[0])
    y_A_and_B_min = max(RecA[1], RecB[1])
    x_A_and_B_max = min(RecA[2], RecB[2])
    y_A_and_B_max = min(RecA[3], RecB[3])
    # 计算交集部分面积, 当(xmax - xmin)为负时,说明A与B框无交集,直接置为0。 (ymax - ymin)同理。
    interArea = max(0, x_A_and_B_max - x_A_and_B_min) * max(0, y_A_and_B_max - y_A_and_B_min)
    return interArea > 0

def merge_RecA_RecB(RecA, RecB): # Rec = [xmin,ymin,xmax,ymax]
    # 获取合并区域的[xmin,ymin,xmax,ymax]
    xmin = min(RecA[0], RecB[0])
    ymin = min(RecA[1], RecB[1])
    xmax = max(RecA[2], RecB[2])
    ymax = max(RecA[3], RecB[3])
    return [xmin,ymin, xmax,ymax]

'''
递归是一个过程或函数在其定义或说明中有直接或间接调用自身的一种方法,
它通常把一个大型复杂的问题层层转化为一个与原问题相似的规模较小的问题来求解。
因此递归过程,最重要的就是查看能不能讲原本的问题分解为更小的子问题,这是使用递归的关键。


    终止条件:矩形框数为1或者为空。
    返回值: 新合并的矩形框
    本级任务: 每一级需要做的就是遍历从它开始的后续矩形框,寻找可以和他合并的矩形

'''
def merge_rect(box,labels):
    '''
    合并重叠框

    输入参数: box :[[xmin,ymin,xmax,ymax],...]
            labels :['0', '0', '1', '1', '1', '2', '2', '2']

    返回:
        合并后的box:[[xmin,ymin,xmax,ymax],...]
        合并后的labels:['0', '1', '2']
    '''
    if len(box) == 1 or len(box) == 0 : # 矩形框数为1或者为空
        return box,labels

    for i in range(len(box)):
        RecA_xyxy = box[i]
        labelA = labels[i]
        for j in range(i+1, len(box)):
            RecB_xyxy = box[j]
            labelB = labels[i]
            if is_RecA_RecB_interSect(RecA_xyxy, RecB_xyxy)  and labelA==labelB:
                rect_xyxy = merge_RecA_RecB(RecA_xyxy, RecB_xyxy)
                # 使用remove(elem)来移除元素
                box.remove(RecA_xyxy)
                box.remove(RecB_xyxy)
                box.append(rect_xyxy)
                labels.pop(i)
                labels.pop(j-1)
                labels.append(labelA)
                merge_rect(box,labels)
                # 返回上一级循环,避免重复处理已合并的矩形
                return box,labels
    return box,labels

def xyxy2xminyminxmaxymax(rect):
    '''
    (x1,y1,x2,y2)  -> (xmin,ymin,xmax,ymax)
    '''
    xmin = min(rect[0],rect[2])
    ymin = min(rect[1],rect[3])
    xmax = max(rect[0],rect[2])
    ymax = max(rect[1],rect[3])
    return xmin,ymin,xmax,ymax

def coord_recovery(res_list,img_height = 80):
    for i in range(len(res_list)):
        for j in res_list[i][1]:
            j[1] = j[1] + i*img_height
            j[3] = j[3] + i*img_height


        # res_list[i][1][0][1] = res_list[i][1][0][1] + i*img_height
        # res_list[i][1][0][3] = res_list[i][1][0][3] + i*img_height
    return res_list

def read_write_json(in_json1_path,
                    in_json2_path,
                    output_json_path,
                    out_img_name,
                    new_img_height,
                    new_img_width,
                    json_dict = {
                            "version": "4.5.6",
                            "flags": {},
                            "shapes": [],
                        },
                ):
    json_dict = {
                    "version": "4.5.6",
                    "flags": {},
                    "shapes": [],
                }
    '''
    读取json文件
    '''
    with open(in_json1_path, "r", encoding='utf-8') as f:
        # json.load数据到变量json_data
        json1_data = json.load(f)
    with open(in_json2_path, "r", encoding='utf-8') as f:
        # json.load数据到变量json_data
        json2_data = json.load(f)

    img1_height = json1_data['imageHeight']
    img1_width = json1_data['imageWidth']
    img2_height = json2_data['imageHeight']
    img2_width = json2_data['imageWidth']
    labels = []
    boxes = []
    for i in json1_data['shapes']:
        labels.append(i['label'])
        rect = int(i['points'][0][0]),int(i['points'][0][1]),int(i['points'][1][0]),int(i['points'][1][1]) # x1,y1,x2,y2
        x1,y1,x2,y2 = xyxy2xminyminxmaxymax(rect)
        boxes.append([x1,y1,x2,y2])

    for i in json2_data['shapes']:
        labels.append(i['label'])
        rect = int(i['points'][0][0]),int(i['points'][0][1])+img1_height,int(i['points'][1][0]),int(i['points'][1][1])+img1_height # x1,y1,x2,y2
        x1,y1,x2,y2 = xyxy2xminyminxmaxymax(rect)
        boxes.append([x1,y1,x2,y2])

    merge_box,merge_labels = merge_rect(boxes,labels) # 合并相交的矩形
    # print(merge_labels,merge_box,sep='\n')
    for box,label in zip(merge_box,merge_labels):
        shapes_dict = {'label': '',
                'points': [], # [[x1,y1],[x2,y2]]
                'group_id': None,
                'shape_type': 'rectangle',
                'flags': {}}
        shapes_dict['label'] = label
        x1,y1,x2,y2 = box
        shapes_dict['points'] = [[x1,y1],[x2,y2]]
        json_dict['shapes'].append(shapes_dict)


    '''
    写新的json文件
    '''
    json_dict["imagePath"] = out_img_name
    json_dict["imageData"] = None
    json_dict["imageHeight"] = new_img_height
    json_dict["imageWidth"] = new_img_width
    with open(output_json_path, 'w') as f:
        f.write(json.dumps(json_dict))


def vconcat_img_json(img1_path,img2_path,json1_path,json2_path,output_dir):
    img1 = cv2.imread(img1_path)
    img2 = cv2.imread(img2_path)
    img1_img2_res = cv2.vconcat([img1, img2])
    new_img_height,new_img_width = img1_img2_res.shape[0],img1_img2_res.shape[1]
    img_type = '.png'
    out_img_name = img1_path.split('/')[-1].split('.')[0] +'_'+ img2_path.split('/')[-1].split('.')[0]+img_type
    out_img_path = os.path.join(output_dir,out_img_name)
    # print(out_img_path)

    out_json_name = img1_path.split('/')[-1].split('.')[0] +'_'+ img2_path.split('/')[-1].split('.')[0]+".json"
    out_json_path = os.path.join(output_dir,out_json_name)
    # print(out_json_path)
    # 保存新的json文件
    read_write_json(json1_path,json2_path,out_json_path,out_img_name,new_img_height,new_img_width)

    # 保存图片
    cv2.imwrite(out_img_path,img1_img2_res)

if __name__=="__main__":
    output_dir = "output"
    if not os.path.exists(output_dir):
        os.mkdir(output_dir)

    in_img_dir = 'images'
    in_json_dir = 'jsons'

    imgs_name_list = [i for i in os.listdir(in_img_dir) if i.endswith('.png')]
    # 按'picture_106_2023_12_14_11_12_23_986'按'106'这个排序
    # imgs_name_list = sorted(imgs_name_list, key=lambda x: int(x.split('_')[1]))
    json_name_list = [i for i in os.listdir(in_json_dir) if i.endswith('.json')]
    # 按'picture_106_2023_12_14_11_12_23_986'按'106'这个排序
    # json_name_list = sorted(json_name_list, key=lambda x: int(x.split('_')[1]))
    # print(imgs_name_list)
    # print(json_name_list)

    for i in range(len(imgs_name_list)-1):
        try:
            img1_name = imgs_name_list[i]
            img2_name = imgs_name_list[i+1]

            img1_path = in_img_dir + '/' + img1_name
            json1_path = in_json_dir + '/' + img1_name[:-4]+ '.json'

            img2_path = in_img_dir + '/' + img2_name
            json2_path = in_json_dir + '/' + img2_name[:-4]+ '.json'

            vconcat_img_json(img1_path,img2_path,json1_path,json2_path,output_dir)

        except Exception as e:
            print(e)
输出结果

- output:拼接后图片数据集和Labelme标注的Json文件所在的文件夹。

{
    "version": "4.5.6",
    "flags": {},
    "shapes": [
        {
            "label": "0",
            "points": [
                [
                    71,
                    33
                ],
                [
                    81,
                    110
                ]
            ],
            "group_id": null,
            "shape_type": "rectangle",
            "flags": {}
        },
        {
            "label": "1",
            "points": [
                [
                    77,
                    221
                ],
                [
                    87,
                    257
                ]
            ],
            "group_id": null,
            "shape_type": "rectangle",
            "flags": {}
        }
    ],
    "imagePath": "1_2.png",
    "imageData": null,
    "imageHeight": 320,
    "imageWidth": 160
}
- 由于本人水平有限,难免出现错漏,敬请批评改正。
- 更多精彩内容,可点击进入Python日常小操作专栏、OpenCV-Python小应用专栏、YOLO系列专栏、自然语言处理专栏或我的个人主页查看
- YOLOv8 Ultralytics:使用Ultralytics框架训练RT-DETR实时目标检测模型
- 基于DETR的人脸伪装检测
- YOLOv7训练自己的数据集(口罩检测)
- YOLOv8训练自己的数据集(足球检测)
- YOLOv5:TensorRT加速YOLOv5模型推理
- YOLOv5:IoU、GIoU、DIoU、CIoU、EIoU
- 玩转Jetson Nano(五):TensorRT加速YOLOv5目标检测
- YOLOv5:添加SE、CBAM、CoordAtt、ECA注意力机制
- YOLOv5:yolov5s.yaml配置文件解读、增加小目标检测层
- Python将COCO格式实例分割数据集转换为YOLO格式实例分割数据集
- YOLOv5:使用7.0版本训练自己的实例分割模型(车辆、行人、路标、车道线等实例分割)
- 使用Kaggle GPU资源免费体验Stable Diffusion开源项目
文章来源:https://blog.csdn.net/FriendshipTang/article/details/135019507
本文来自互联网用户投稿,该文观点仅代表作者本人,不代表本站立场。本站仅提供信息存储空间服务,不拥有所有权,不承担相关法律责任。 如若内容造成侵权/违法违规/事实不符,请联系我的编程经验分享网邮箱:veading@qq.com进行投诉反馈,一经查实,立即删除!
本文来自互联网用户投稿,该文观点仅代表作者本人,不代表本站立场。本站仅提供信息存储空间服务,不拥有所有权,不承担相关法律责任。 如若内容造成侵权/违法违规/事实不符,请联系我的编程经验分享网邮箱:veading@qq.com进行投诉反馈,一经查实,立即删除!
