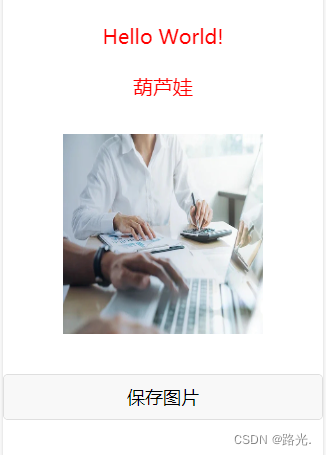
小程序实现绘制图片 保存到手机
2024-01-08 13:29:23

?HTML
<template>
	<view>
		<canvas canvas-id="myCanvas" :style="{height:'380px',width:wWidth+'px',background:'#FFFFFF'}"></canvas>
		<view class="textCenter">
			<button @click="saveCanvas">保存图片</button>
		</view>
	</view>
</template>
JS
<script>
	export default {
		data() {
			return {
				wHeight:'',
				wWidth:''
			}
		},
		onLoad(){
			this.wHeight=uni.getWindowInfo().screenHeight-50; //屏幕可视区域高度
			this.wWidth=uni.getWindowInfo().screenWidth;//屏幕可视区域宽
			// 获取Canvas对象
			var context = wx.createCanvasContext('myCanvas')
            //设置背景颜色是白色,这个地方就是设置一个与canvas画布一样大小的方框设置方框背景
			context.setFillStyle('#FFFFFF')
			context.fillRect(0,0,this.wWidth,380);
			context.stroke()

			// 绘制文本
			context.setFontSize(20)
			context.setFillStyle('red')
			context.setTextAlign('center')
			context.fillText('Hello World!',  this.wWidth/2, 50)

			context.setFontSize(20)

			context.setFillStyle('red')
			context.setTextAlign('center')

			context.fillText('葫芦娃', this.wWidth/2, 100)
			context.stroke()
			let _this=this;
			// 绘制图片
			wx.getImageInfo({
				src: 'https://yujia-shanghai-bucket.oss-cn-shanghai.aliyuncs.com/h5/out_program/1687242451873_634a7025d03364b415b90bf5a07306071827dbc97358-C6odDl_fw1200.webp.jpg',
				success(res) {
					context.drawImage(res.path, _this.wWidth/2-100, 140, 200, 200)
					context.stroke()
					// 将Canvas绘制出来
					context.draw()
				}
			})
		},
		methods: {
			saveCanvas(){
				wx.canvasToTempFilePath({
					x: 0,
					y: 0,
					width: this.wWidth,
					height: 380,
					canvasId: 'myCanvas',
					fileType:'jpg',
					success: function (res) {
						console.log(res.tempFilePath);
						wx.saveImageToPhotosAlbum({
							filePath: res.tempFilePath,
						    success: (resS) => {
							    console.log(resS)
							    uni.showToast({
								    title:'保存成功',
								    icon:'success'
							    })
						    },
						    fail: (errS) => {

						    }})
					    },fail: (err) => {
						    console.log(err);
					    }
				    })
				    return;

			    }
		    }
	    }
</script>
文章来源:https://blog.csdn.net/qq_41429765/article/details/131348483
本文来自互联网用户投稿,该文观点仅代表作者本人,不代表本站立场。本站仅提供信息存储空间服务,不拥有所有权,不承担相关法律责任。 如若内容造成侵权/违法违规/事实不符,请联系我的编程经验分享网邮箱:veading@qq.com进行投诉反馈,一经查实,立即删除!
本文来自互联网用户投稿,该文观点仅代表作者本人,不代表本站立场。本站仅提供信息存储空间服务,不拥有所有权,不承担相关法律责任。 如若内容造成侵权/违法违规/事实不符,请联系我的编程经验分享网邮箱:veading@qq.com进行投诉反馈,一经查实,立即删除!