Python+Yolov8+onnx-deepsort方法物体人流量识别统计
程序示例精选
Python+Yolov8+onnx-deepsort方法物体人流量识别统计
如需安装运行环境或远程调试,见文章底部个人QQ名片,由专业技术人员远程协助!
前言
这篇博客针对《Python+Yolov8+onnx-deepsort方法物体人流量识别统计》编写代码,代码整洁,规则,易读。 学习与应用推荐首选。
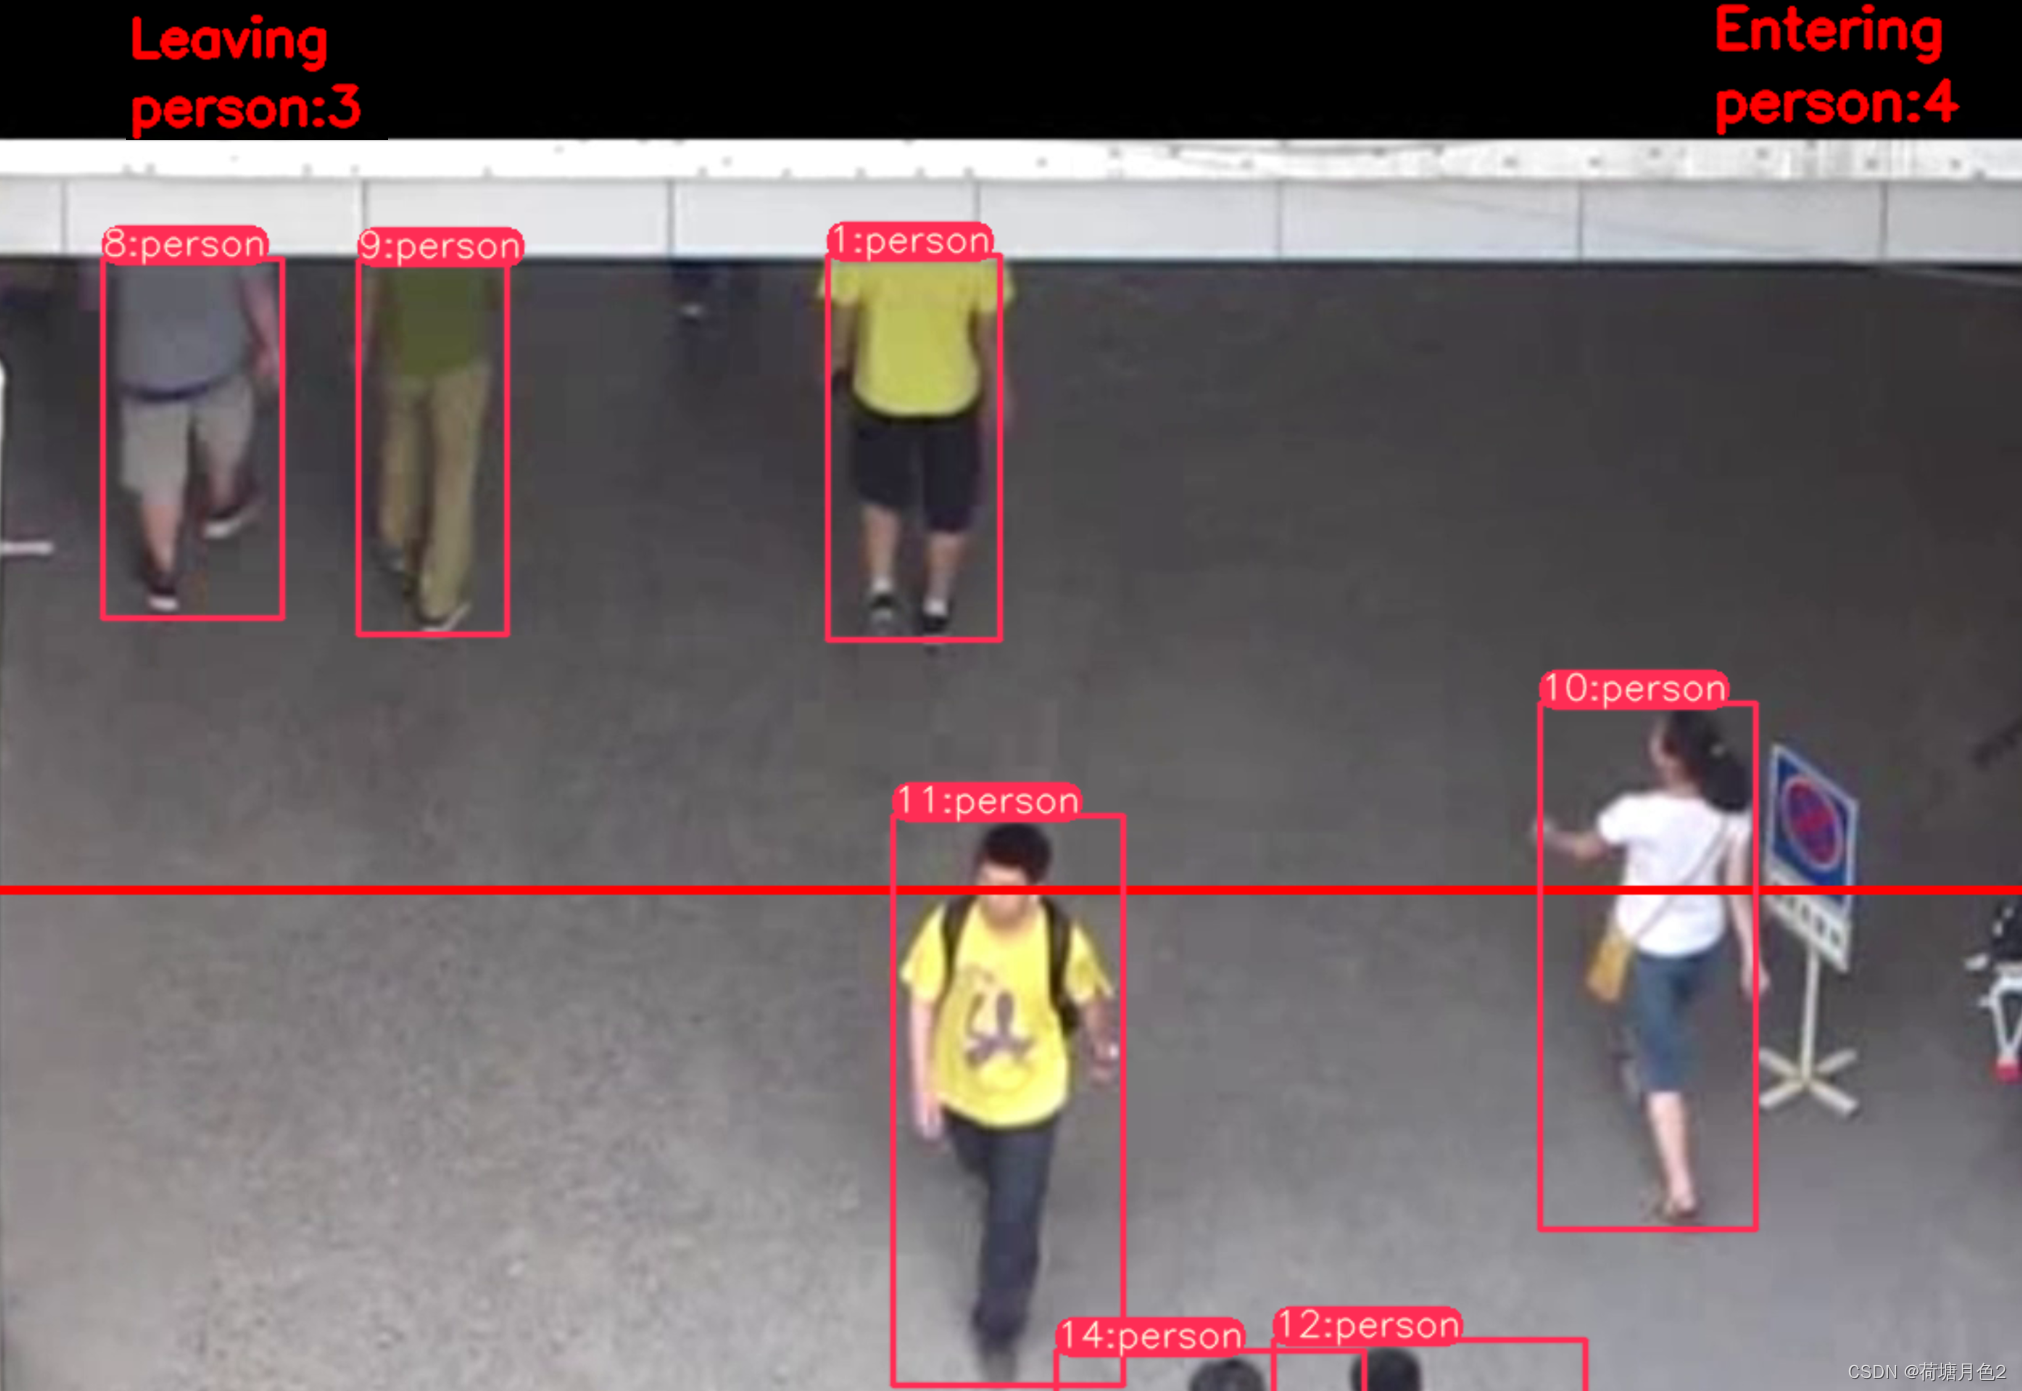
运行结果

文章目录
一、所需工具软件
二、使用步骤
???????1. 主要代码
???????2. 运行结果
三、在线协助
一、所需工具软件
???????1. Python
???????2. Pycharm
二、使用步骤
代码如下(示例):
import cv2
from yolov8 import YOLOv8
from deep_sort_pytorch.deep_sort import DeepSort
from deep_sort_pytorch.utils.parser import get_config
from collections import deque
def init_tracker():
    print("init_tracker")
    global deepsort
    cfg_deep = get_config()
    cfg_deep.merge_from_file("deep_sort_pytorch/configs/deep_sort.yaml")

    deepsort= DeepSort(cfg_deep.DEEPSORT.REID_CKPT,
                            max_dist=cfg_deep.DEEPSORT.MAX_DIST, min_confidence=cfg_deep.DEEPSORT.MIN_CONFIDENCE,
                            nms_max_overlap=cfg_deep.DEEPSORT.NMS_MAX_OVERLAP, max_iou_distance=cfg_deep.DEEPSORT.MAX_IOU_DISTANCE,
                            max_age=cfg_deep.DEEPSORT.MAX_AGE, n_init=cfg_deep.DEEPSORT.N_INIT, nn_budget=cfg_deep.DEEPSORT.NN_BUDGET,
                            use_cuda=True)
##########################################################################################
def xyxy_to_xywh(*xyxy):
    """" Calculates the relative bounding box from absolute pixel values. """
    bbox_left = min([xyxy[0].item(), xyxy[2].item()])
    bbox_top = min([xyxy[1].item(), xyxy[3].item()])
    bbox_w = abs(xyxy[0].item() - xyxy[2].item())
    bbox_h = abs(xyxy[1].item() - xyxy[3].item())
    x_c = (bbox_left + bbox_w / 2)
    y_c = (bbox_top + bbox_h / 2)
    w = bbox_w
    h = bbox_h
    return x_c, y_c, w, h

def xyxy_to_tlwh(bbox_xyxy):
    tlwh_bboxs = []
    for i, box in enumerate(bbox_xyxy):
        x1, y1, x2, y2 = [int(i) for i in box]
        top = x1
        left = y1
        w = int(x2 - x1)
        h = int(y2 - y1)
        tlwh_obj = [top, left, w, h]
        tlwh_bboxs.append(tlwh_obj)
    return tlwh_bboxs

def compute_color_for_labels(label):
    """
    Simple function that adds fixed color depending on the class
    """
    if label == 0: #person
        color = (85,45,255)
    elif label == 2: # Car
        color = (222,82,175)
    elif label == 3:  # Motobike
        color = (0, 204, 255)
    elif label == 5:  # Bus
        color = (0, 149, 255)
    else:
        color = [int((p * (label ** 2 - label + 1)) % 255) for p in palette]
    return tuple(color)

def draw_border(img, pt1, pt2, color, thickness, r, d):
    x1,y1 = pt1
    x2,y2 = pt2
    # Top left
    cv2.line(img, (x1 + r, y1), (x1 + r + d, y1), color, thickness)
    cv2.line(img, (x1, y1 + r), (x1, y1 + r + d), color, thickness)
    cv2.ellipse(img, (x1 + r, y1 + r), (r, r), 180, 0, 90, color, thickness)
    # Top right
    cv2.line(img, (x2 - r, y1), (x2 - r - d, y1), color, thickness)
    cv2.line(img, (x2, y1 + r), (x2, y1 + r + d), color, thickness)
    cv2.ellipse(img, (x2 - r, y1 + r), (r, r), 270, 0, 90, color, thickness)
    # Bottom left
    cv2.line(img, (x1 + r, y2), (x1 + r + d, y2), color, thickness)
    cv2.line(img, (x1, y2 - r), (x1, y2 - r - d), color, thickness)
    cv2.ellipse(img, (x1 + r, y2 - r), (r, r), 90, 0, 90, color, thickness)
    # Bottom right
    cv2.line(img, (x2 - r, y2), (x2 - r - d, y2), color, thickness)
    cv2.line(img, (x2, y2 - r), (x2, y2 - r - d), color, thickness)
    cv2.ellipse(img, (x2 - r, y2 - r), (r, r), 0, 0, 90, color, thickness)

    cv2.rectangle(img, (x1 + r, y1), (x2 - r, y2), color, -1, cv2.LINE_AA)
    cv2.rectangle(img, (x1, y1 + r), (x2, y2 - r - d), color, -1, cv2.LINE_AA)

    cv2.circle(img, (x1 +r, y1+r), 2, color, 12)
    cv2.circle(img, (x2 -r, y1+r), 2, color, 12)
    cv2.circle(img, (x1 +r, y2-r), 2, color, 12)
    cv2.circle(img, (x2 -r, y2-r), 2, color, 12)

    return img

def UI_box(x, img, color=None, label=None, line_thickness=None):
    # Plots one bounding box on image img
    tl = line_thickness or round(0.002 * (img.shape[0] + img.shape[1]) / 2) + 1  # line/font thickness
    color = color or [random.randint(0, 255) for _ in range(3)]
    c1, c2 = (int(x[0]), int(x[1])), (int(x[2]), int(x[3]))

def intersect(A,B,C,D):
    return ccw(A,C,D) != ccw(B,C,D) and ccw(A,B,C) != ccw(A,B,D)

def ccw(A,B,C):
    return (C[1]-A[1]) * (B[0]-A[0]) > (B[1]-A[1]) * (C[0]-A[0])

def get_direction(point1, point2):
    direction_str = ""

def draw_boxes(img, bbox, names,object_id, identities=None, offset=(0, 0)):
    cv2.line(img, line[0], line[1], (0,0,255), 3)

    height, width, _ = img.shape
    # remove tracked point from buffer if object is lost
    for key in list(data_deque):
      if key not in identities:
        data_deque.pop(key)

    for i, box in enumerate(bbox):
        x1, y1, x2, y2 = [int(i) for i in box]
        x1 += offset[0]
        x2 += offset[0]
        y1 += offset[1]
        y2 += offset[1]

        # code to find center of bottom edge
        center = (int((x2+x1)/ 2), int((y2+y2)/2))

        # get ID of object
        id = int(identities[i]) if identities is not None else 0

        # create new buffer for new object
        if id not in data_deque:
          data_deque[id] = deque(maxlen= 64)
        color = compute_color_for_labels(object_id[i])
        obj_name = names[object_id[i]]
        label = '{}{:d}'.format("", id) + ":"+ '%s' % (obj_name)

        # add center to buffer
        data_deque[id].appendleft(center)
        if len(data_deque[id]) >= 2:
          direction = get_direction(data_deque[id][0], data_deque[id][1])
          if intersect(data_deque[id][0], data_deque[id][1], line[0], line[1]):
              cv2.line(img, line[0], line[1], (255, 255, 255), 3)
              if "South" in direction:
                if obj_name not in object_counter:
                    object_counter[obj_name] = 1
                else:
                    object_counter[obj_name] += 1
              if "North" in direction:
                if obj_name not in object_counter1:
                    object_counter1[obj_name] = 1
                else:
                    object_counter1[obj_name] += 1
        UI_box(box, img, label=label, color=color,
运行结果

三、在线协助:
如需安装运行环境或远程调试,见文章底部个人 QQ 名片,由专业技术人员远程协助!
1)远程安装运行环境,代码调试
2)Visual Studio, Qt, C++, Python编程语言入门指导
3)界面美化
4)软件制作
5)云服务器申请
6)网站制作
当前文章连接:https://blog.csdn.net/alicema1111/article/details/132666851
个人博客主页:https://blog.csdn.net/alicema1111?type=blog
博主所有文章点这里:https://blog.csdn.net/alicema1111?type=blog
博主推荐:
Python人脸识别考勤打卡系统:
https://blog.csdn.net/alicema1111/article/details/133434445
Python果树水果识别:https://blog.csdn.net/alicema1111/article/details/130862842
Python+Yolov8+Deepsort入口人流量统计:https://blog.csdn.net/alicema1111/article/details/130454430
Python+Qt人脸识别门禁管理系统:https://blog.csdn.net/alicema1111/article/details/130353433
Python+Qt指纹录入识别考勤系统:https://blog.csdn.net/alicema1111/article/details/129338432
Python Yolov5火焰烟雾识别源码分享:https://blog.csdn.net/alicema1111/article/details/128420453
Python+Yolov8路面桥梁墙体裂缝识别:https://blog.csdn.net/alicema1111/article/details/133434445
本文来自互联网用户投稿,该文观点仅代表作者本人,不代表本站立场。本站仅提供信息存储空间服务,不拥有所有权,不承担相关法律责任。 如若内容造成侵权/违法违规/事实不符,请联系我的编程经验分享网邮箱:veading@qq.com进行投诉反馈,一经查实,立即删除!