IDEA中,如何将maven项目变为SpringBoot项目?
2023-12-17 17:34:26
第一步:新建Maven工程
这很简单不做过多赘述。
第二步:修改pom.xml文件
分别加入springboot父依赖,web依赖,test测试依赖,maven打包依赖。
<?xml version="1.0" encoding="UTF-8"?>
<project xmlns="http://maven.apache.org/POM/4.0.0"
         xmlns:xsi="http://www.w3.org/2001/XMLSchema-instance"
         xsi:schemaLocation="http://maven.apache.org/POM/4.0.0 http://maven.apache.org/xsd/maven-4.0.0.xsd">
    <modelVersion>4.0.0</modelVersion>

    <!--添加springboot父依赖-->
    <parent>
        <groupId>org.springframework.boot</groupId>
        <artifactId>spring-boot-starter-parent</artifactId>
        <version>2.5.4</version>
    </parent>

    <groupId>com.oracle</groupId>
    <artifactId>flowableSpringboot</artifactId>
    <version>1.0-SNAPSHOT</version>

    <properties>
        <maven.compiler.source>8</maven.compiler.source>
        <maven.compiler.target>8</maven.compiler.target>
        <project.build.sourceEncoding>UTF-8</project.build.sourceEncoding>
    </properties>
    <dependencies>
        <!--web依赖-->
        <dependency>
            <groupId>org.springframework.boot</groupId>
            <artifactId>spring-boot-starter-web</artifactId>
        </dependency>
        <!--test测试依赖-->
        <dependency>
            <groupId>org.springframework.boot</groupId>
            <artifactId>spring-boot-starter-test</artifactId>
            <scope>test</scope>
        </dependency>
    </dependencies>
    <!--maven打包依赖-->
    <build>
        <plugins>
            <plugin>
                <groupId>org.springframework.boot</groupId>
                <artifactId>spring-boot-maven-plugin</artifactId>
            </plugin>
        </plugins>
    </build>

</project>
第三步:添加application.yml
resources下,创建application.yml文件。
server:
  port: 8888
第四步:创建启动类
你可以起名叫App.java,我这里是项目名+Application.java,文件放在java中你的包下。
package com.oracle;

import org.springframework.boot.SpringApplication;
import org.springframework.boot.autoconfigure.SpringBootApplication;

@SpringBootApplication
public class FlowableSpringBootApplication {
    public static void main(String[] args) {
        SpringApplication.run(FlowableSpringBootApplication.class,args);
    }
}
第五步:创建一个controller进行访问测试
package com.oracle.controller;
import org.springframework.web.bind.annotation.GetMapping;
import org.springframework.web.bind.annotation.RequestMapping;
import org.springframework.web.bind.annotation.RestController;
@RestController
@RequestMapping("/springboot")
public class HelloController {
@GetMapping(path = "/hello")
public String hello(){
return "Hello,world";
}
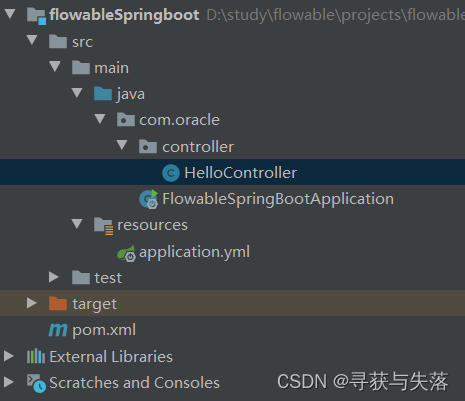
}第六步:查看项目结构
第七步:启动测试
打开启动类,右键运行main方法。

出现这些就算运行成功!!!
访问http://localhost:8888/springboot/hello
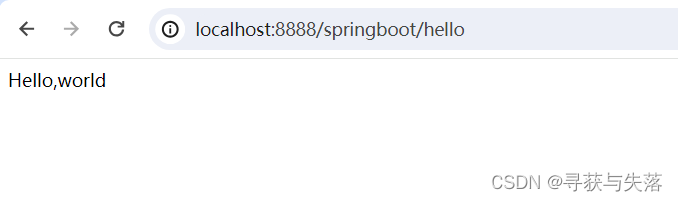
成功访问!!!
文章来源:https://blog.csdn.net/qq_38196449/article/details/135046134
本文来自互联网用户投稿,该文观点仅代表作者本人,不代表本站立场。本站仅提供信息存储空间服务,不拥有所有权,不承担相关法律责任。 如若内容造成侵权/违法违规/事实不符,请联系我的编程经验分享网邮箱:veading@qq.com进行投诉反馈,一经查实,立即删除!
本文来自互联网用户投稿,该文观点仅代表作者本人,不代表本站立场。本站仅提供信息存储空间服务,不拥有所有权,不承担相关法律责任。 如若内容造成侵权/违法违规/事实不符,请联系我的编程经验分享网邮箱:veading@qq.com进行投诉反馈,一经查实,立即删除!