【Flowable】流程引擎在springboot中的应用——从流程定义到流程结束审批
2024-01-10 10:33:37
使用工具:
- Tomcat
- FlowableUI
- IDEA
Ps:本文是一个简易demo,包含从 流程定义 到 流程审批结束 整个流程,暂不涉及表达式、候选人组、网关等复杂功能。
一、流程定义
流程定义使用Flowable官方集成的FlowableUI,因在新版本中已经移除,所以这里使用6.7版本。
1、FlowableUI安装
→下载地址,选择6.7.2中的安装包
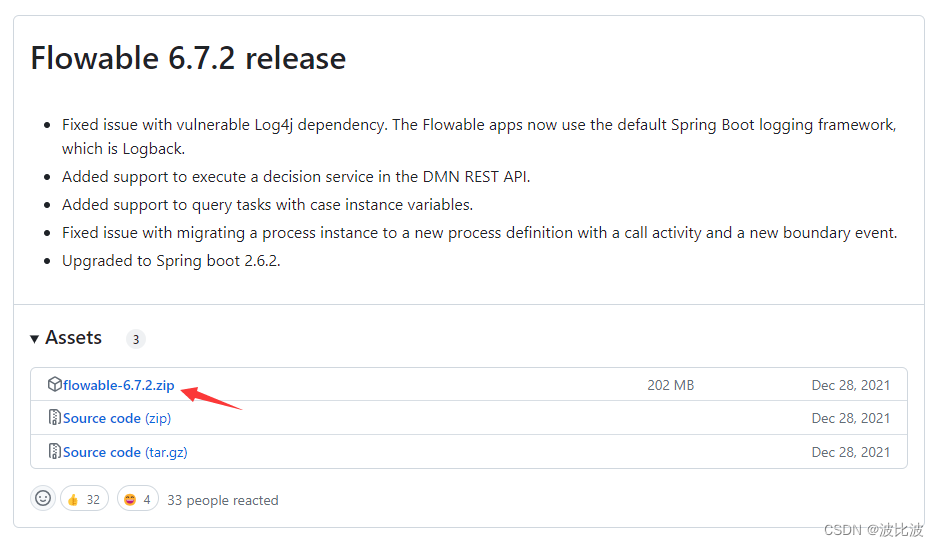
下载完后将安装包内的 flowable-ui.war 放到Tomcat安装目录的webapps下,注意Tomcat的路径不要用中文。
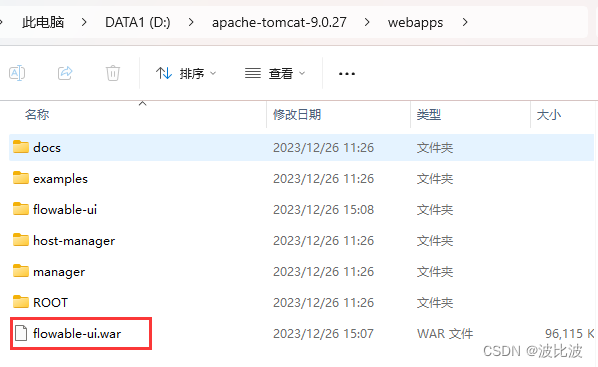
上一步操作完后即可启动Tomcat(双击bin目录下的startup.bat启动),等待启动完成,即可访问FlowableUI,访问地址:http://localhost:8080/flowable-ui 。
登录账号:admin
登录密码:test
登录成功后,页面如下:

2、FlowableUI使用
首先选择IDM App创建几个用户,用于后续审批添加审批人。下面是添加示例:
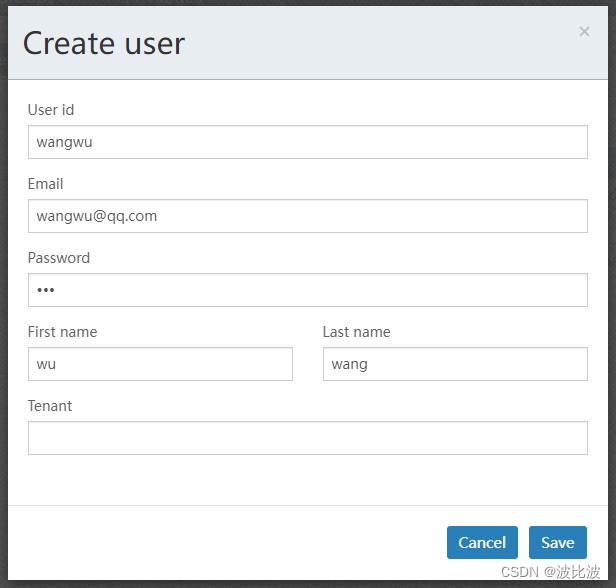
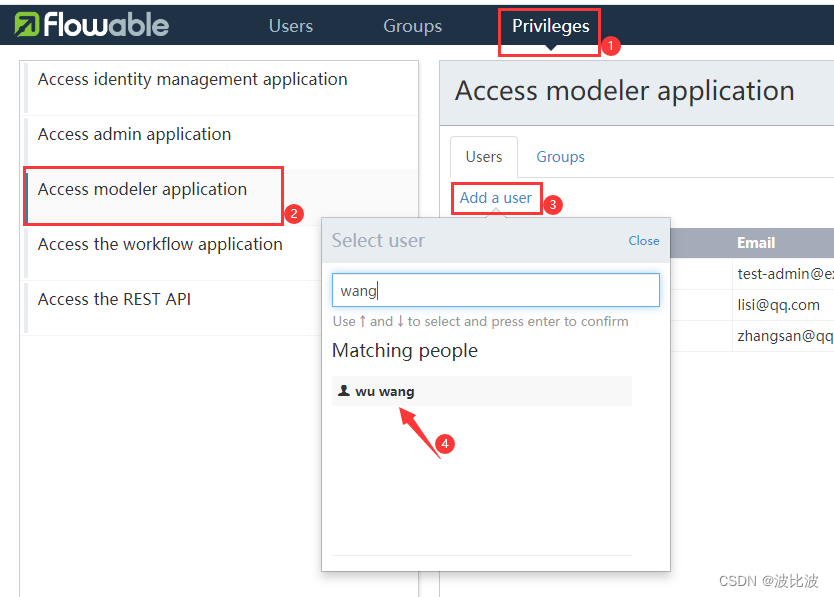
再为用户添加权限:这里添加的是modeler应用权限,同样的操作再添加workflow应用权限。
然后在Modeler App中绘制流程图:
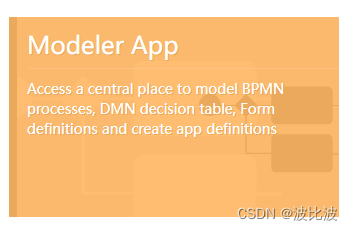
点击创建流程:

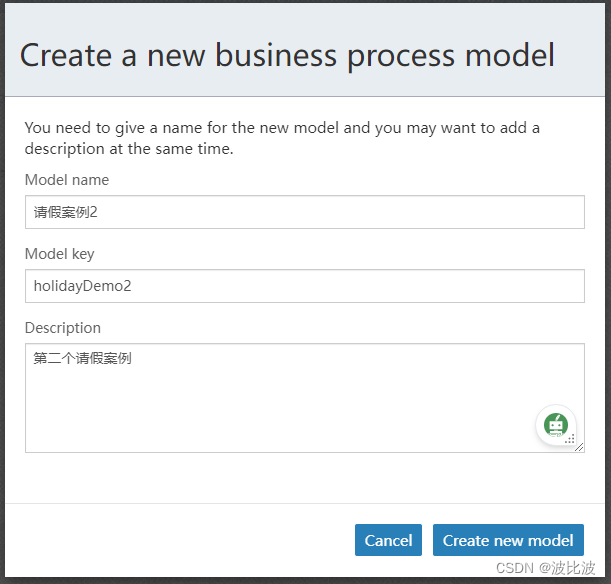
注意:如果要创建多个模型的话,key最好不要重复。
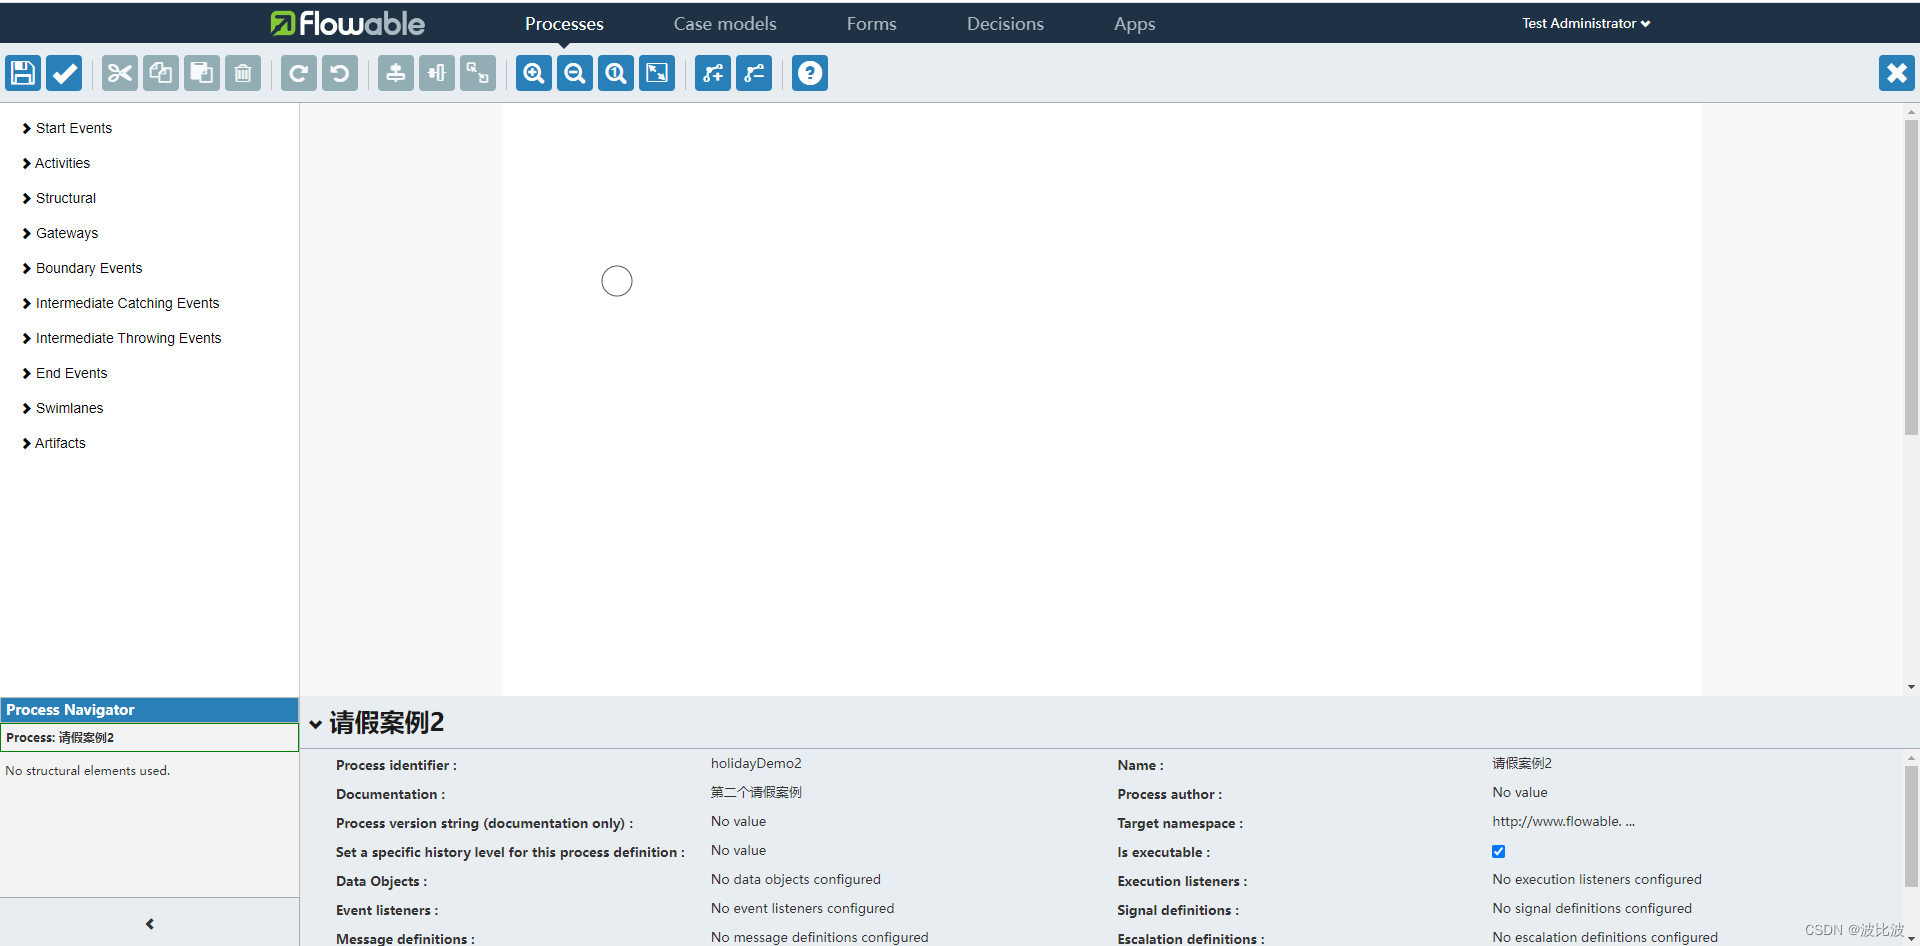
→ 进入流程绘制区域:
绘制好后,点击这里分配审批人:
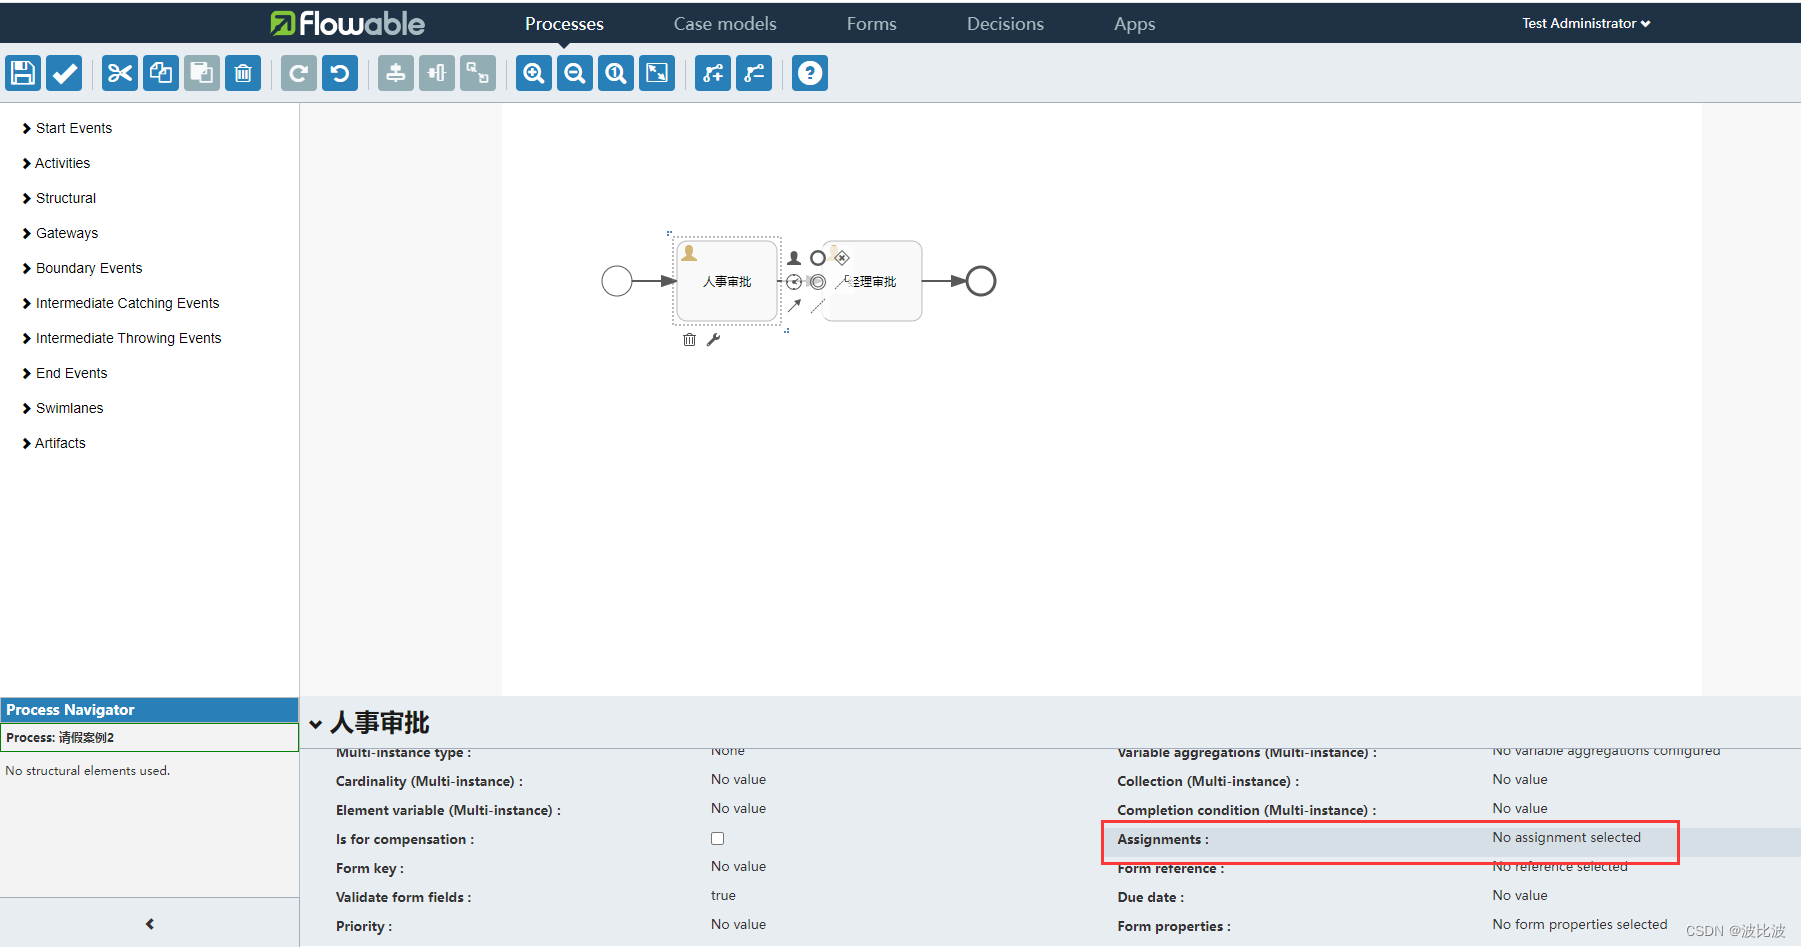
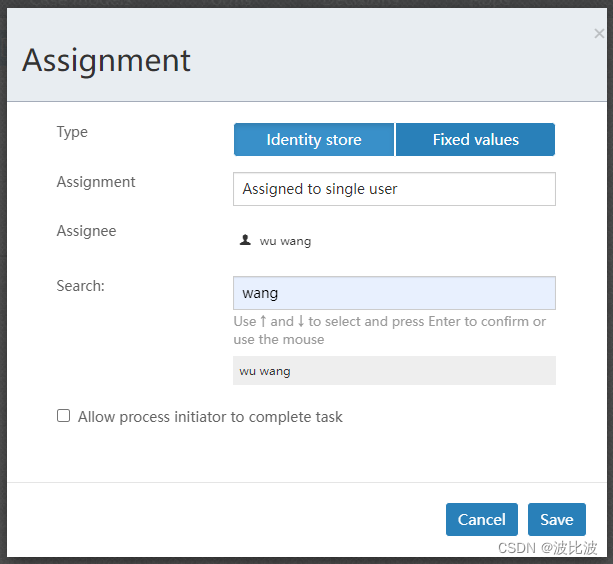
将两个审批模块都分配好审批人后,保存模型并退出。
保存好后,下面出现了新建的流程模型:

点开流程模型,点击右上角的下载按钮,将模型的XML文件保存到本地:
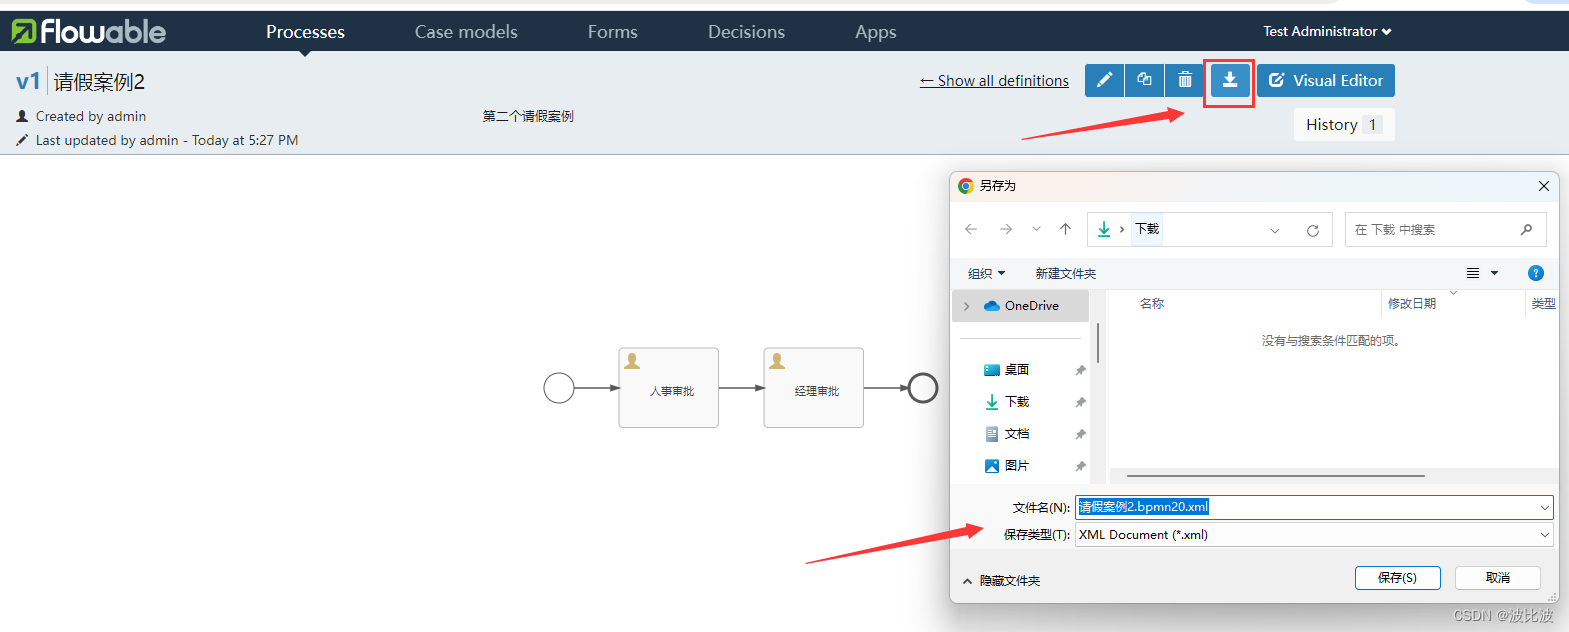
XML文件内容如下:
<?xml version="1.0" encoding="UTF-8"?>
<definitions xmlns="http://www.omg.org/spec/BPMN/20100524/MODEL" xmlns:xsi="http://www.w3.org/2001/XMLSchema-instance" xmlns:xsd="http://www.w3.org/2001/XMLSchema" xmlns:flowable="http://flowable.org/bpmn" xmlns:bpmndi="http://www.omg.org/spec/BPMN/20100524/DI" xmlns:omgdc="http://www.omg.org/spec/DD/20100524/DC" xmlns:omgdi="http://www.omg.org/spec/DD/20100524/DI" typeLanguage="http://www.w3.org/2001/XMLSchema" expressionLanguage="http://www.w3.org/1999/XPath" targetNamespace="http://www.flowable.org/processdef" exporter="Flowable Open Source Modeler" exporterVersion="6.7.2">
  <process id="holidaydemo1" name="请假案例1" isExecutable="true">
    <documentation>第一个流程案例-请假</documentation>
    <startEvent id="startEvent1" name="开始" flowable:formFieldValidation="true"></startEvent>
    <userTask id="sid-429217D9-A838-4492-B125-C99BA2C76845" name="人事审批" flowable:assignee="zhangsan" flowable:formFieldValidation="true">
      <extensionElements>
        <modeler:activiti-idm-assignee xmlns:modeler="http://flowable.org/modeler"><![CDATA[true]]></modeler:activiti-idm-assignee>
        <modeler:assignee-info-email xmlns:modeler="http://flowable.org/modeler"><![CDATA[zhangsan@qq.com]]></modeler:assignee-info-email>
        <modeler:assignee-info-firstname xmlns:modeler="http://flowable.org/modeler"><![CDATA[san]]></modeler:assignee-info-firstname>
        <modeler:assignee-info-lastname xmlns:modeler="http://flowable.org/modeler"><![CDATA[zhang]]></modeler:assignee-info-lastname>
        <modeler:initiator-can-complete xmlns:modeler="http://flowable.org/modeler"><![CDATA[false]]></modeler:initiator-can-complete>
      </extensionElements>
    </userTask>
    <sequenceFlow id="sid-FE95403A-2634-4588-85D4-FFFC92004137" sourceRef="startEvent1" targetRef="sid-429217D9-A838-4492-B125-C99BA2C76845"></sequenceFlow>
    <userTask id="sid-67463C45-74BB-4AF6-A441-C97ABF9893FB" name="经理审批" flowable:assignee="lisi" flowable:formFieldValidation="true">
      <extensionElements>
        <modeler:activiti-idm-assignee xmlns:modeler="http://flowable.org/modeler"><![CDATA[true]]></modeler:activiti-idm-assignee>
        <modeler:assignee-info-email xmlns:modeler="http://flowable.org/modeler"><![CDATA[lisi@qq.com]]></modeler:assignee-info-email>
        <modeler:assignee-info-firstname xmlns:modeler="http://flowable.org/modeler"><![CDATA[si]]></modeler:assignee-info-firstname>
        <modeler:assignee-info-lastname xmlns:modeler="http://flowable.org/modeler"><![CDATA[li]]></modeler:assignee-info-lastname>
        <modeler:initiator-can-complete xmlns:modeler="http://flowable.org/modeler"><![CDATA[false]]></modeler:initiator-can-complete>
      </extensionElements>
    </userTask>
    <sequenceFlow id="sid-D75A4A43-FF2E-4137-BB74-BA6B5DB7DBEA" sourceRef="sid-429217D9-A838-4492-B125-C99BA2C76845" targetRef="sid-67463C45-74BB-4AF6-A441-C97ABF9893FB"></sequenceFlow>
    <endEvent id="sid-291AD5AE-7E80-4EEA-ACF4-C1F44E402B09" name="结束"></endEvent>
    <sequenceFlow id="sid-B15F5419-06C6-4000-8E43-4786AEAC5799" sourceRef="sid-67463C45-74BB-4AF6-A441-C97ABF9893FB" targetRef="sid-291AD5AE-7E80-4EEA-ACF4-C1F44E402B09"></sequenceFlow>
  </process>
  <bpmndi:BPMNDiagram id="BPMNDiagram_holidaydemo1">
    <bpmndi:BPMNPlane bpmnElement="holidaydemo1" id="BPMNPlane_holidaydemo1">
      <bpmndi:BPMNShape bpmnElement="startEvent1" id="BPMNShape_startEvent1">
        <omgdc:Bounds height="30.0" width="30.0" x="100.0" y="163.0"></omgdc:Bounds>
      </bpmndi:BPMNShape>
      <bpmndi:BPMNShape bpmnElement="sid-429217D9-A838-4492-B125-C99BA2C76845" id="BPMNShape_sid-429217D9-A838-4492-B125-C99BA2C76845">
        <omgdc:Bounds height="80.0" width="100.0" x="210.0" y="138.0"></omgdc:Bounds>
      </bpmndi:BPMNShape>
      <bpmndi:BPMNShape bpmnElement="sid-67463C45-74BB-4AF6-A441-C97ABF9893FB" id="BPMNShape_sid-67463C45-74BB-4AF6-A441-C97ABF9893FB">
        <omgdc:Bounds height="80.0" width="100.0" x="375.0" y="138.0"></omgdc:Bounds>
      </bpmndi:BPMNShape>
      <bpmndi:BPMNShape bpmnElement="sid-291AD5AE-7E80-4EEA-ACF4-C1F44E402B09" id="BPMNShape_sid-291AD5AE-7E80-4EEA-ACF4-C1F44E402B09">
        <omgdc:Bounds height="28.0" width="28.0" x="520.0" y="164.0"></omgdc:Bounds>
      </bpmndi:BPMNShape>
      <bpmndi:BPMNEdge bpmnElement="sid-FE95403A-2634-4588-85D4-FFFC92004137" id="BPMNEdge_sid-FE95403A-2634-4588-85D4-FFFC92004137" flowable:sourceDockerX="15.0" flowable:sourceDockerY="15.0" flowable:targetDockerX="50.0" flowable:targetDockerY="40.0">
        <omgdi:waypoint x="129.94999913076796" y="178.0"></omgdi:waypoint>
        <omgdi:waypoint x="209.99999999998067" y="178.0"></omgdi:waypoint>
      </bpmndi:BPMNEdge>
      <bpmndi:BPMNEdge bpmnElement="sid-D75A4A43-FF2E-4137-BB74-BA6B5DB7DBEA" id="BPMNEdge_sid-D75A4A43-FF2E-4137-BB74-BA6B5DB7DBEA" flowable:sourceDockerX="50.0" flowable:sourceDockerY="40.0" flowable:targetDockerX="50.0" flowable:targetDockerY="40.0">
        <omgdi:waypoint x="309.9499999998897" y="178.0"></omgdi:waypoint>
        <omgdi:waypoint x="374.99999999998465" y="178.0"></omgdi:waypoint>
      </bpmndi:BPMNEdge>
      <bpmndi:BPMNEdge bpmnElement="sid-B15F5419-06C6-4000-8E43-4786AEAC5799" id="BPMNEdge_sid-B15F5419-06C6-4000-8E43-4786AEAC5799" flowable:sourceDockerX="50.0" flowable:sourceDockerY="40.0" flowable:targetDockerX="14.0" flowable:targetDockerY="14.0">
        <omgdi:waypoint x="474.95000000000005" y="178.0"></omgdi:waypoint>
        <omgdi:waypoint x="520.0" y="178.0"></omgdi:waypoint>
      </bpmndi:BPMNEdge>
    </bpmndi:BPMNPlane>
  </bpmndi:BPMNDiagram>
</definitions>
二、流程部署
- 首先创建一个springboot项目,使用maven框架,并引入以下依赖:
<dependency>
   <groupId>org.springframework.boot</groupId>
   <artifactId>spring-boot-starter-web</artifactId>
</dependency>

<dependency>
   <groupId>org.springframework.boot</groupId>
   <artifactId>spring-boot-starter-test</artifactId>
   <scope>test</scope>
</dependency>

<dependency>
   <groupId>org.projectlombok</groupId>
   <artifactId>lombok</artifactId>
   <version>1.18.30</version>
</dependency>
<!--Flowable的核心依赖-->
<dependency>
   <groupId>org.flowable</groupId>
   <artifactId>flowable-spring-boot-starter</artifactId>
   <version>6.7.2</version>
</dependency>
<!-- MySQL的依赖 -->
<dependency>
   <groupId>mysql</groupId>
   <artifactId>mysql-connector-java</artifactId>
   <version>8.0.27</version>
</dependency>
<dependency>
   <groupId>com.alibaba</groupId>
   <artifactId>druid</artifactId>
   <version>1.1.14</version>
</dependency>
<!-- 单元测试 -->
<dependency>
   <groupId>junit</groupId>
   <artifactId>junit</artifactId>
   <version>4.13.2</version>
   <scope>test</scope>
</dependency>
<!-- 日志相关 -->
<dependency>
   <groupId>org.slf4j</groupId>
   <artifactId>slf4j-api</artifactId>
   <version>1.7.21</version>
</dependency>
<dependency>
   <groupId>org.slf4j</groupId>
   <artifactId>slf4j-log4j12</artifactId>
   <version>1.7.21</version>
</dependency>
- 在resource目录上新建一个process文件夹,并将刚才下载XML文件放进去。

- 完成目录结构的创建
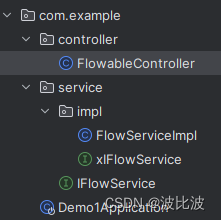
- 编写流程部署接口及业务代码:
//FlowableContorller:
@PostMapping("/deploy/{xmlName}")
public String deployFlow(@PathVariable("xmlName") String xmlName) {
    return flowService.depolyFlow(xmlName);
}

//FlowServiceImpl:
/**
 * 流程部署
 * @param xmlName
 */
@Override
public String depolyFlow(String xmlName) {
    Deployment deploy = processEngine.getRepositoryService().createDeployment()
            .addClasspathResource("process/"+xmlName) // 部署一个流程
            .name("第一个请假流程案例")
            .deploy();
    System.out.println(deploy.getId());
    return deploy.getId();
}

//xmlName为保存的xml文件名
三、启动流程
启动流程接口及业务代码:
//FlowableContorller:
/**
 * 根据ID启动流程
 * @return
 */
@PostMapping("/start/{processId}")
public String startProcessById(@PathVariable("processId") String processId){
    System.out.println("开始启动");
    return flowService.startProcessById(processId);
}

/**
 * 根据Key启动流程
 */
@PostMapping("/start/key/{processKey}")
public String startProcessByKey(@PathVariable("processKey") String processKey){
    System.out.println("开始启动");
    return flowService.startProcessByKey(processKey);
}

//FlowServiceImpl:
@Override
public String startProcessById(String processId) {
    ProcessInstance processInstance = runtimeService.startProcessInstanceById(processId);
    return processInstance.getId();
}

@Override
public String startProcessByKey(String processKey) {
    ProcessInstance processInstance = runtimeService.startProcessInstanceByKey(processKey);
    return processInstance.getId();
}

//其中id和key为 act_re_procdef 表中的id和key
四、流程审批
流程审批的接口及业务代码:(先查询待办,再完成审批)
//FlowableContorller:
/**
 * 根据登录用户查询待办
 */
@PostMapping("/task/{name}")
public List<String> findTask(@PathVariable("name") String name){
    return flowService.findTask(name);
}

/**
 * 选择需要完成的任务(根据任务id完成任务审批)
 */
@PutMapping("complete/{taskId}")
public void completeTask(@PathVariable("taskId") String taskId){
    flowService.completeTask(taskId);
}

//FlowServiceImpl:
@Override
public List<String> findTask(String name) {
    // 查询 act_ru_task 中的记录
    List<Task> list = taskService.createTaskQuery()
            .taskAssignee(name) // 根据审批人名字来查询
            .list();// 返回多条记录
    List<String> listStr = new ArrayList<>();
    for (Task task : list) {
        listStr.add(task.getId());
        System.out.println(task.getId());
    }
    return listStr;
}

@Override
public void completeTask(String taskId) {
    taskService.complete(taskId); // 通过complete方法完成审批
    System.out.println("完成审批");
}
文章来源:https://blog.csdn.net/xjx19991226/article/details/135483996
本文来自互联网用户投稿,该文观点仅代表作者本人,不代表本站立场。本站仅提供信息存储空间服务,不拥有所有权,不承担相关法律责任。 如若内容造成侵权/违法违规/事实不符,请联系我的编程经验分享网邮箱:veading@qq.com进行投诉反馈,一经查实,立即删除!
本文来自互联网用户投稿,该文观点仅代表作者本人,不代表本站立场。本站仅提供信息存储空间服务,不拥有所有权,不承担相关法律责任。 如若内容造成侵权/违法违规/事实不符,请联系我的编程经验分享网邮箱:veading@qq.com进行投诉反馈,一经查实,立即删除!