rabbit MQ的延迟队列处理模型示例(基于SpringBoot延时插件实现)
2023-12-13 05:31:39
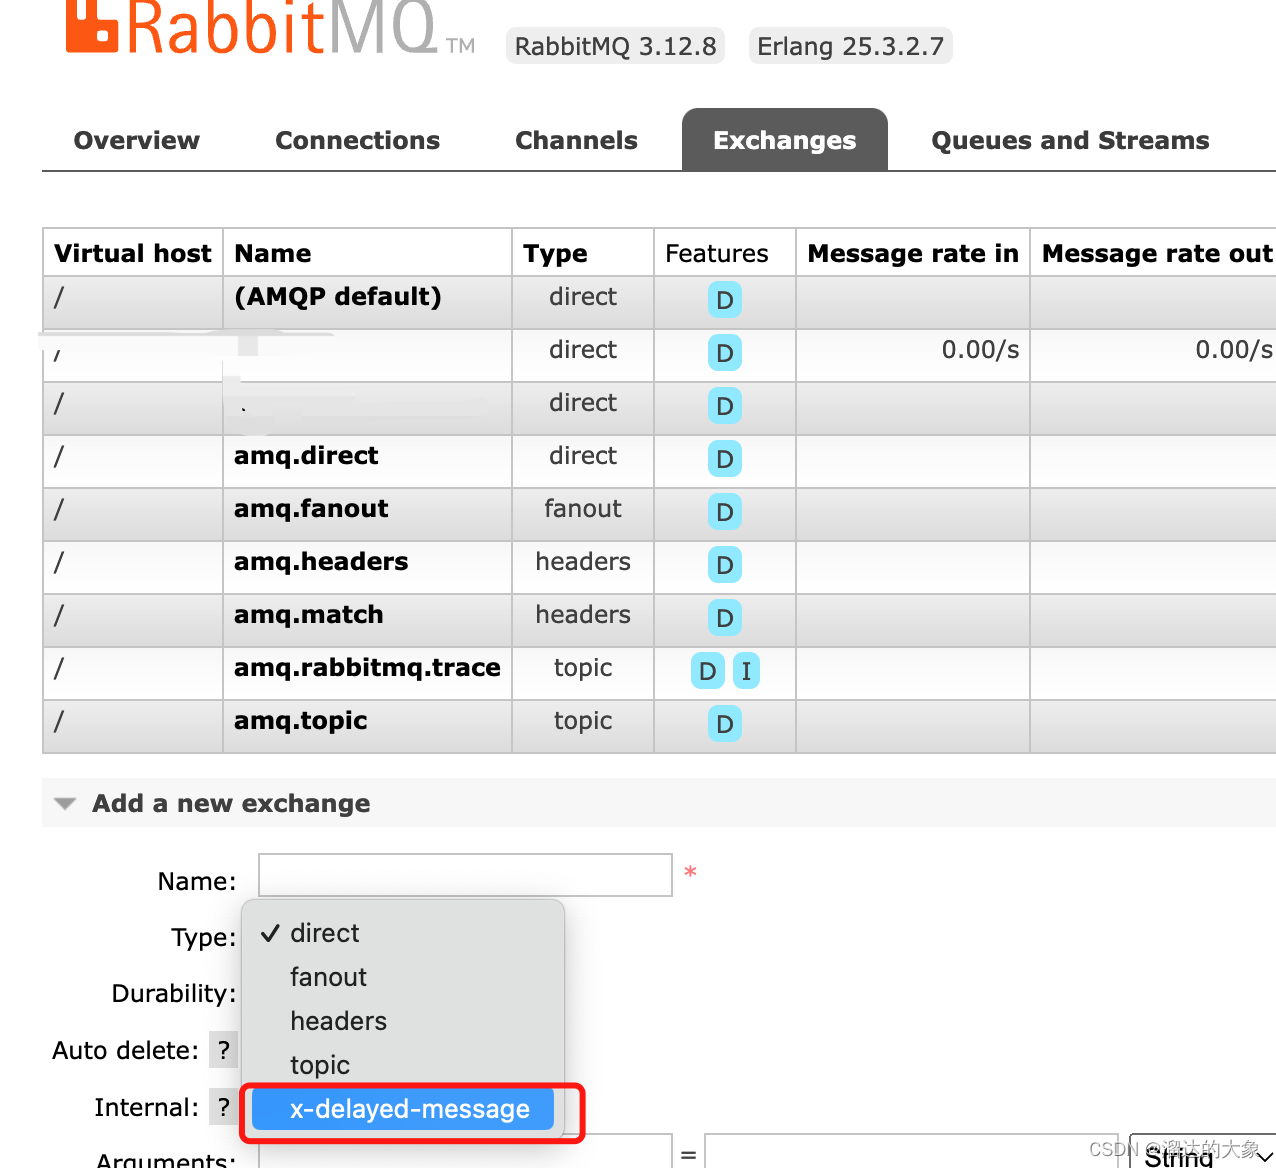
rabbitMQ安装插件rabbitmq-delayed-message-exchange
交换机由此type 表示组件安装成功


生产者发送消息时设置延迟值 消息在交换机滞纳至指定延迟后,进入队列,被消费者消费。
组件注解类:
package com.esint.configs;


import org.springframework.amqp.core.*;
import org.springframework.beans.factory.annotation.Qualifier;
import org.springframework.context.annotation.Bean;
import org.springframework.context.annotation.Configuration;

import java.util.HashMap;
import java.util.Map;

@Configuration
public class DelayedQueueConfig {

    //交换机
    public static final String DELAYED_EXCHANGE_NAME = "delayed.exchange";
    //队列
    public static final String DELAYED_QUEUE_NAME = "delayed.queue";
    //routingKey
    public static final String DELAYED_ROUTING_KEY = "delayed.routingkey";

    /**
     * 基于插件声明一个自定义交换机
     * @return
     */
    @Bean
    public  CustomExchange delayedExchange(){
        //String name, String type, boolean durable, boolean autoDelete, Map<String, Object> arguments) {

        Map<String, Object> arguments = new HashMap<>();
        arguments.put("x-delayed-type","direct");
        return new CustomExchange(DELAYED_EXCHANGE_NAME,"x-delayed-message",true, false,arguments);
    }

    @Bean
    public Queue delayedQueue(){

        return QueueBuilder.durable(DELAYED_QUEUE_NAME).build();
    }

    @Bean
    public Binding delayedQueueBindingDelayedExchange(@Qualifier("delayedQueue") Queue delayedQueue,
    @Qualifier("delayedExchange") CustomExchange delayedExchange){
        return BindingBuilder.bind(delayedQueue).to(delayedExchange).with(DELAYED_ROUTING_KEY).noargs();
    }
}
生产者代码实现:
package com.esint.controller;

//发送延迟消息

import com.esint.configs.DelayedQueueConfig;
import lombok.extern.slf4j.Slf4j;
import org.springframework.amqp.rabbit.core.RabbitTemplate;
import org.springframework.beans.factory.annotation.Autowired;
import org.springframework.web.bind.annotation.GetMapping;
import org.springframework.web.bind.annotation.PathVariable;
import org.springframework.web.bind.annotation.RequestMapping;
import org.springframework.web.bind.annotation.RestController;

import java.util.Date;

@Slf4j
@RestController
@RequestMapping("/ttl")
public class SendMesController {

    @Autowired
    private RabbitTemplate rabbitTemplate;


    @GetMapping("/sendDelayMsg/{message}/{delayTime}")
    public void sendMsg(@PathVariable String message,@PathVariable Integer delayTime){

        log.info("当前时间:{},发送一条ttl为{}ms的消息给延迟交换机转队列:{}",new Date().toString(),delayTime,message);
        rabbitTemplate.convertAndSend(DelayedQueueConfig.DELAYED_EXCHANGE_NAME,DelayedQueueConfig.DELAYED_ROUTING_KEY,
                message, mes->{
            mes.getMessageProperties().setDelay(delayTime);
            return mes;
        });
    }


}
消费者实现:
package com.esint.consumer;

import com.esint.configs.DelayedQueueConfig;
import lombok.extern.slf4j.Slf4j;
import org.springframework.amqp.core.Message;
import org.springframework.amqp.rabbit.annotation.RabbitListener;
import org.springframework.stereotype.Component;

import java.util.Date;

/**
 * 基于插件的延时消息
 */
@Slf4j
@Component
public class DelayQueueConsumer {

    //监听消息队列
    @RabbitListener(queues = DelayedQueueConfig.DELAYED_QUEUE_NAME)
    public void receiveDelayQueue(Message message){
        String msg = new String(message.getBody());
        log.info("当前时间{} 收到延迟消息:{}",new Date().toString(),msg);
    }
}
测试:
http://127.0.0.1:19092/ttl/sendDelayMsg/helloDelay1/30000
http://127.0.0.1:19092/ttl/sendDelayMsg/helloDelay2/3000
发送第一条消息:helloDelay1 延迟30s
发送第二条消息:helloDelay2 延迟3s

满足条件。
总结:
阻塞层在交换机。
发送消息灵活设置时间,现达到时间先被消费。
需要安装延时插件。
文章来源:https://blog.csdn.net/qq_17040587/article/details/134554418
本文来自互联网用户投稿,该文观点仅代表作者本人,不代表本站立场。本站仅提供信息存储空间服务,不拥有所有权,不承担相关法律责任。 如若内容造成侵权/违法违规/事实不符,请联系我的编程经验分享网邮箱:veading@qq.com进行投诉反馈,一经查实,立即删除!
本文来自互联网用户投稿,该文观点仅代表作者本人,不代表本站立场。本站仅提供信息存储空间服务,不拥有所有权,不承担相关法律责任。 如若内容造成侵权/违法违规/事实不符,请联系我的编程经验分享网邮箱:veading@qq.com进行投诉反馈,一经查实,立即删除!