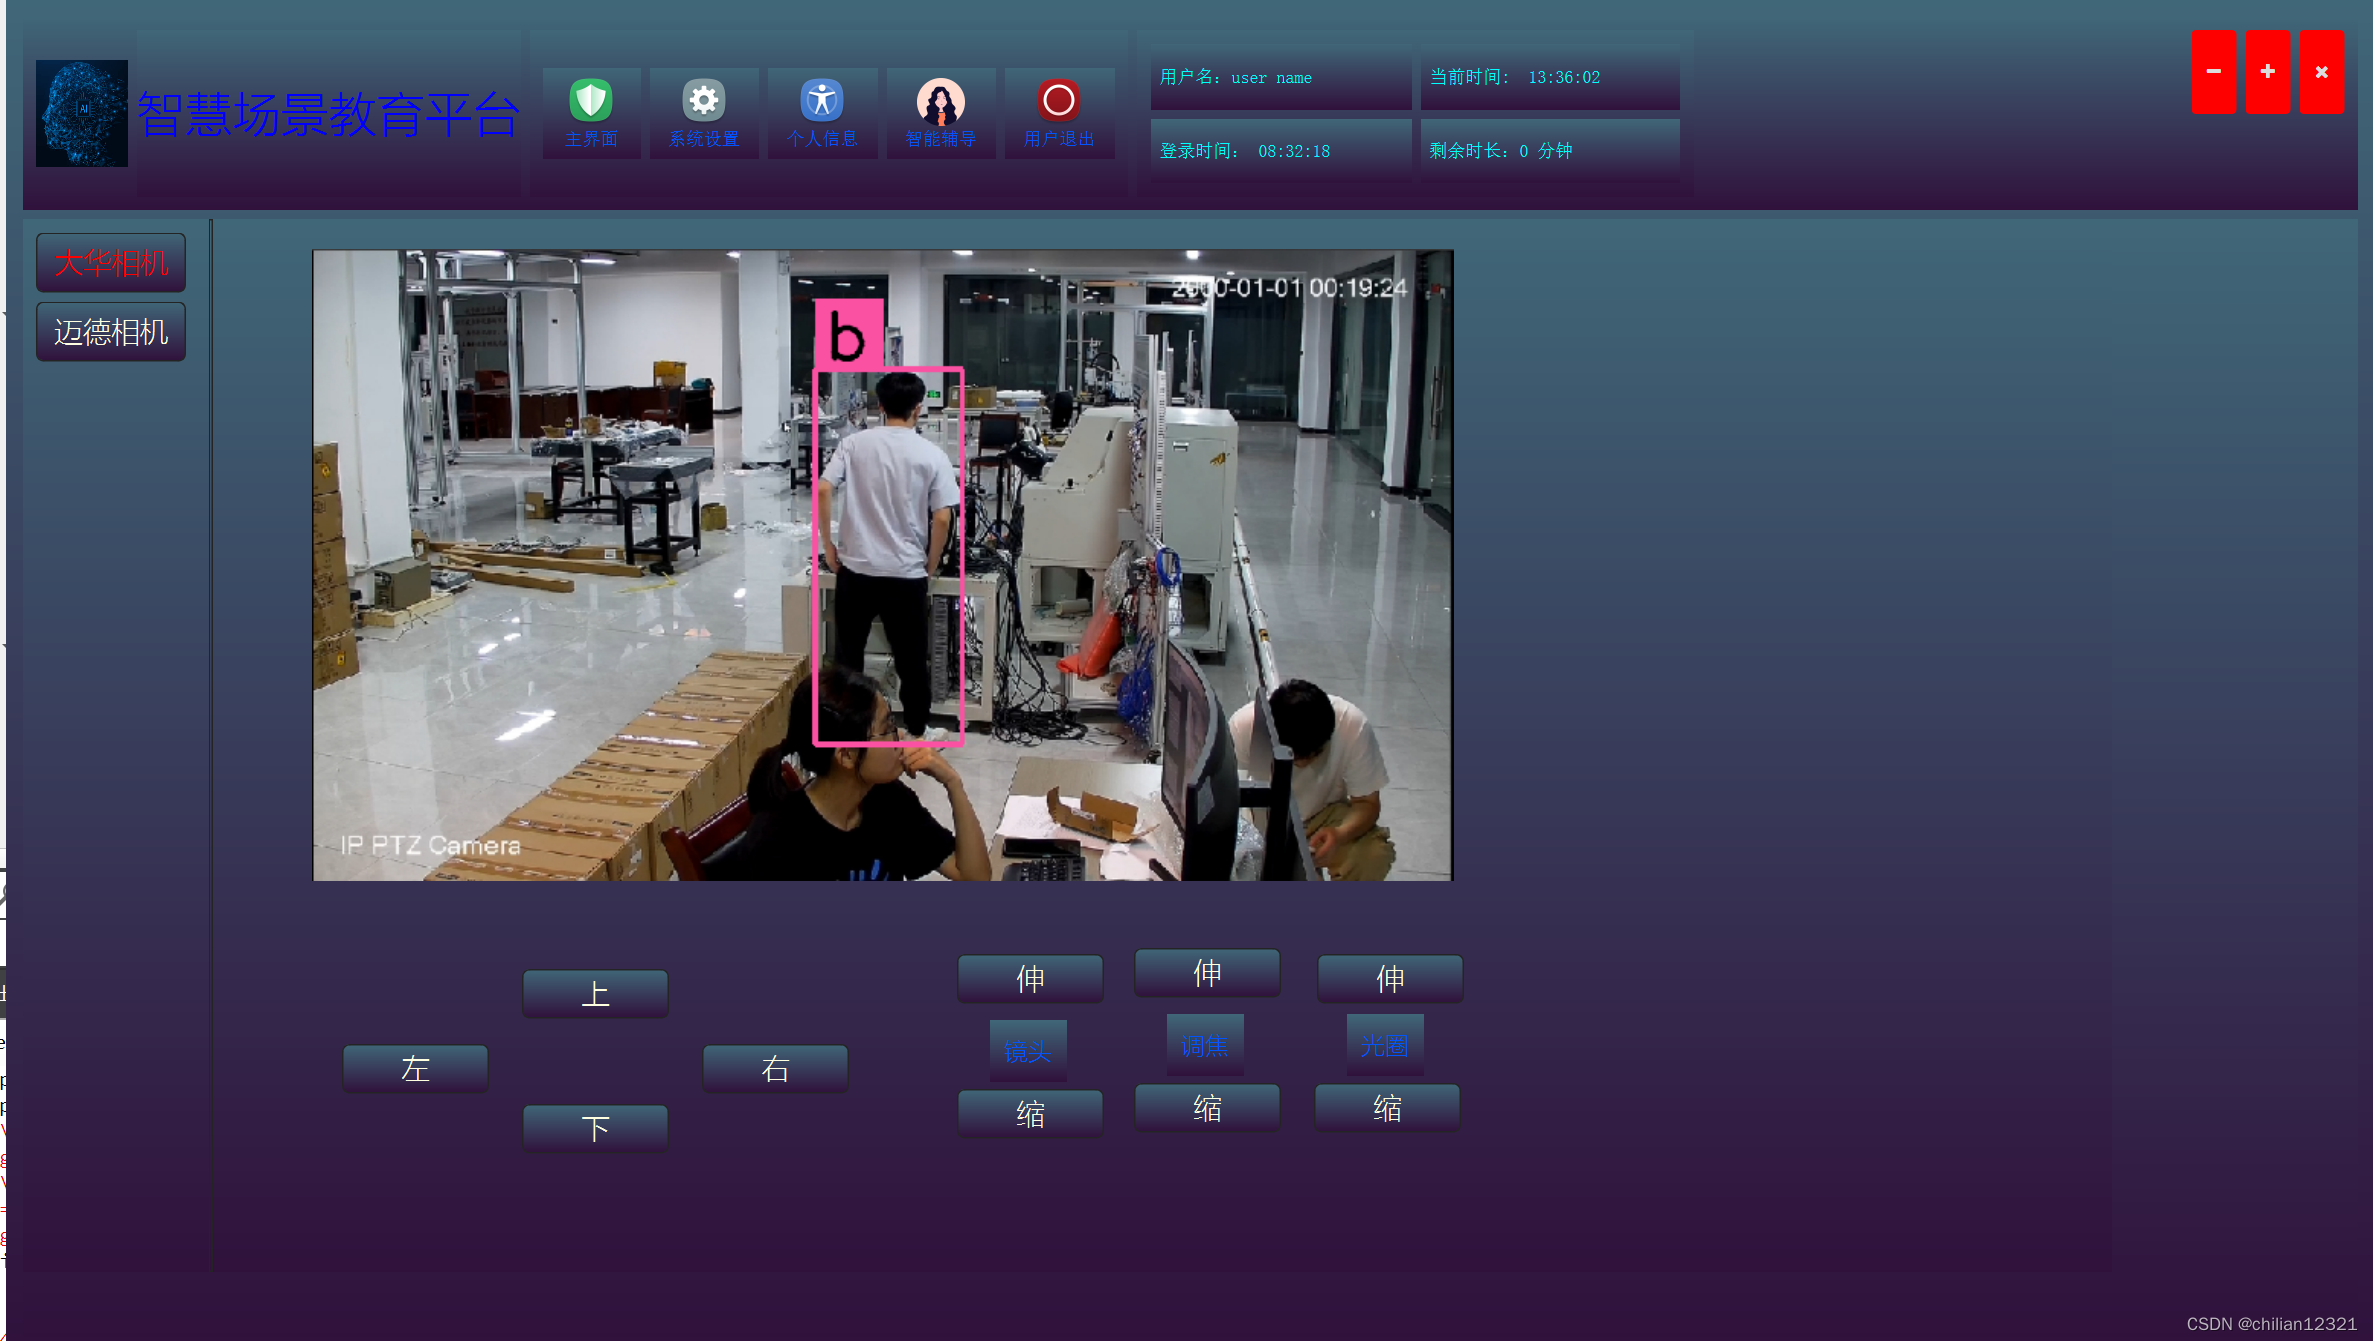
QT C++调用python传递RGB图像和三维数组,并接受python返回值(图像)
目的:
用QT调用python代码,将QT读取的图像(Qimage)作为参数传入python中,将QT的三维数组作为参数传递给python,python接收QT传入的图像进行计算,将结果返回给QT并显示。
一? ?.pro 头文件的配置,和lib库的配置
INCLUDEPATH += \
    -I D:\tools\python3_9\include
INCLUDEPATH += \
    -I D:\tools\python3_9\Lib\site-packages\numpy\core\include
LIBS += \
    -L D:\tools\python3_9\libs -lpython39
?二。系统环境变量的配置? 在path添加 python环境? ?D:/tools/python3_9


三,python环境的初始化
//加入python环境
? 1.? Py_SetPythonHome(L"D:/tools/python3_9");
??2. 类似于先连接上Python? ? Py_Initialize();
? 3.?注意使用这个 import_array1(); 用于后边numpy数组的调用,? ?import_array();会报无返回值的错误。
其他看代码注释
?
void  MainForm::init_python()
{

    //加入python
    Py_SetPythonHome(L"D:/tools/python3_9");
    // 1. 类似于先连接上Python

    Py_Initialize();
    import_array1();
    if (!Py_IsInitialized()) {
        qDebug() << "Fail to init Python.";
    }


    // 2. 加入python文件的路径
    PyRun_SimpleString("import os");
    PyRun_SimpleString("import sys");
    std::string path = "sys.path.append('E:/DigitalScreen/StuEmo/realtime_detect')";
    PyRun_SimpleString(&path[0]);
    PyRun_SimpleString("print(sys.path)");

    // 3. 找到要用的python文件
     PyObject * pModule = PyImport_ImportModule("capture_xjh");
    if (pModule == NULL) {
        qDebug() <<"Fail to load Python module (capture_xjh.py)";
    }

    // 1. 找到Python的类
    PyObject* pDict = PyModule_GetDict(pModule);
    if(!pDict) {
        qDebug() << "Cant find dictionary.";
    }
     Py_DECREF(pModule);

    PyObject* pClassCalc = PyDict_GetItemString(pDict, "RtDetector");
    if (!pClassCalc) {
        qDebug() << "Cant find PythonClass class.";
    }
    Py_DECREF(pDict);
    // 2. 初始化对象
    PyObject* pConstruct = PyInstanceMethod_New(pClassCalc);
    if (!pConstruct) {
        qDebug() << "Cant find PythonClass constructor.";
    }
    Py_DECREF(pClassCalc);

    PyObject* cons_args = PyTuple_New(5);
    PyTuple_SetItem(cons_args, 0, Py_BuildValue("s",  "group1"));
    PyTuple_SetItem(cons_args, 1, Py_BuildValue("s",  "E:/DigitalScreen/StuEmo/GROUP_DATA/"));
    PyTuple_SetItem(cons_args, 2, Py_BuildValue("s",   "E:/DigitalScreen/StuEmo/weights/detr_face_body.pt"));
    PyTuple_SetItem(cons_args, 3, Py_BuildValue("s",   "E:/DigitalScreen/StuEmo/realtime_detect/Person_reID/model/ft_ResNet50/net_last.pth"));
    PyTuple_SetItem(cons_args, 4, Py_BuildValue("O",   Py_True));

    pInstance = PyObject_CallObject(pConstruct, cons_args);
    if (!pInstance) {
        qDebug() << "Cant construct instance.";
    }
    Py_DECREF(cons_args);
    Py_DECREF(pConstruct);

    // PyObject* methods = PyObject_Dir(pInstance);
    // if (methods) {
    //     // 遍历返回的方法列表
    //     for (Py_ssize_t i = 0; i < PyList_GET_SIZE(methods); ++i) {
    //         PyObject* method = PyList_GET_ITEM(methods, i);
    //         const char* methodName = PyUnicode_AsUTF8(method);
    //         qDebug() << "Method Name:" << methodName;
    //     }
    //     Py_DECREF(methods);
    // } else {
    //     qDebug() << "Failed to get methods of the instance.";
    // }

    //测试
    // PyObject* pRet =PyObject_CallMethod(pInstance,"addTest1","ii",5,6);
    // if (!pRet) {
    //     qDebug() << "Cant addTest.";
    // }
    // else{
    //     double ret = PyFloat_AsDouble(pRet);
    //     qDebug() << "sum: " << ret;
    // }

    // Py_DECREF(pRet);

    //通过图片检测
     QImage qImage ("E:/DigitalScreen/StuEmo/images/1.png");
     UsePythonface(  qImage);
}
四,Qimage? 转换到numpy数组的使用
Qimage 传入的是QImage::Format_RGB888格式图片,通过
? for (int i = 0; i < height; i++)
? ? ? ? {
? ? ? ? ? ? for (int j = 0; j < width; j++)
? ? ? ? ? ? {
? ? ? ? ? ? ? ? QRgb pixel = qImage.pixel( j,i);
? ? ? ? ? ? ? ? CArrays[index++] = qRed(pixel);
? ? ? ? ? ? ? ? CArrays[index++] = qGreen(pixel);
? ? ? ? ? ? ? ? CArrays[index++] = qBlue(pixel);
? ? ? ? ? ? }
? ? ? ? }转换为一维数组CArrays
?// 创建 NumPy 数组 通过CArrays转换而来
? ? ? ? npy_intp dims[3] = { height, width, 3 }; // 图像是RGB格式的
? ? ? ? PyObject* imageArray = PyArray_SimpleNewFromData(3, dims, NPY_UINT8, (void*)CArrays);
返回值又通过?mempcpy(CArrays,PyArray_DATA(imageData),width*height*3);
? 再生成? ? ? QImage img((unsigned char*)CArrays, width, height, ?QImage::Format_RGB888);
调用 disp_image( img);显示图像
void MainForm::UsePythonface( QImage qImage)
{
    if(!qImage.isNull())
    {
        int width = qImage.width();
        int height = qImage.height();
        unsigned char *CArrays = (unsigned  char*)malloc(sizeof(unsigned char) * width*height*3);
        qDebug()<<"qImage.width()"<<qImage.width()<<"qImage.height()"<<qImage.height()<<"qImage.format()"<<qImage.format()<<endl;

        int index =0;
        for (int i = 0; i < height; i++)
        {
            for (int j = 0; j < width; j++)
            {
                QRgb pixel = qImage.pixel( j,i);

                CArrays[index++] = qRed(pixel);
                CArrays[index++] = qGreen(pixel);
                CArrays[index++] = qBlue(pixel);
            }
        }
        //qDebug()<< CArrays[width*height*3-1] <<endl;
        // 创建 NumPy 数组
        npy_intp dims[3] = { height, width, 3 }; // 假设图像是RGB格式的
        PyObject* imageArray = PyArray_SimpleNewFromData(3, dims, NPY_UINT8, (void*)CArrays);


        //qDebug()<<"start UsePythonface"<<endl;
        PyObject* imageData = PyObject_CallMethod(pInstance, "process_frame", "O", imageArray);
        Py_DECREF(imageArray);
        if(!imageData)
        {
            PyErr_Print(); // 打印 Python 错误信息
            qDebug()<<"cant UsePythonface"<<endl;
            return;
        }

        // qDebug()<<"end UsePythonface"<<endl;
        mempcpy(CArrays,PyArray_DATA(imageData),width*height*3);
        QImage img((unsigned char*)CArrays, width, height,  QImage::Format_RGB888);
        //qDebug()<<"img.width()"<<img.width()<<"img.height()"<<img.height()<<"img.format()"<<img.format()<<endl;

        CArrays = nullptr;
        delete[] CArrays;

        Py_DECREF(imageData);
        disp_image( img);

    }
}
本文来自互联网用户投稿,该文观点仅代表作者本人,不代表本站立场。本站仅提供信息存储空间服务,不拥有所有权,不承担相关法律责任。 如若内容造成侵权/违法违规/事实不符,请联系我的编程经验分享网邮箱:veading@qq.com进行投诉反馈,一经查实,立即删除!