Python实现多种图像去噪方法
Python实现多种图像去噪方法:中值滤波,均值滤波,高通滤波,低通滤波,高斯滤波,同态滤波
图像和视频逐渐成为人们生活中信息获取的重要来源。人们准确地获取信源发出的图像和视频信息需要保证在传输过程中的无失真性,而在传输过程中很容易受到外部噪声干扰,因此需要在接收端采用去噪算法减轻图像的噪声。
本文首先介绍了多种图像去噪的方法:低通滤波,高通滤波,均值滤波,中值滤波,高斯滤波和同态滤波。
然后针对图像传输中常见的椒盐噪声,分别利用上述滤波方法进行了图像去噪,通过实验证明,中值滤波能有效滤除椒盐噪声。
图像去噪
图像和视频信息在传输过程中很容易受到成像设备和外部环境的噪声干扰,导致人们接收到的信息和信源发出的信息差异很大,如果不能很好地消除这些外部噪声,那么人们将会接收到错误的信息。
外部噪声类型多种多样,可以按照噪声的时间特征、频率特征等进行分类。常见的一种噪声是椒盐噪声,也称为脉冲噪声。它的出现通常是由于图像信号突然受到强烈的干扰而产生。它是一种随机出现的白点或黑点,它会导致图像中暗的区域突然出现一个白点,亮的区域突然出现一个黑点。
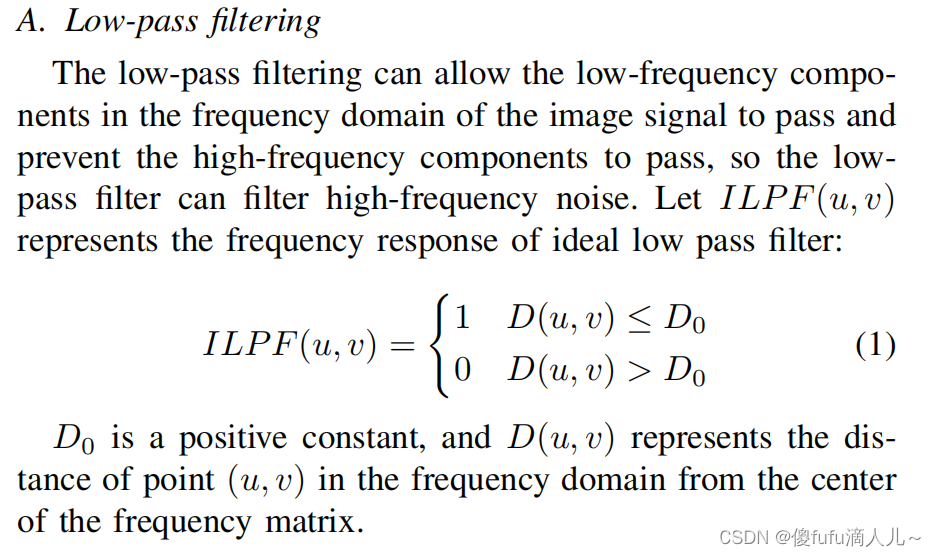
低通滤波
低通滤波器可以允许图像信号频域中的低频分量通过而组织高频分量通过,因此低通滤波可以过滤高频噪声。理想的低通滤波器:
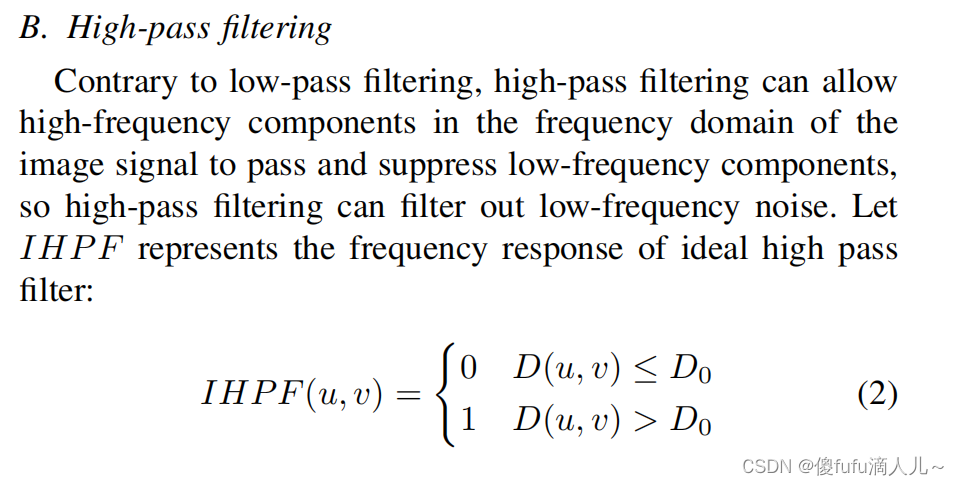
高通滤波
与低通滤波相反,高通滤波可以允许图像信号频域中的高频分量通过而抑制低频分量,因此高通滤波可以过滤掉低频噪声。理想的高通滤波器:
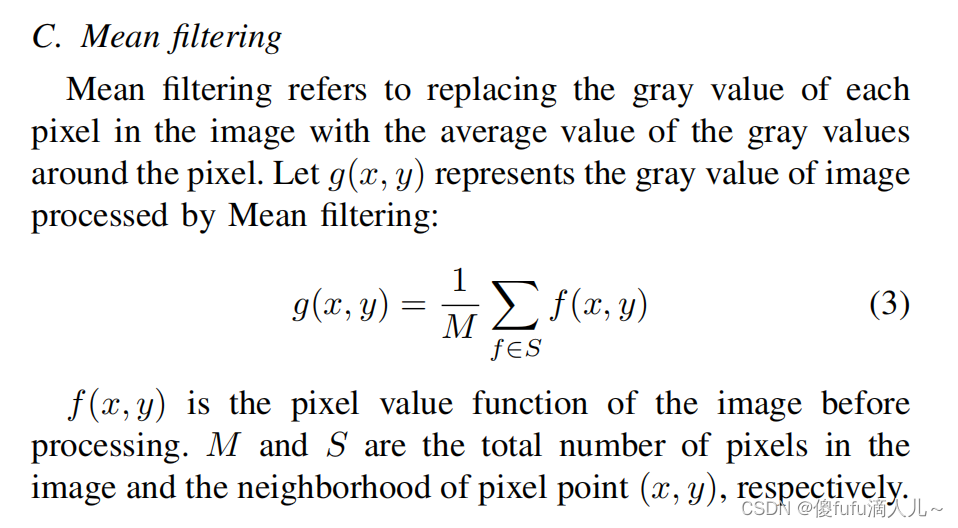
均值滤波
均值滤波是指将图像中的每个像素点的灰度值替换为该像素点附近灰度值的平均值。均值滤波器:
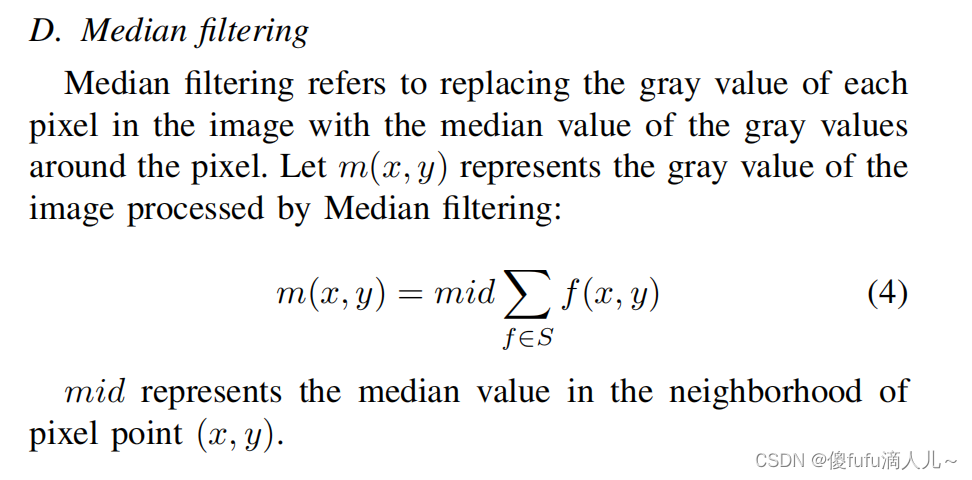
中值滤波
中值滤波是指将图像中的每个像素点的灰度值替换为该像素点附近灰度值的中值。中值滤波器:
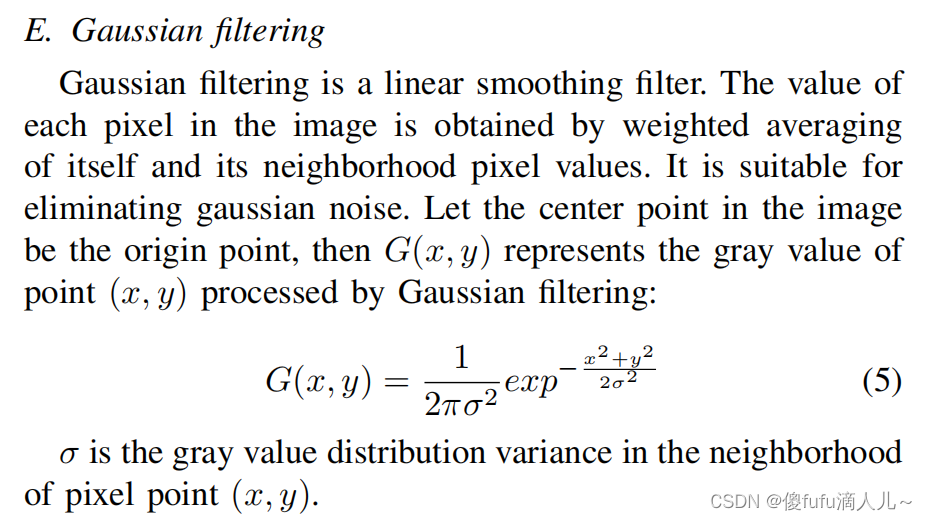
高斯滤波
高斯滤波是一种线性平滑滤波,图像中每一个像素点的值都由其本身和邻域内的其他像素值经过加权平均后得到,它适用于消除高斯噪声。高斯滤波器:
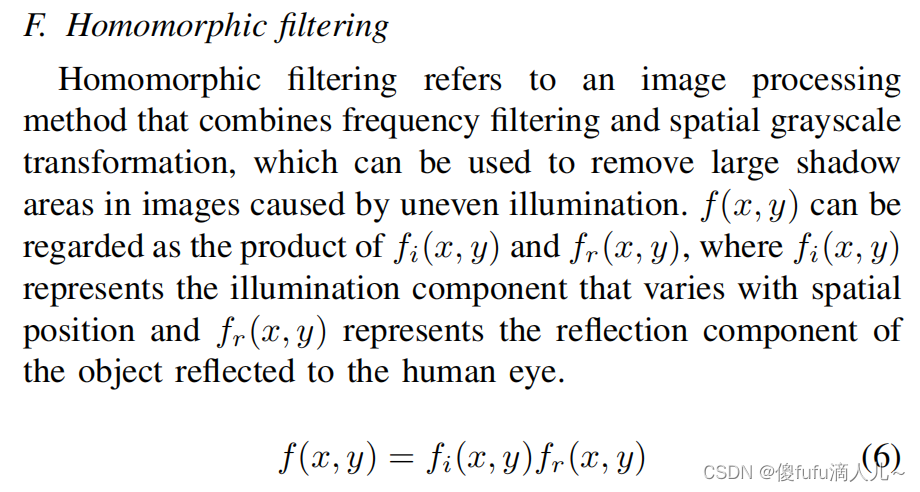
同态滤波
同态滤波是指把频率滤波和空域灰度变换结合起来的一种图像处理方法,它可以用于删除由于不均匀照明引起的图像中的大阴影区域。同态滤波器:
Python代码实现低通、高通滤波等
# @description:
# @author:Jianping Zhou
# @email:jianpingzhou0927@gmail.com
# @Time:2022/11/13 16:37
import cv2
import numpy as np
import matplotlib.pyplot as plt
import math
from skimage import io
from salt_pepper_noise import pepper_and_salt

plt.rcParams['font.sans-serif'] = ['SimHei']  # 用来正常显示中文标签
plt.rcParams['axes.unicode_minus'] = False  # 用来正常显示负号


def salt_pepper(image, salt, pepper):
    """
    添加椒盐噪声的图像
    :param image: 输入图像
    :param salt: 盐比例
    :param pepper: 椒比例
    :return: 添加了椒盐噪声的图像
    """
    height = image.shape[0]
    width = image.shape[1]
    pertotal = salt + pepper  # 总噪声占比
    noise_image = image.copy()
    noise_num = int(pertotal * height * width)
    for i in range(noise_num):
        rows = np.random.randint(0, height - 1)
        cols = np.random.randint(0, width - 1)
        if (np.random.randint(0, 100) < salt * 100):
            noise_image[rows][cols] = 255
        else:
            noise_image[rows][cols] = 0
    return noise_image


def low_pass_filtering(image, radius):
    """
    低通滤波函数
    :param image: 输入图像
    :param radius: 半径
    :return: 滤波结果
    """
    # 对图像进行傅里叶变换,fft是一个三维数组,fft[:, :, 0]为实数部分,fft[:, :, 1]为虚数部分
    fft = cv2.dft(np.float32(image), flags=cv2.DFT_COMPLEX_OUTPUT)
    # 对fft进行中心化,生成的dshift仍然是一个三维数组
    dshift = np.fft.fftshift(fft)

    # 得到中心像素
    rows, cols = image.shape[:2]
    mid_row, mid_col = int(rows / 2), int(cols / 2)

    # 构建掩模,256位,两个通道
    mask = np.zeros((rows, cols, 2), np.float32)
    mask[mid_row - radius:mid_row + radius, mid_col - radius:mid_col + radius] = 1

    # 给傅里叶变换结果乘掩模
    fft_filtering = dshift * mask
    # 傅里叶逆变换
    ishift = np.fft.ifftshift(fft_filtering)
    image_filtering = cv2.idft(ishift)
    image_filtering = cv2.magnitude(image_filtering[:, :, 0], image_filtering[:, :, 1])
    # 对逆变换结果进行归一化(一般对图像处理的最后一步都要进行归一化,特殊情况除外)
    cv2.normalize(image_filtering, image_filtering, 0, 1, cv2.NORM_MINMAX)
    return image_filtering


def high_pass_filtering(image, radius, n):
    """
    高通滤波函数
    :param image: 输入图像
    :param radius: 半径
    :param n: ButterWorth滤波器阶数
    :return: 滤波结果
    """
    # 对图像进行傅里叶变换,fft是一个三维数组,fft[:, :, 0]为实数部分,fft[:, :, 1]为虚数部分
    fft = cv2.dft(np.float32(image), flags=cv2.DFT_COMPLEX_OUTPUT)
    # 对fft进行中心化,生成的dshift仍然是一个三维数组
    dshift = np.fft.fftshift(fft)

    # 得到中心像素
    rows, cols = image.shape[:2]
    mid_row, mid_col = int(rows / 2), int(cols / 2)

    # 构建ButterWorth高通滤波掩模

    mask = np.zeros((rows, cols, 2), np.float32)
    for i in range(0, rows):
        for j in range(0, cols):
            # 计算(i, j)到中心点的距离
            d = math.sqrt(pow(i - mid_row, 2) + pow(j - mid_col, 2))
            try:
                mask[i, j, 0] = mask[i, j, 1] = 1 / (1 + pow(radius / d, 2 * n))
            except ZeroDivisionError:
                mask[i, j, 0] = mask[i, j, 1] = 0
    # 给傅里叶变换结果乘掩模
    fft_filtering = dshift * mask
    # 傅里叶逆变换
    ishift = np.fft.ifftshift(fft_filtering)
    image_filtering = cv2.idft(ishift)
    image_filtering = cv2.magnitude(image_filtering[:, :, 0], image_filtering[:, :, 1])
    # 对逆变换结果进行归一化(一般对图像处理的最后一步都要进行归一化,特殊情况除外)
    cv2.normalize(image_filtering, image_filtering, 0, 1, cv2.NORM_MINMAX)
    return image_filtering


def bandpass_filter(image, radius, w, n=1):
    """
    带通滤波函数
    :param image: 输入图像
    :param radius: 带中心到频率平面原点的距离
    :param w: 带宽
    :param n: 阶数
    :return: 滤波结果
    """
    # 对图像进行傅里叶变换,fft是一个三维数组,fft[:, :, 0]为实数部分,fft[:, :, 1]为虚数部分
    fft = cv2.dft(np.float32(image), flags=cv2.DFT_COMPLEX_OUTPUT)
    # 对fft进行中心化,生成的dshift仍然是一个三维数组
    dshift = np.fft.fftshift(fft)

    # 得到中心像素
    rows, cols = image.shape[:2]
    mid_row, mid_col = int(rows / 2), int(cols / 2)

    # 构建掩模,256位,两个通道
    mask = np.zeros((rows, cols, 2), np.float32)
    for i in range(0, rows):
        for j in range(0, cols):
            # 计算(i, j)到中心点的距离
            d = math.sqrt(pow(i - mid_row, 2) + pow(j - mid_col, 2))
            if radius - w / 2 < d < radius + w / 2:
                mask[i, j, 0] = mask[i, j, 1] = 1
            else:
                mask[i, j, 0] = mask[i, j, 1] = 0

    # 给傅里叶变换结果乘掩模
    fft_filtering = dshift * np.float32(mask)
    # 傅里叶逆变换
    ishift = np.fft.ifftshift(fft_filtering)
    image_filtering = cv2.idft(ishift)
    image_filtering = cv2.magnitude(image_filtering[:, :, 0], image_filtering[:, :, 1])
    # 对逆变换结果进行归一化(一般对图像处理的最后一步都要进行归一化,特殊情况除外)
    cv2.normalize(image_filtering, image_filtering, 0, 1, cv2.NORM_MINMAX)
    return image_filtering


def bandstop_filter(image, radius, w, n=1):
    """
    带通滤波函数
    :param image: 输入图像
    :param radius: 带中心到频率平面原点的距离
    :param w: 带宽
    :param n: 阶数
    :return: 滤波结果
    """
    # 对图像进行傅里叶变换,fft是一个三维数组,fft[:, :, 0]为实数部分,fft[:, :, 1]为虚数部分
    fft = cv2.dft(np.float32(image), flags=cv2.DFT_COMPLEX_OUTPUT)
    # 对fft进行中心化,生成的dshift仍然是一个三维数组
    dshift = np.fft.fftshift(fft)

    # 得到中心像素
    rows, cols = image.shape[:2]
    mid_row, mid_col = int(rows / 2), int(cols / 2)

    # 构建掩模,256位,两个通道
    mask = np.zeros((rows, cols, 2), np.float32)
    for i in range(0, rows):
        for j in range(0, cols):
            # 计算(i, j)到中心点的距离
            d = math.sqrt(pow(i - mid_row, 2) + pow(j - mid_col, 2))
            if radius - w / 2 < d < radius + w / 2:
                mask[i, j, 0] = mask[i, j, 1] = 0
            else:
                mask[i, j, 0] = mask[i, j, 1] = 1

    # 给傅里叶变换结果乘掩模
    fft_filtering = dshift * np.float32(mask)
    # 傅里叶逆变换
    ishift = np.fft.ifftshift(fft_filtering)
    image_filtering = cv2.idft(ishift)
    image_filtering = cv2.magnitude(image_filtering[:, :, 0], image_filtering[:, :, 1])
    # 对逆变换结果进行归一化(一般对图像处理的最后一步都要进行归一化,特殊情况除外)
    cv2.normalize(image_filtering, image_filtering, 0, 1, cv2.NORM_MINMAX)
    return image_filtering


if __name__ == "__main__":
    image = cv2.imread("./results/lena_salt_pepper.png", 0)
    # image = salt_pepper(image, 0.04, 0.04)
    image_low_pass_filtering5 = low_pass_filtering(image, 50)
    image_high_pass_filtering5 = high_pass_filtering(image, 50, 1)
    cv2.imshow('lena_salt_pepper', image)
    cv2.waitKey(0)

    cv2.imshow('lena_low_pass_filtering', image_low_pass_filtering5)
    # plt.imshow(image_low_pass_filtering5, 'gray')
    # plt.savefig("./results/lena_low_pass_filtering.jpg", dpi=200, bbox_inches='tight', pad_inches=0)
    # image_low_pass_filtering5 = image_low_pass_filtering5.astype(np.uint8)
    io.imsave('./results/lena_low_pass_filtering.png', image_low_pass_filtering5)

    cv2.imshow('lena_high_pass_filtering', image_high_pass_filtering5)
    # plt.imshow(image_high_pass_filtering5, 'gray')
    # plt.savefig("./results/lena_high_pass_filtering.jpg", dpi=200, bbox_inches='tight', pad_inches=0)
    # image_high_pass_filtering5 = image_high_pass_filtering5.astype(np.uint8)
    io.imsave('./results/lena_high_pass_filtering.png', image_high_pass_filtering5)
    # cv2.waitKey(0)
    '''
    # image = pepper_and_salt(image, 0.04)
    image_low_pass_filtering5 = low_pass_filtering(image, 50)
    image_low_pass_filtering1 = low_pass_filtering(image, 10)
    image_high_pass_filtering5 = high_pass_filtering(image, 50, 1)
    image_high_pass_filtering1 = high_pass_filtering(image, 10, 1)
    image_bandpass_filtering5 = bandpass_filter(image, 30, 56, 1)
    image_bandstop_filtering5 = bandstop_filter(image, 30, 56, 1)
    plt.subplot(241), plt.imshow(image, 'gray'), plt.title("原图"), plt.xticks([]), plt.yticks([])
    # plt.subplot(334), plt.imshow(image_noise, 'gray'), plt.title("添加了椒盐噪声的图像"), plt.xticks([]), plt.yticks([])
    plt.subplot(242), plt.imshow(image_low_pass_filtering5, 'gray'), plt.title("半径为50像素的低通滤波"), plt.xticks(
        []), plt.yticks([])
    plt.subplot(246), plt.imshow(image_low_pass_filtering1, 'gray'), plt.title("半径为10像素的低通滤波"), plt.xticks(
        []), plt.yticks([])
    plt.subplot(243), plt.imshow(image_high_pass_filtering5, 'gray'), plt.title("半径为50像素的高通滤波"), plt.xticks(
        []), plt.yticks([])
    plt.subplot(247), plt.imshow(image_high_pass_filtering1, 'gray'), plt.title("半径为10像素的高通滤波"), plt.xticks(
        []), plt.yticks([])
    plt.subplot(244), plt.imshow(image_bandpass_filtering5, 'gray'), plt.title("带通滤波"), plt.xticks([]), plt.yticks([])
    plt.subplot(248), plt.imshow(image_bandstop_filtering5, 'gray'), plt.title("带阻滤波"), plt.xticks([]), plt.yticks([])
    plt.show()
   	'''
更多详细代码发布在https://github.com/JeremyChou28/digital_image_processing/tree/main/project2
本文来自互联网用户投稿,该文观点仅代表作者本人,不代表本站立场。本站仅提供信息存储空间服务,不拥有所有权,不承担相关法律责任。 如若内容造成侵权/违法违规/事实不符,请联系我的编程经验分享网邮箱:veading@qq.com进行投诉反馈,一经查实,立即删除!