小程序隐私保护指引组件wx.getPrivacySetting
2023-12-22 15:36:25
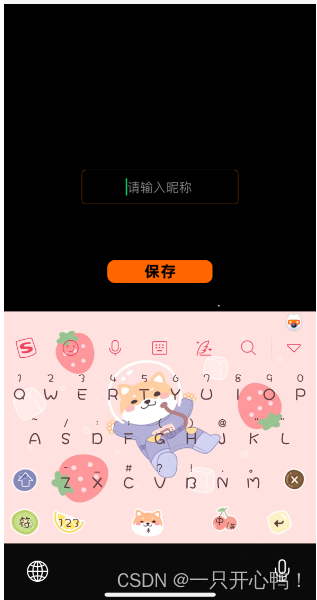
问题:项目里使用了获取微信昵称的input标签,发现上线后获取不到微信昵称

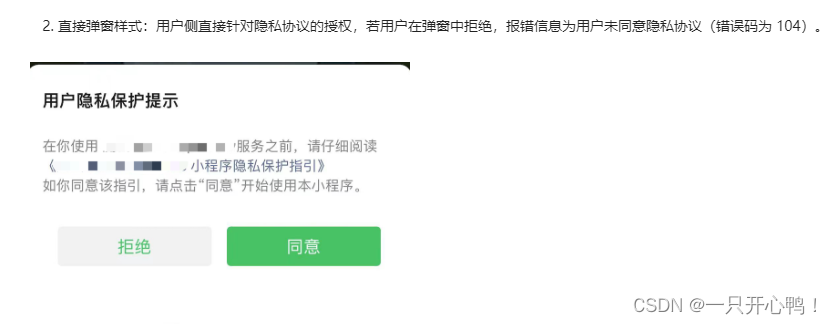
解决方案去更新隐私保护协议
然后重新进入小程序就会弹出弹框

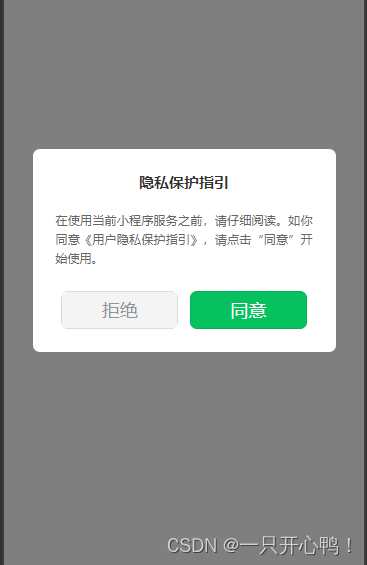
2.自己自定义一个隐私保护提示,以下是我的组件
在component里面创建privacyPopup文件夹
privacyPopup.html代码
<view class="privacy" wx:if="{{innerShow}}">
        <view class="content">
            <view class="title">隐私保护指引</view>
            <view class="des">
                在使用当前小程序服务之前,请仔细阅读<text class="link" bindtap="openPrivacyContract">{{ privacyContractName }}</text>。如你同意{{
                  urlTitle }},请点击“同意”开始使用。
            </view>
            <view class="btns">
                <button class="item reject" bindtap="handleDisagree">拒绝</button>
                <button id="agree-btn"  type="default" class="item agree weui-btn"  open-type="agreePrivacyAuthorization"
                bindagreeprivacyauthorization="handleAgree">同意</button>
            </view>
        </view>
    </view>
privacyPopup.js代码
 Component({
    data: {
        title: "用户隐私保护提示",
        desc1: "感谢您使用本游戏,您使用本游戏前应当阅井同意",
        urlTitle: "《用户隐私保护指引》",
        desc2: "当您点击同意并开始时用产品服务时,即表示你已理解并同息该条款内容,该条款将对您产生法律约束力。如您拒绝,将无法进入游戏。",
        innerShow: false,
        height: 0,
    },
    lifetimes: {
      attached: function() {
        if (wx.getPrivacySetting) {
          wx.getPrivacySetting({
            success: res => {
              console.log("要授权:", res)
                console.log("是否需要授权:", res.needAuthorization, "隐私协议的名称为:", res.privacyContractName)
                if (res.needAuthorization) {
                  this.popUp()
                } else{
                  this.triggerEvent("agree")
                }
            },
            fail: () => { },
            complete: () => { },
          })
        } else {
          // 低版本基础库不支持 wx.getPrivacySetting 接口,隐私接口可以直接调用
          this.triggerEvent("agree")
        }
      },
    },
    methods: {
        handleDisagree(e) {
            this.triggerEvent("disagree")
            this.disPopUp()
        },
        handleAgree(e) {
            this.triggerEvent("agree")
            this.disPopUp()
        },
        popUp() {
            this.setData({
                innerShow: true
            })
        },
        disPopUp() {
            this.setData({
                innerShow: false
            })
        },
        openPrivacyContract() {
          wx.openPrivacyContract({
            success: res => {
              console.log('openPrivacyContract success')
            },
            fail: res => {
              console.error('openPrivacyContract fail', res)
            }
          })
        }
    }
})
privacyPopup.json代码
{
    "component": true,
    "usingComponents": {}
}
privacyPopup.wxss代码
.privacy {
  position: fixed;
  top: 0;
  right: 0;
  bottom: 0;
  left: 0;
  background: rgba(0, 0, 0, .5);
  z-index: 9999999;
  display: flex;
  align-items: center;
  justify-content: center;
}

.content {
  width: 632rpx;
  padding: 48rpx;
  box-sizing: border-box;
  background: #fff;
  border-radius: 16rpx;
}

.content .title {
  text-align: center;
  color: #333;
  font-weight: bold;
  font-size: 32rpx;
}

.content .des {
  font-size: 26rpx;
  color: #666;
  margin-top: 40rpx;
  text-align: justify;
  line-height: 1.6;
}

.content .des .link {
  color: #07c160;
  text-decoration: underline;
}

.btns {
  margin-top: 48rpx;
  display: flex;
}

.btns .item {
  justify-content: space-between;
  width: 244rpx;
  height: 80rpx;
  display: flex;
  align-items: center;
  justify-content: center;
  border-radius: 16rpx;
  box-sizing: border-box;
  border: none;
}

.btns .reject {
  background: #f4f4f5;
  color: #909399;
}

.btns .agree {
  background: #07c160;
  color: #fff;
}
3.在需要的页面json里引入组件,注意路径哦
index.json
{
  "usingComponents": {
    "privacy-popup": "../../component/privacyPopup/privacyPopup"
  }
}
index.wxml页面引入
<view>
<privacy-popup ></privacy-popup>
</view>
index.js
4.最后成果

文章来源:https://blog.csdn.net/oneya1/article/details/135153185
本文来自互联网用户投稿,该文观点仅代表作者本人,不代表本站立场。本站仅提供信息存储空间服务,不拥有所有权,不承担相关法律责任。 如若内容造成侵权/违法违规/事实不符,请联系我的编程经验分享网邮箱:veading@qq.com进行投诉反馈,一经查实,立即删除!
本文来自互联网用户投稿,该文观点仅代表作者本人,不代表本站立场。本站仅提供信息存储空间服务,不拥有所有权,不承担相关法律责任。 如若内容造成侵权/违法违规/事实不符,请联系我的编程经验分享网邮箱:veading@qq.com进行投诉反馈,一经查实,立即删除!