图像处理之把模糊的图片变清晰
1.图片如果是有雾化效果的对图像产生影响的,要先进行图形增强,Retinex是基于深度神经网络了,我在之前图形处理的文章一路从神经网络(概率统计)—>积卷神经网络(对区域进行概率统计,对图片进行切割多个识别对象)–>深度积卷神经网络(RetinexNet也是模拟人脑的处理过程,增加模拟物体反射情况的层处理环境影响问题)
RetinexNet 是一种用于图像增强的神经网络模型。它基于 Retinex 理论,旨在提高图像的对比度和色彩平衡,从而改善图像的质量。
Retinex 理论是由 Edwin H. Land
提出的,该理论认为人类视觉系统对物体的颜色和亮度感知是基于物体的相对辐射度,而与环境光照条件无关。基于这一理论,RetinexNet
旨在实现类似的功能:将图像中的反射成分和阴影成分进行分离,以便更好地调整图像的对比度和亮度,从而使图像更加清晰、自然和易于理解。RetinexNet
模型通常基于深度学习技术,使用卷积神经网络(CNN)等结构来学习图像增强的过程。它可以应用于许多图像处理任务,如去雾、去噪、增强对比度等,从而改善图像的质量和视觉效果。总的来说,RetinexNet 是一种专门设计用于图像增强的神经网络模型,它的目标是改善图像的质量,使图像更加清晰、自然和易于理解。
2.代码 pyhton3.8
import tensorflow as tf
from tensorflow import keras

# 定义RetinexNet模型
def build_model(input_shape):
    input = keras.layers.Input(shape=input_shape)

    # 卷积层和池化层
    x = keras.layers.Conv2D(32, (3, 3), activation='relu', padding='same')(input)
    x = keras.layers.MaxPool2D((2,2))(x)
    x = keras.layers.Conv2D(64, (3, 3), activation='relu', padding='same')(x)
    x = keras.layers.MaxPool2D((2,2))(x)
    x = keras.layers.Conv2D(128, (3, 3), activation='relu', padding='same')(x)

    # 跳跃连接和残差块
    skip1 = x
    x = keras.layers.Conv2D(128, (3, 3), activation='relu', padding='same')(x)
    x = keras.layers.Conv2D(128, (3, 3), activation='relu', padding='same')(x)
    x = keras.layers.Add()([x, skip1])

    skip2 = x
    x = keras.layers.Conv2D(128, (3, 3), activation='relu', padding='same')(x)
    x = keras.layers.Conv2D(128, (3, 3), activation='relu', padding='same')(x)
    x = keras.layers.Add()([x, skip2])

    # 反卷积层
    x = keras.layers.Conv2DTranspose(64, (3, 3), strides=(2, 2), activation='relu', padding='same')(x)
    x = keras.layers.Conv2DTranspose(32, (3, 3), strides=(2, 2), activation='relu', padding='same')(x)

    # 输出层
    output = keras.layers.Conv2D(3, (3, 3), activation='sigmoid', padding='same')(x)

    model = keras.models.Model(input, output)
    return model

# 加载数据集并准备训练数据
(x_train, _), (x_test, _) = keras.datasets.cifar10.load_data()
x_train = x_train.astype('float32') / 255.
x_test = x_test.astype('float32') / 255.

# 构建和编译模型
model = build_model(x_train.shape[1:])
model.compile(optimizer='adam', loss='mse')

# 训练模型
model.fit(x_train, x_train, epochs=10, batch_size=32, validation_data=(x_test, x_test))

# 保存模型
model.save('retinexnet.h5')
#会生成模型文件

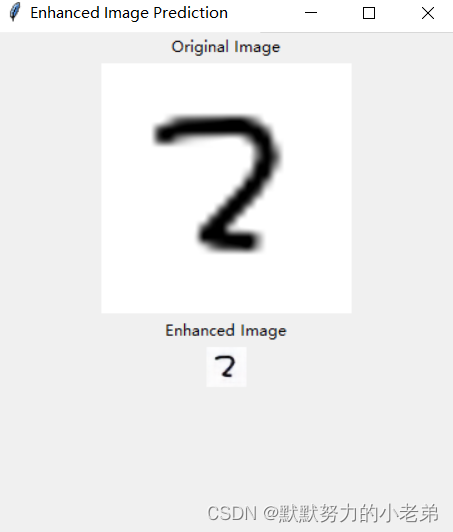
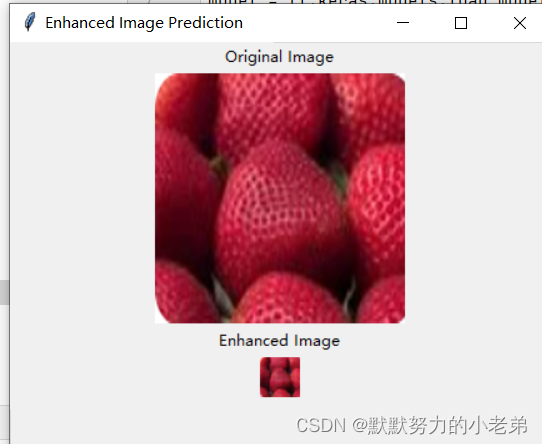
2.使用模型进行图形增强(模型的训练集是默认的CIFAR-10 ) 如果我们想要对特定的物体进行增强,我们可以使用自己的训练数据,比如草莓,我有个大胆的想法,对老的电影的变成高清电源是不是可以用这个模型,那一定在电影业一定有被大量训练过的模型,就不知道开不开源…
https://www.cs.toronto.edu/~kriz/cifar.html
//测试
import tkinter as tk
from PIL import Image, ImageTk
import tensorflow as tf
import numpy as np

# 加载模型
model = tf.keras.models.load_model('retinexnet.h5')

# 创建Tkinter窗口
root = tk.Tk()
root.title("Enhanced Image Prediction")

# 加载图像并进行预测
image = Image.open('aa/2/blur.png')
image = image.resize((32, 32))  # 调整图像大小
image_array = np.array(image)  # Convert to NumPy array
image_array = image_array / 255.0  # 缩放到 [0, 1] 范围内
image_tensor = tf.convert_to_tensor(image_array, dtype=tf.float32)  # Convert to tensor
enhanced_image = model.predict(tf.expand_dims(image_tensor, axis=0))

# 将NumPy数组转换为PIL图像对象
enhanced_image = (enhanced_image * 255).astype(np.uint8)
enhanced_image = np.squeeze(enhanced_image, axis=0)  # 去除batch维度
enhanced_image = Image.fromarray(enhanced_image)

# 将PIL图像对象转换为Tkinter PhotoImage对象
enhanced_image_tk = ImageTk.PhotoImage(enhanced_image)

# 在窗口中显示原始图像
original_label = tk.Label(root, text="Original Image")
original_label.pack()
original_img = Image.open('aa/2/blur.png')
original_img = original_img.resize((200, 200))
original_photo = ImageTk.PhotoImage(original_img)
original_label = tk.Label(image=original_photo)
original_label.image = original_photo
original_label.pack()

# 在窗口中显示增强后的图像
enhanced_label = tk.Label(root, text="Enhanced Image")
enhanced_label.pack()
enhanced_label = tk.Label(image=enhanced_image_tk)
enhanced_label.image = enhanced_image_tk
enhanced_label.pack()

# 启动Tkinter事件循环
root.mainloop()
#效果貌似就是把图片缩小了,确实清晰很多,

#emmm,貌似没有什么变化,可能训练数据太少了

3.使用其他人的模型进行图片分辨率高清化处理
import tensorflow as tf
import tensorflow_hub as hub
from tensorflow.keras.preprocessing.image import array_to_img

# 加载EDSR模型
model = hub.load("https://tfhub.dev/captain-pool/esrgan-tf2/1")

# 读取图像文件
image = tf.io.read_file('aa/2/blur.png')
image = tf.image.decode_jpeg(image, channels=3)
input_image = tf.expand_dims(image, axis=0)  # 增加批次维度
input_image = tf.cast(input_image, tf.float32)

# 使用EDSR模型进行超分辨率重建
output_image = model(input_image)

# 输出重建后的图像
reconstructed_image = output_image[0]

# 将重建图像转换为PIL图像对象并保存
reconstructed_image_pil = array_to_img(reconstructed_image.numpy())
reconstructed_image_pil.save('output_image.png')
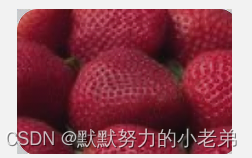
#之前的图片

#效果看起来比较像真实的草莓

本文来自互联网用户投稿,该文观点仅代表作者本人,不代表本站立场。本站仅提供信息存储空间服务,不拥有所有权,不承担相关法律责任。 如若内容造成侵权/违法违规/事实不符,请联系我的编程经验分享网邮箱:veading@qq.com进行投诉反馈,一经查实,立即删除!