【react-draggable实际应用】实现左右拖拽
2023-12-13 04:25:47
1、所实现拖拽效果
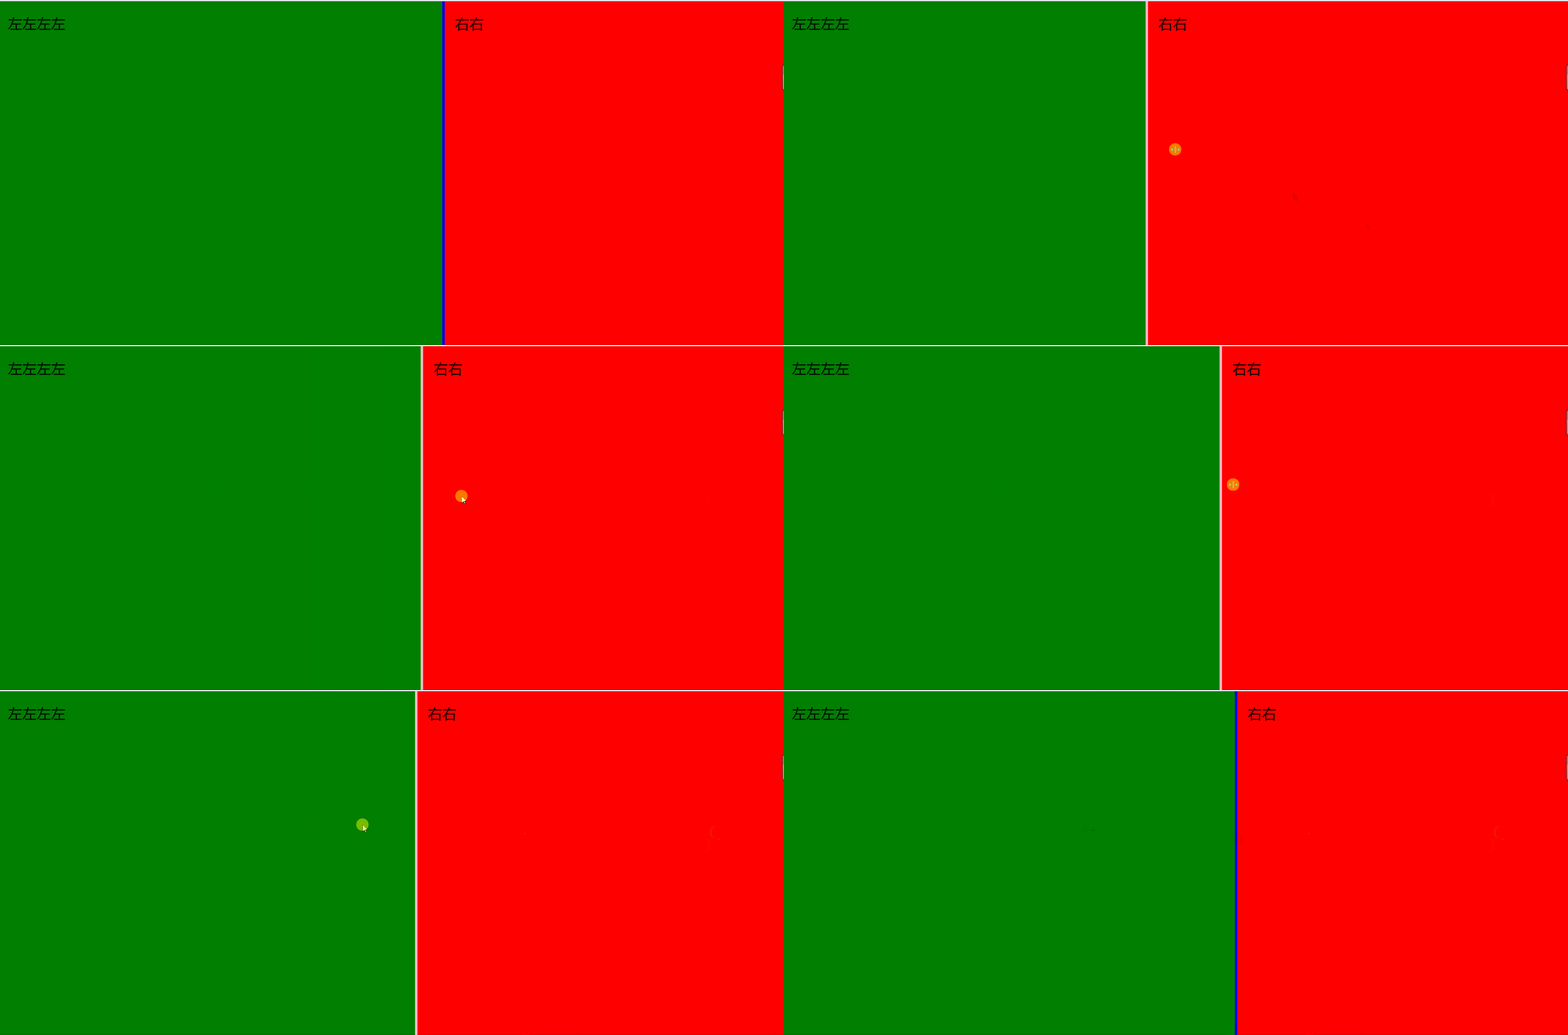
1、第一种实现效果

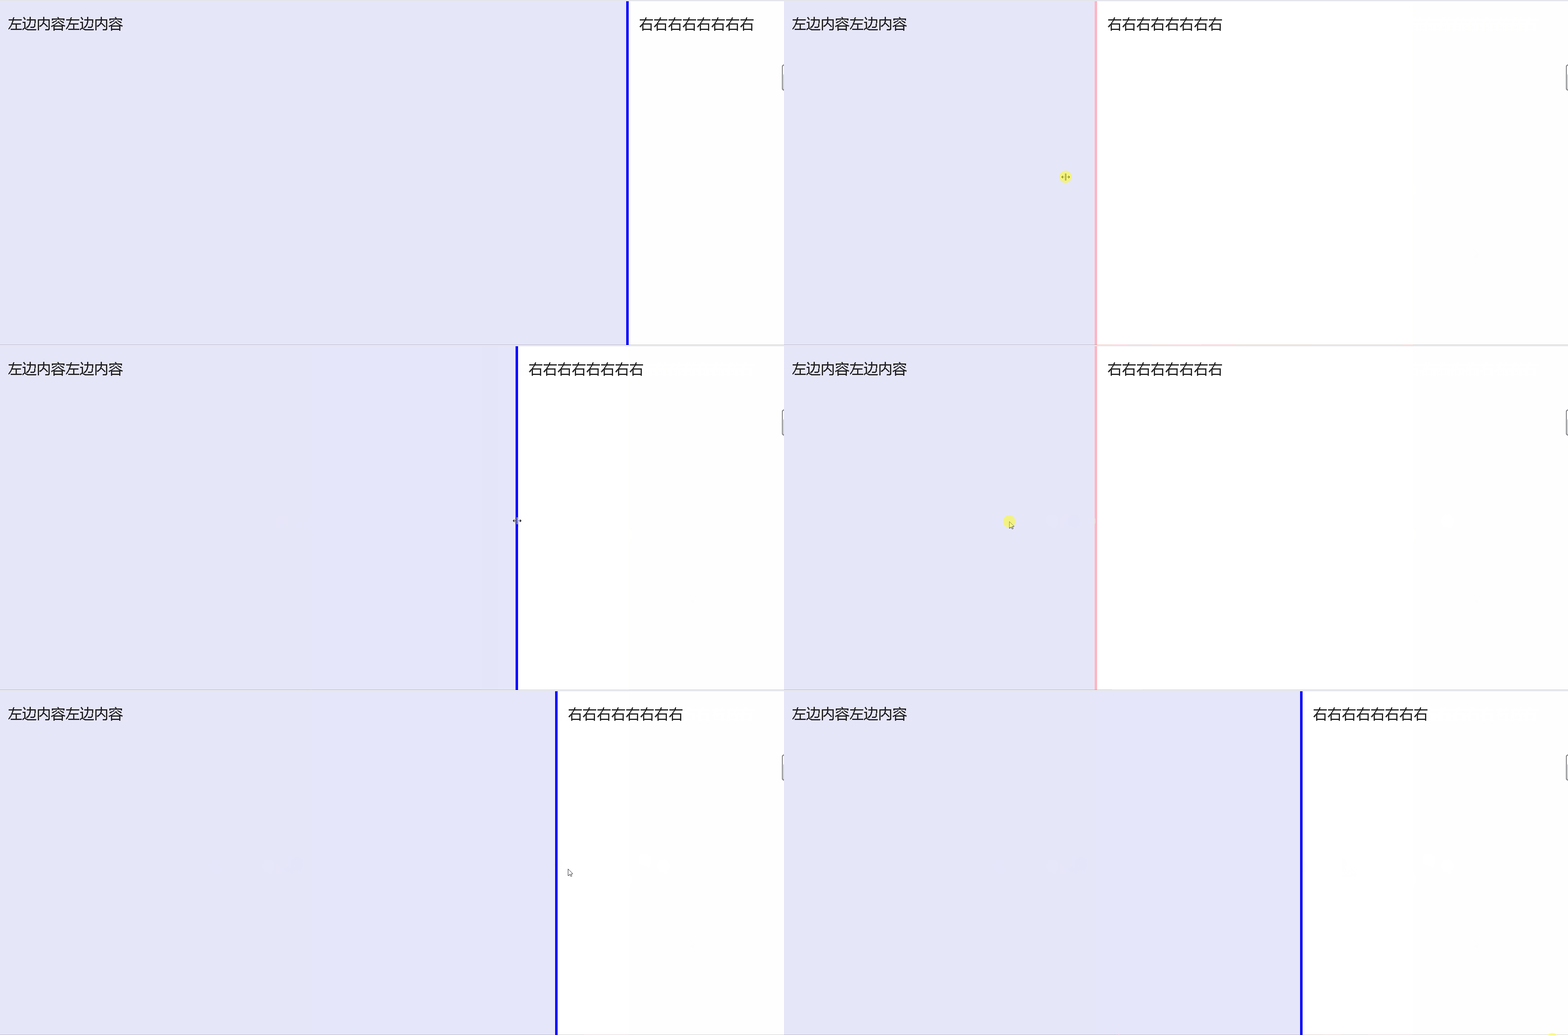
2、第二种实现效果

2、第一种实现方法
1、tsx代码
import React, { Component, useState } from 'react';
import Draggable from 'react-draggable';
import classNames from 'classnames';

import styles from './index.less';

/**
 * @name vhToPx 以window.innerWidth为基准,传入vh值,返回px值
 * @param value 传入的vh数值 如50
 */
const vhToPx = (value: number) => {
  var vh = window.innerWidth / 100;
  return value * vh;
};

export const dtl = () => {
  // 各宽度的初始值
  const initialSize = {
    initialLeftBoxWidth: vhToPx(60), // 左边区块初始宽度
    leftBoxWidth: vhToPx(60), // 左边区块初始宽度
    leftBoxMinWidth: vhToPx(40), // 左边区块最小宽度
    leftBoxMaxWidth: vhToPx(80), // 左边区块最大宽度
    dragBoxBackground: 'blue', // 拖拽盒子的背景色
  };
  // 实际要使用sizeParam这个值,要保持初始值不变
  const [sizeParam, setSizeParam] = useState(initialSize);

  /**
   * @name changeSizeParam 改变sizeParam的值
   * @param params 传入的值
   */
  const changeSizeParam = (params: any) => {
    setSizeParam({...sizeParam, ...params});
  };

  /**
   * @name onDrag react-draggable拖拽事件
   * @param ev DraggableEvent
   * @param ui DraggableData
   */
  const onDrag = (ev: any, ui: any) => {
    const {initialLeftBoxWidth} = sizeParam;
    const newLeftBoxWidth = ui.x + initialLeftBoxWidth;
    changeSizeParam({
      leftBoxWidth: newLeftBoxWidth,
      dragBoxBackground: '#FFB6C1',
    });
  };

  /**
   * @name onDragStop react-draggable拖拽结束事件
   */
  const onDragStop = () => {
    changeSizeParam({
      dragBoxBackground: 'blue',
    });
  };

  return (
    <div className={classNames(styles['dtl-content'])}>
      <div
        className={'dtl-left'}
        style={{width: `${sizeParam.leftBoxWidth}px`}}
      >
        <h1>
          左左左左
        </h1>
      </div>
      <div
        className={'dtl-right'}
        style={{width: `calc(100% - ${sizeParam.leftBoxWidth}px)`}}
      >
        <Draggable
          axis={'x'}
          defaultPosition={{x: 0, y: 0}}
          bounds={{
            left: sizeParam.leftBoxMinWidth - sizeParam.initialLeftBoxWidth,
            right: sizeParam.leftBoxMaxWidth - sizeParam.initialLeftBoxWidth,
          }}
          onDrag={onDrag}
          onStop={onDragStop}
        >
          <div
            className={'dragBox'}
            style={{
              left: `${sizeParam.initialLeftBoxWidth - 5}px`,
              background: `${sizeParam.dragBoxBackground}`,
            }}
          />
        </Draggable>
        <h1> 右右</h1>
      </div>
    </div>
  );
};

export default dtl;
2、样式代码
.dtl-content {
  display: flex;
  justify-content: flex-start;
  flex-direction: row;
  flex-wrap: nowrap;

  width: 100%;
  height: 100%;
  position: relative;
  overflow: hidden;
  background-color: #f5f5f7;

  :global {
    .dtl-left {
      position: relative;
      height: 100vh;
      padding: 20px;
      background-color: green;
      overflow: hidden;
      display: flex;
      flex-direction: column;
      flex-grow: 1;
    }

    .dtl-right {
      height: 100vh;
      padding: 20px;
      background-color: red;
      flex-grow: 1;
      z-index: 100;
    }

    .dragBox {
      position: absolute;
      top: 0;
      width: 5px;
      height: 100vh;
      cursor: col-resize;
      z-index: 1000;
    }
  }
}
3、 第二种实现方法
1、代码
import React, { Component } from 'react';
import Draggable from 'react-draggable';
import styled from 'styled-components';

// 容器
const Container = styled.div`
  display: flex;
  justify-content: flex-start;
`;

// 左边内容部分
const LeftContent = styled.div`
  position: relative;
  width: ${(props) => props.width}px;
  height: 100vh;
  padding: 20px;
  background-color: #e6e6fa;
  overflow: hidden;
  flex-grow: 1;
`;

// 拖拽部分
const DraggableBox = styled.div`
  position: absolute;
  left: ${(props) => props.left}px;
  top: 0;
  width: 5px;
  height: 100vh;
  background-color: ${(props) => props.background};
  cursor: col-resize;
  z-index: 1000;
`;

// 右边内容部分
const RightContent = styled.div`
  width: calc(100% - ${(props) => props.leftBoxWidth}px);
  height: 100vh;
  padding: 20px;
  background-color: #fff;
  flex-grow: 1;
  z-index: 100;
`;

const Li = styled.li`
  white-space: nowrap;
`;

function vhToPx(value) {
  var vh = window.innerWidth / 100;
  return value * vh;
}

class DraggableExp extends Component {
  state = {
    initialLeftBoxWidth: vhToPx(80), // 左边区块初始宽度
    leftBoxWidth: vhToPx(80), // 左边区块初始宽度
    leftBoxMinWidth: vhToPx(40), // 左边区块最小宽度
    leftBoxMaxWidth: vhToPx(80), // 左边区块最大宽度
    dragBoxBackground: 'blue', // 拖拽盒子的背景色
  };

  // 拖动时设置拖动box背景色,同时更新左右box的宽度
  onDrag = (ev, ui) => {
    const { initialLeftBoxWidth } = this.state;
    const newLeftBoxWidth = ui.x + initialLeftBoxWidth;
    this.setState({
      leftBoxWidth: newLeftBoxWidth,
      dragBoxBackground: '#FFB6C1',
    });
  };

  // 拖拽结束,重置drag-box的背景色
  onDragStop = () => {
    this.setState({
      dragBoxBackground: 'blue',
    });
  };

  render() {
    const {
      initialLeftBoxWidth,
      leftBoxWidth,
      leftBoxMinWidth,
      leftBoxMaxWidth,
      dragBoxBackground,
    } = this.state;
    return (
      <Container>
        <LeftContent width={leftBoxWidth}>
          <h1>左边内容左边内容</h1>
        </LeftContent>
        <RightContent leftBoxWidth={leftBoxWidth}>
          <Draggable
            axis="x"
            defaultPosition={{ x: 0, y: 0 }}
            bounds={{
              left: leftBoxMinWidth - initialLeftBoxWidth,
              right: leftBoxMaxWidth - initialLeftBoxWidth,
            }}
            onDrag={this.onDrag}
            onStop={this.onDragStop}
          >
            <DraggableBox
              left={initialLeftBoxWidth - 5}
              background={dragBoxBackground}
            />
          </Draggable>
          <h1>右右右右右右右右</h1>
        </RightContent>
      </Container>
    );
  }
}

export default DraggableExp;
文章来源:https://blog.csdn.net/m0_56542349/article/details/134872349
本文来自互联网用户投稿,该文观点仅代表作者本人,不代表本站立场。本站仅提供信息存储空间服务,不拥有所有权,不承担相关法律责任。 如若内容造成侵权/违法违规/事实不符,请联系我的编程经验分享网邮箱:veading@qq.com进行投诉反馈,一经查实,立即删除!
本文来自互联网用户投稿,该文观点仅代表作者本人,不代表本站立场。本站仅提供信息存储空间服务,不拥有所有权,不承担相关法律责任。 如若内容造成侵权/违法违规/事实不符,请联系我的编程经验分享网邮箱:veading@qq.com进行投诉反馈,一经查实,立即删除!