自定义导航栏与自定义构建函数

文章概叙
本文主要讲的是自定义导航栏Tabs,并使用到@builder装饰器来做自定义构建函数,本文的代码较长,建议使用电脑端查看。
书接上回
上回的代码使用了Tabs实现了切换卡片的效果,但很多时候,我们的底部栏并不是只有一个文字,还要有图标以及切换的效果,甚至还要求我们的某一个TabBar是独一无二的,所以自定义导航栏是一定要实现的。
在ArkUI中,自然有自定义导航栏的实现,而由于这一部分是公共的,所以我们可以将其抽出来,作为一个函数去"渲染",而由于该效果是只有当前页面才有的,因此我们只需要将其定义在当前的组件中,无需再去定义一个组件,所以我们选择的是@Builder的自定义函数。
ArkUI还提供了一种更轻量的UI元素复用机制@Builder,@Builder所装饰的函数遵循build()函数语法规则,开发者可以将重复使用的UI元素抽象成一个方法,在build方法里调用。
自定义函数的语法如下:
@Builder MyBuilderFunction(paramsA,paramsB){
   // ui布局
 }
而当我们使用的时候,只需要很方便地去调用该方法即可,因为是在内部的,所以需要添加this。
this.MyBuilderFunction()
开始代码
作为轻量级的UI元素复用机制,自定义函数的最大好处自然是复用,以及可以在函数中调用我们的参数,而不需要具体的将之前定义好的参数传进去.
按照自然的思路,我们想要实现的效果是tabBar中既有文字,又有icon,且当前tab被渲染的时候,还会显示出另一个icon。
因此,我们的自定义函数需要传入四个参数,分别是文字,未被选中的icon,被选中的icon,以及当前tabbar的下标,既
  @Builder TabBuilder(title: string, targetIndex: number, selectedImg: Resource, normalImg: Resource) {
    Column() {
      Image(this.currentIndex === targetIndex ? selectedImg : normalImg)
        .size({ width: 25, height: 25 })
      Text(title)
        .fontColor(this.currentIndex === targetIndex ? '#1698CE' : '#6B6B6B')
    }
    .width('100%')
    .height(50)
    .justifyContent(FlexAlign.Center)
需要注意的是,第三行的"currentIndex"代表的是当前tab选中,而这个参数是在tabs的“onChange”监听函数中获得的。
想使用这个函数的时候,我们可以在tabBar这么写
 .tabBar(this.TabBuilder(this.tabList[1].name,
        1,
        this.tabList[1].selected_icon,
        this.tabList[1].unselected_icon))
因为返回的是一个组件,所以不需要再做啥了。
最后的代码如下
@Entry
@Component
struct Index {
  @State currentIndex: number = 0
  tabList: {
    name: string,
    unselected_icon: Resource,
    selected_icon: Resource
  }[] = [
    { name: "发现",
      unselected_icon: $r("app.media.found_unselect"),
      selected_icon: $r("app.media.found_select"),
    },
    { name: "我的",
      unselected_icon: $r("app.media.mine_unselect"),
      selected_icon: $r("app.media.mine_select")
    }]
?
  @Builder TabBuilder(title: string, targetIndex: number, selectedImg: Resource, normalImg: Resource) {
    Column() {
      Image(this.currentIndex === targetIndex ? selectedImg : normalImg)
        .size({ width: 25, height: 25 })
      Text(title)
        .margin({ top: 5 })
        .fontSize(16)
        .fontColor(this.currentIndex === targetIndex ? '#FFAA00' : '#3A9B78')
    }
    .width('100%')
    .height(50)
    .justifyContent(FlexAlign.Center)
  }
?
  build() {
    Tabs({ barPosition: BarPosition.End }) {
      TabContent() {
        Text(`这个是${this.tabList[0].name}`)
      }
      .tabBar(this.TabBuilder(
        this.tabList[0].name,
        0,
        this.tabList[0].selected_icon,
        this.tabList[0].unselected_icon)
      )
      .backgroundColor("#ccc")
?
      TabContent() {
        Text(`这个是${this.tabList[1].name}`)
      }
      .tabBar(this.TabBuilder(this.tabList[1].name,
        1,
        this.tabList[1].selected_icon,
        this.tabList[1].unselected_icon))
      .backgroundColor("#ccc")
    }
    .width("100%")
    .height("100%")
    .onChange((index) => {
      this.currentIndex = index
    })
  }
}
效果图如下
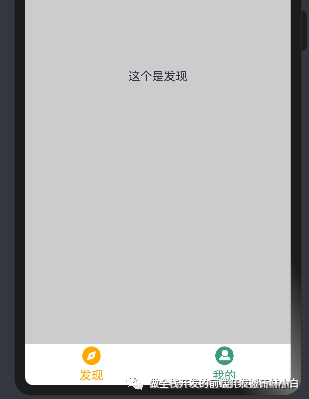
对于自定义构建函数,没啥好讲的,记得添加一个@builder就可以了。
而代码中的四个文件的资源,都是放在media目录下的,使用"$r"的形式去读取到本地的resourece?
个人公众号
呜呜呜,个人公众号求关注,主要讲的是React、NodeJs、Javascript以及鸿蒙等的开发文章,主要是公众号上的都是连贯的,对大佬们观看比较方便。
本文来自互联网用户投稿,该文观点仅代表作者本人,不代表本站立场。本站仅提供信息存储空间服务,不拥有所有权,不承担相关法律责任。 如若内容造成侵权/违法违规/事实不符,请联系我的编程经验分享网邮箱:veading@qq.com进行投诉反馈,一经查实,立即删除!