web综合大实验!!!
2024-01-01 06:50:27
目录
?一、要求

二、操作步骤
第一步:关闭防火墙+SeLinux
[root@localhost node2]# systemctl stop firewalld
[root@localhost node2]# setenforce 0
第二步:挂载
服务器端:在linux上面实现网页服务器需要Apache这套服务器软件,httpd提供Apache主程序 http://httpd.apache.org/docs/2.4/ 安装软件:httpd
-
服务端:192.168.17.172
-
客户端:主机
[root@localhost node2]# mount /dev/sr0 /mnt/
第三步:编辑配置文件
[root@localhost node2]# vim /etc/yum.repos.d/web.repo[BaseOS]
name=BaseOS
baseurl=file:///mnt/BaseOS
gpgcheck=0
?
[AppStream]
name=AppStream
baseurl=file:///mnt/AppStream
gpgcheck=0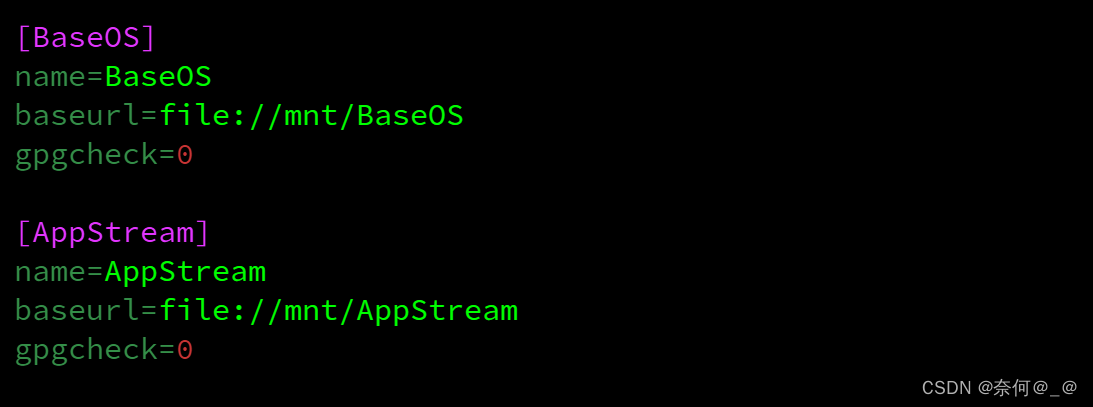
第四步:安装软件包
1、安装httpd
[root@localhost node1]# dnf install httpd -y
[root@localhost ~]# rpm -ql httpd[root@localhost httpd]# tree /etc/httpd
/etc/httpd
├── conf
│ ├── httpd.conf
│ └── magic
├── conf.d
│ ├── autoindex.conf
│ ├── README
│ ├── userdir.conf
│ └── welcome.conf
├── conf.modules.d
│ ├── 00-base.conf
│ ├── 00-dav.conf
│ ├── 00-lua.conf
│ ├── 00-mpm.conf
│ ├── 00-proxy.conf
│ ├── 00-systemd.conf
│ └── 01-cgi.conf
├── logs -> ../../var/log/httpd
├── modules -> ../../usr/lib64/httpd/modules
└──
run -> /run/httpd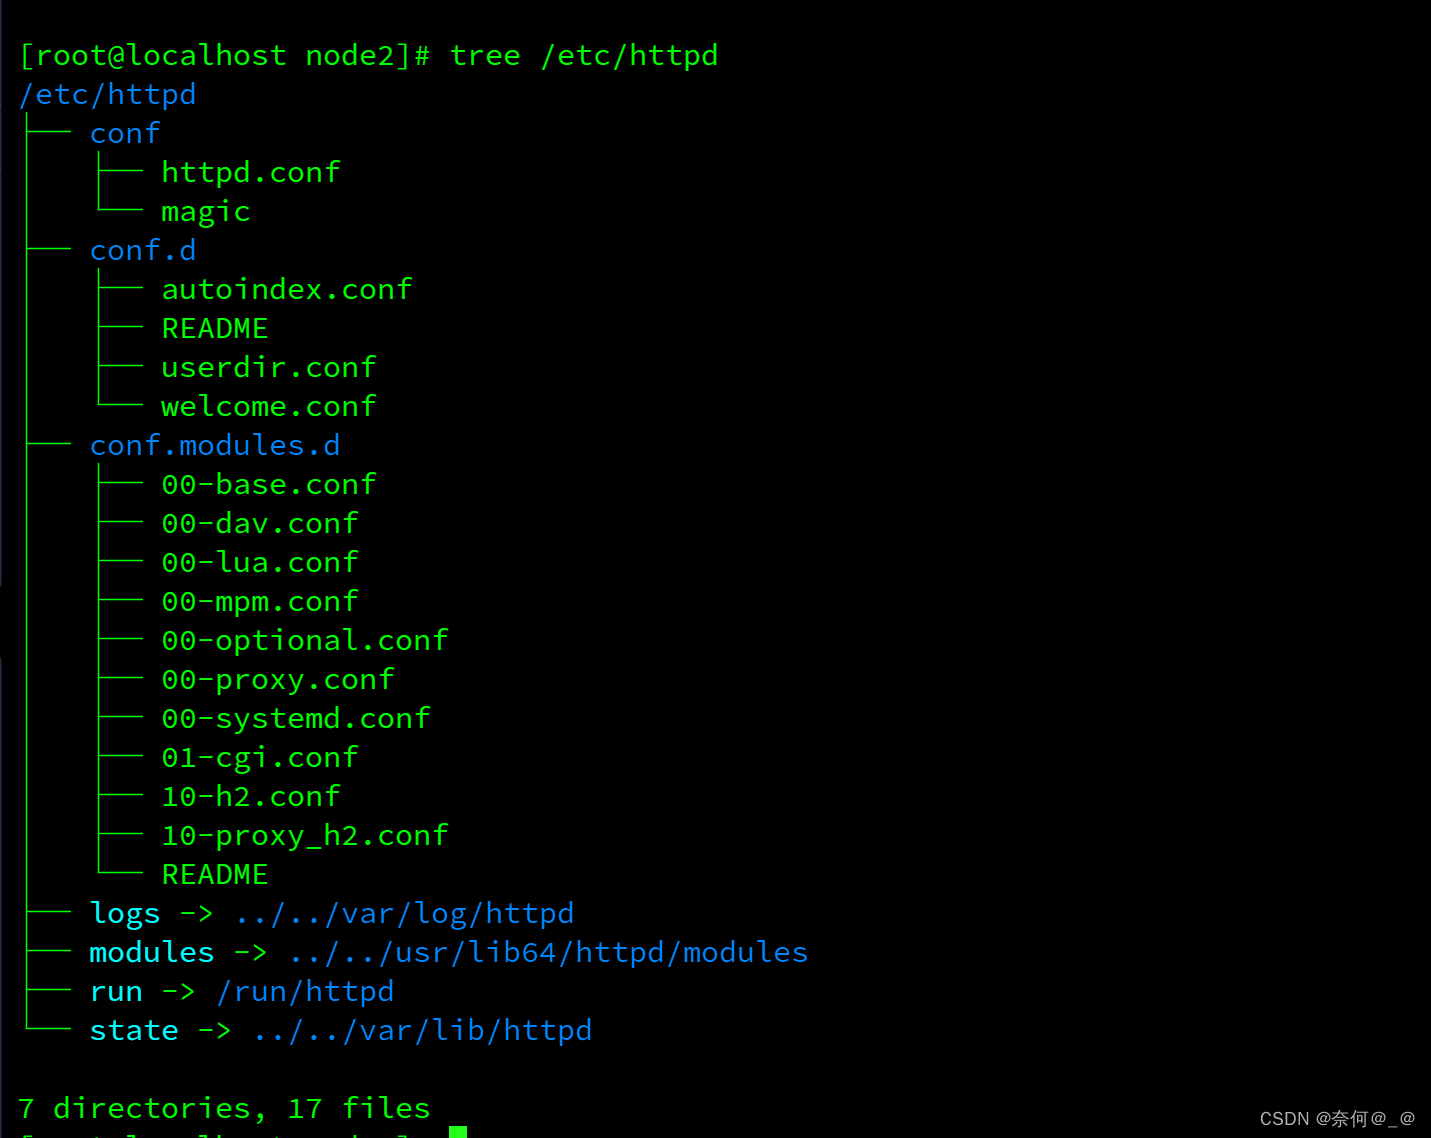
2、安装mod_ssl模块
[root@localhost node2]# yum install mod_ssl -y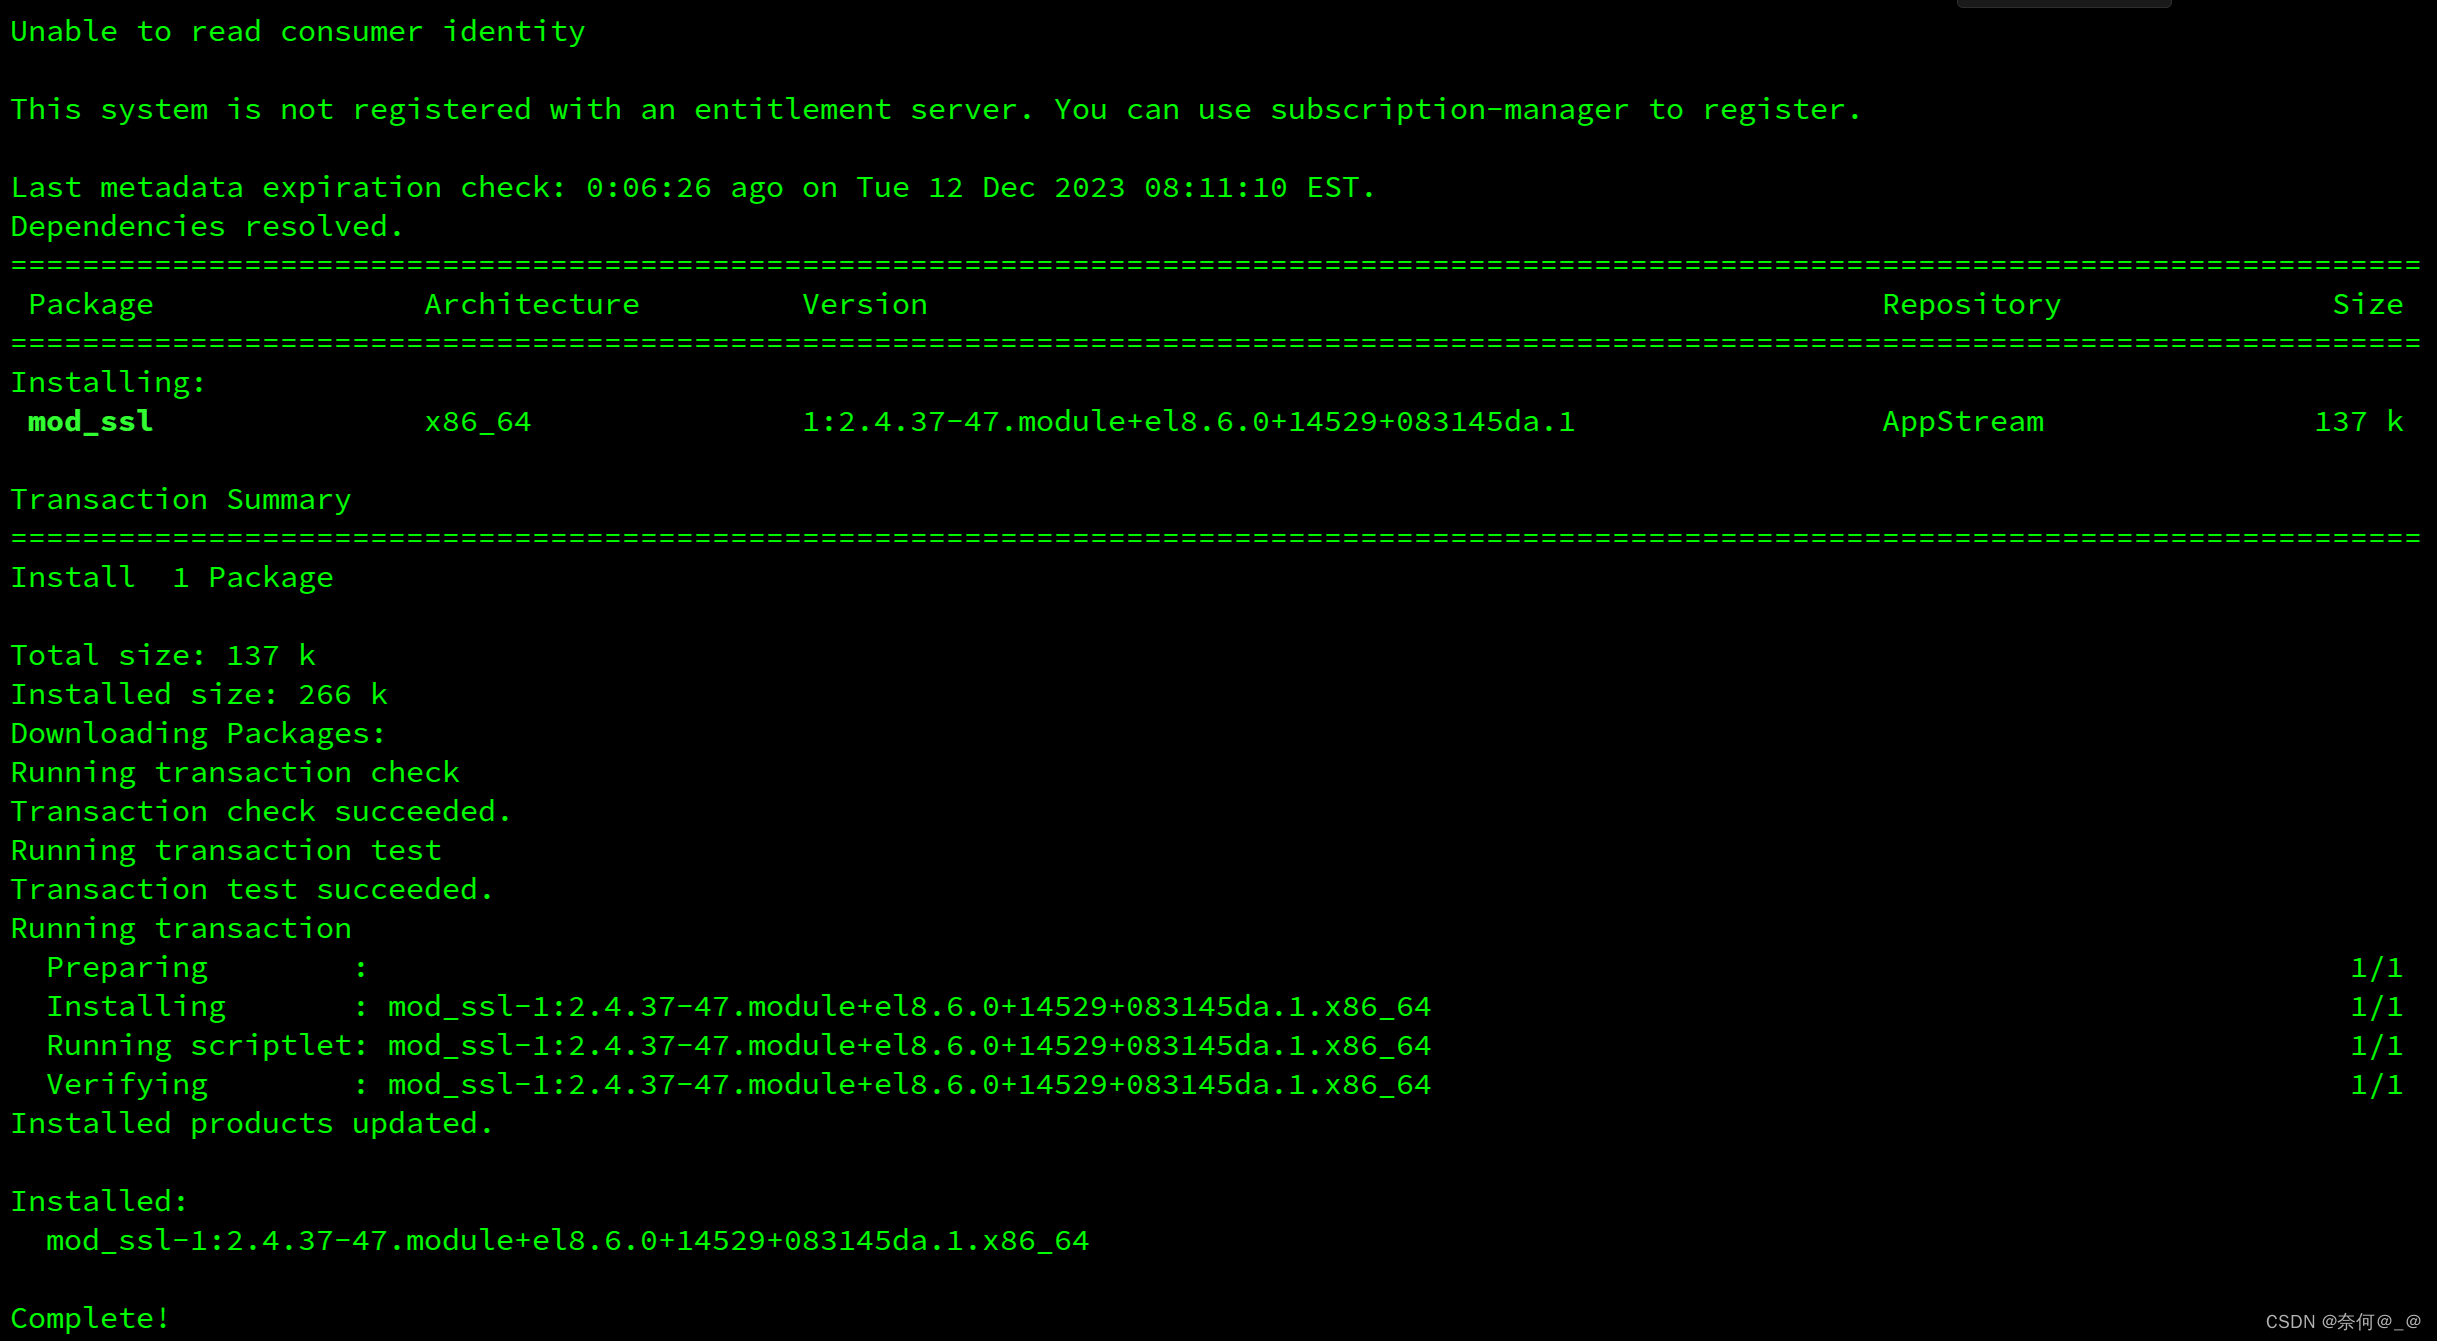
第五步:定义主配置文件
[root@localhost node2]# vim /etc/httpd/conf.d/vhost.conf<Directory /www>
? ? ? AllowOverride none
? ? ? Require all granted
</Directory>
?
<VirtualHost 192.168.17.172:80>
? ? ? ServerName www.openlab.com
? ? ? DocumentRoot /www/openlab
</VirtualHost>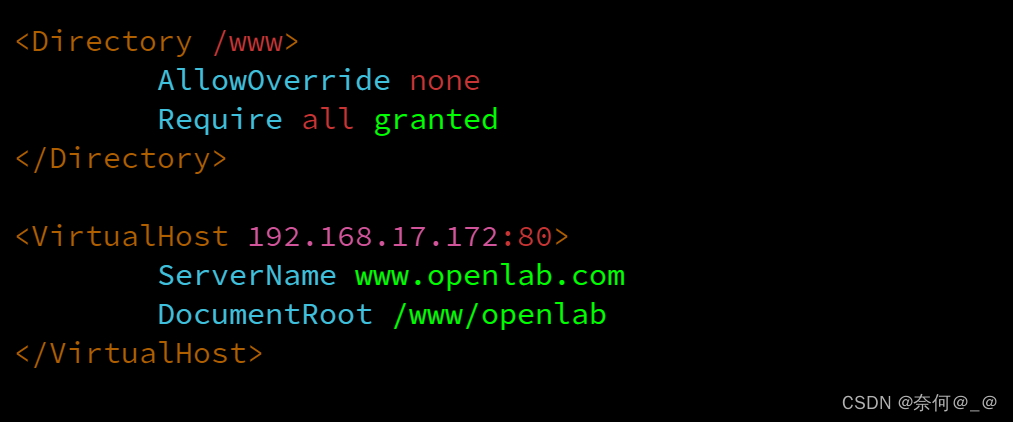
1、创建首页文件
[root@localhost node2]# mkdir /www/openlab -pv
[root@localhost node2]# echo ‘welcome to openlab!!!’ > /www/openlab/index.html
[root@localhost node2]# cat /www/openlab/index.html
welcome to openlab!!!
2、重启httpd
[root@localhost node2]# systemctl restart httpd3、添加域名管理信息
[root@localhost node2]# vim /etc/hosts
4、ping测试
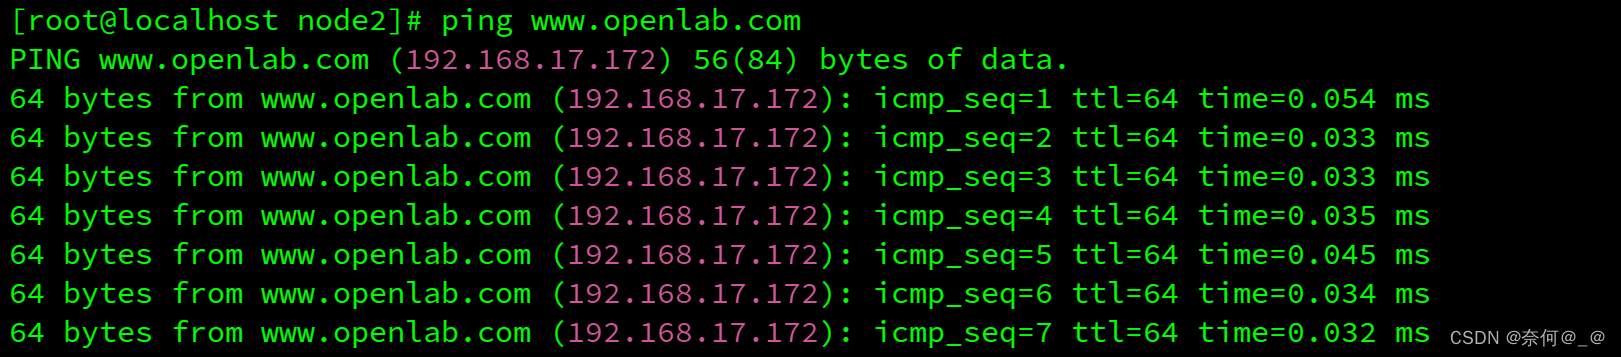
5、访问
[root@localhost node2]# curl www.openlab.com
第六步:定义学生信息子配置文件
1、配置文件
[root@localhost node2]# mkdir /www/openlab/student
[root@localhost node2]# echo this is student information > /www/openlab/student/index.html
2、访问查看
[root@localhost node2]# curl www.openlab.com/student/
this is student information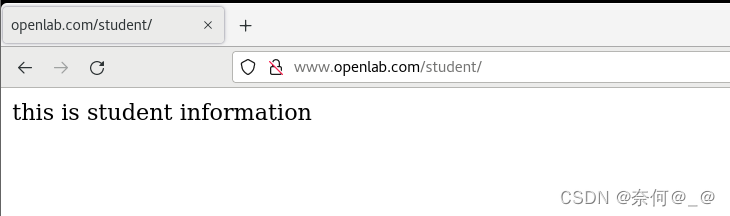
3、用户访问控制
要求 :学生信息网站只有song和tian两人可以访问,其他用户不能访问。
[root@localhost node2]# vim /etc/httpd/conf.d/vhost.conf<Directory /www/openlab/student>
? ? ? AuthType Basic
? ? ? AuthName "......"
? ? ? AuthUserFile /etc/httpd/users
? ? ? Require user song tian
</Directory>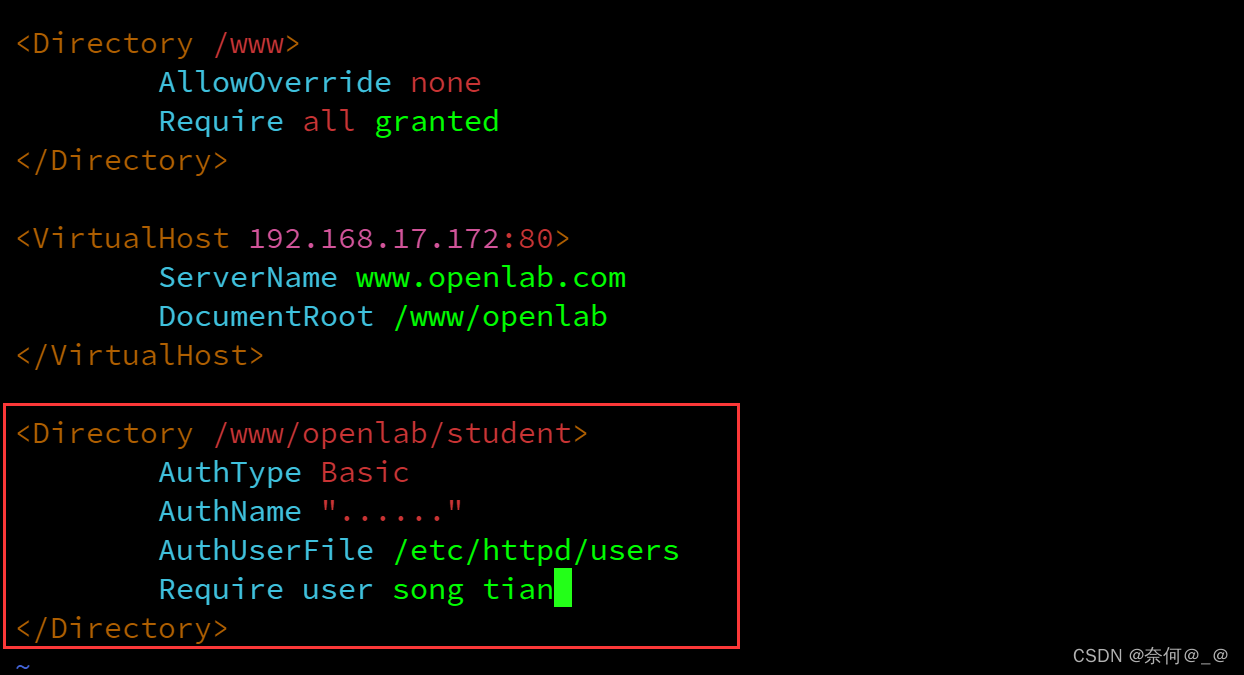
4、创建管理用户
[root@localhost node2]# htpasswd -c /etc/httpd/users song
输入密码
#再次添加不需要-c
[root@localhost node2]# htpasswd /etc/httpd/users tian
输入密码
5、重启服务
[root@localhost node2]# systemctl restart httpd6、访问测试
[root@localhost node2]# curl www.openlab.com/student/ -u song
Enter host password for user 'song':
this is student information
[root@localhost node2]# curl www.openlab.com/student/ -u tian
Enter host password for user 'tian':
this is student information
除了认证的两个外全部认证失败
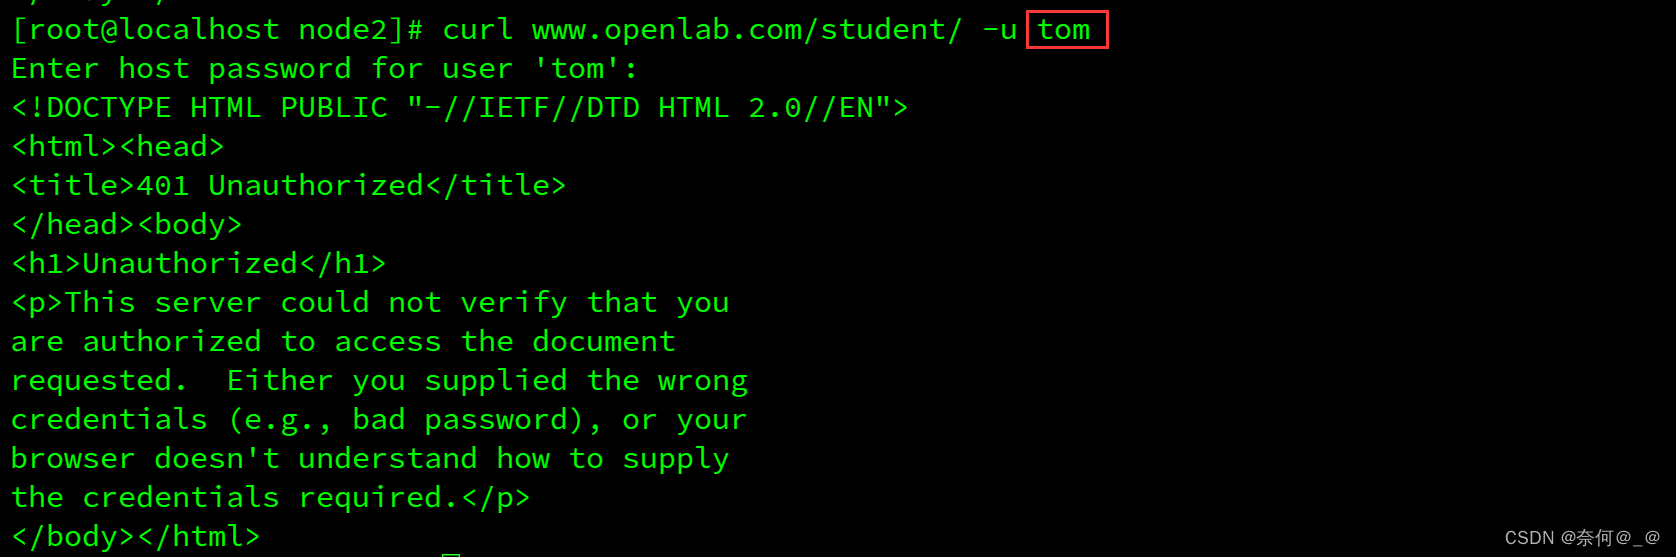
在浏览器测试更加直观
第七步:定义教学资料子配置文件
1、配置文件
[root@localhost node2]# mkdir /www/openlab/data
[root@localhost node2]# echo this is instructional material > /www/openlab/data/index.html
2、访问查看
[root@localhost node2]# curl www.openlab.com/data/
第八步:定义缴费网站子配置文件
1、配置文件
[root@localhost node2]# mkdir /www/openlab/money
[root@localhost node2]# echo this is Payment website > /www/openlab/money/index.html
2、访问查看
[root@localhost node2]# curl www.openlab.com/data/
3、配置https加密
要求:访问缴费网站实现数据加密基于https访问。
(1)生成密钥
[root@localhost node2]# openssl req -newkey rsa:4096 -nodes -sha256 -keyout /etc/pki/tls/private/money.key -x509 -days 365 -out /etc/pki/tls/certs/money.crt-
openssl req: 这是OpenSSL命令行工具的一个子命令,用于生成证书签名请求(CSR)。 -
-newkey rsa:4096: 这表示生成一个新的RSA密钥对,密钥长度为4096位。 -
-nodes: 这表示不使用密码保护私钥。 -
-sha256: 这表示使用SHA-256算法对证书进行签名。 -
-keyout /etc/pki/tls/private/money.key: 这表示将生成的私钥保存到/etc/pki/tls/private/money.key文件中。 -
-x509: 这表示生成一个X.509格式的证书。 -
-days 365: 这表示证书的有效期限为365天。 -
-out /etc/pki/tls/certs/money.crt: 这表示将生成的证书保存到/etc/pki/tls/certs/money.crt文件中。

(2)编辑配置文件
[root@localhost node2]# vim /etc/httpd/conf.d/vhost.conf<Directory /1/2>
? ? ? AllowOverride none
? ? ? Require all granted
</Directory>
?
<VirtualHost 192.168.17.172:443>
? ? ? ServerName www.openlab.com/money
? ? ? DocumentRoot /www
? ? ? Alias /money /1/2 ?#加密子界面
? ? ? SSLEngine on
? ? ? SSLCertificateFile /etc/pki/tls/certs/money.crt
? ? ? SSLCertificateKeyFile /etc/pki/tls/private/money.key
</VirtualHost>
(4)编写网页信息
[root@localhost node2]# mkdir /1/2/ -pv
mkdir: created directory '/1'
mkdir: created directory '/1/2/'
[root@localhost node2]# echo this is money > /1/2/index.html
(5)重启httpd
[root@localhost node2]# systemctl restart httpd(6)测试
[root@localhost node2]# curl https://www.openlab.com/money/ -k
完成!!!
文章来源:https://blog.csdn.net/weixin_51525416/article/details/135092025
本文来自互联网用户投稿,该文观点仅代表作者本人,不代表本站立场。本站仅提供信息存储空间服务,不拥有所有权,不承担相关法律责任。 如若内容造成侵权/违法违规/事实不符,请联系我的编程经验分享网邮箱:veading@qq.com进行投诉反馈,一经查实,立即删除!
本文来自互联网用户投稿,该文观点仅代表作者本人,不代表本站立场。本站仅提供信息存储空间服务,不拥有所有权,不承担相关法律责任。 如若内容造成侵权/违法违规/事实不符,请联系我的编程经验分享网邮箱:veading@qq.com进行投诉反馈,一经查实,立即删除!