基于dockerfile搭建LNMP
2023-12-13 05:48:12
| 组件 | 自定义IP | 所需组件 |
| nginx | 172.111.0.10 | nginx+wordpress |
| mysql | 172.111.0.20 | mysql-5.7.20 |
| php | 172.111.0.30 | php |
LNMP介绍
L:Linux平台,操作系统,另外桑组件的运行平台
N:nginx 提供前端页面
M:MySQL,开源关系的数据库,主要是用来保存用户账号信息。
P:PHP,开发一种动态页面的编程语言,解释解析动态页面,起到中间件的作用。(nginx和数据库的中间,沟通nginx和数据库,已请求数据库上的信息)
lnmp:企业网站的应用模式之一。早期的论坛架构就是lnmp搭建的
实验部署

systemctl stop firewalld
setenforce 0
关闭防火墙和安全机制


cd /opt
mkdir nginx mysql php
cd nginx
拖入nginx   wordpress

vim Dockerfile

声明基础镜像
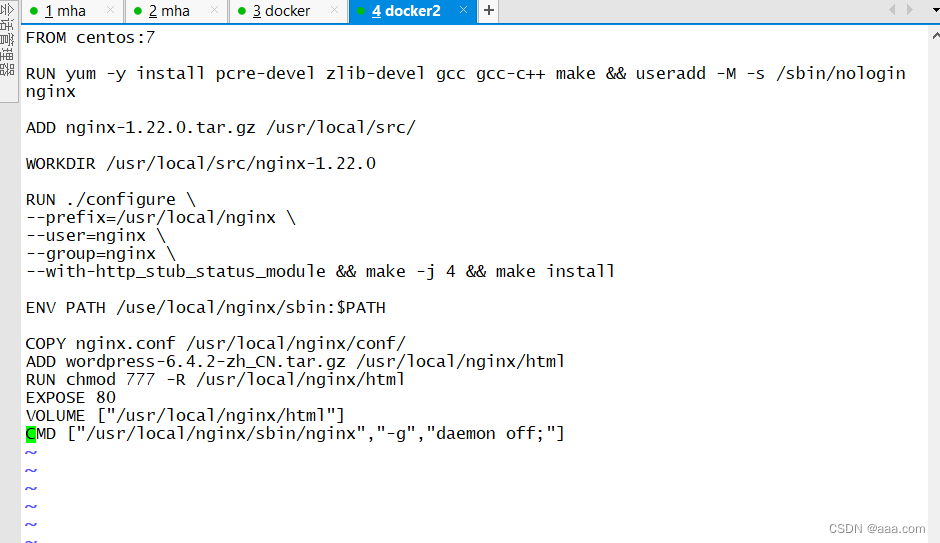
FROM centos:7

RUN yum -y install pcre-devel zlib-devel gcc gcc-c++ make && useradd -M -s /sbin/nologin nginx

ADD nginx-1.22.0.tar.gz /usr/local/src/

指定工作目录
WORKDIR /usr/local/src/nginx-1.22.0

配置和编译安装
RUN ./CONFIG \
--prefix=/usr/local/nginx \
user=nginx \
--group=nginx \
--with-http_stub_status_module && make -j 4 && make install


添加环境变量
ENV PATH /use/local/nginx/sbin:$PATH
接下来多开一个终端去配置nginx.conf文件
开另一个终端
vim nginx.conf

COPY nginx.conf /usr/local/nginx/conf/
ADD wordpress-6.4.2-zh_CN.tar.gz /usr/local/nginx/html
EXPOSE 80

创建容器内的数据卷,即可以对外给宿主机挂载,也可以对内给容器使用
VOLUME ["/usr/local/nginx/html"]

设定容器启动时的命令
CMD ["/usr/local/nginx/sbin/nginx","-g","daemon off;"]

wq!
镜像文件配置完毕,接下来自定义网段和创建镜像和容器
docker network create --subnet=172.111.0.0/16 --opt "com.docker.network.bridge.name"="docker1" mynetwork

docker network ls
查看

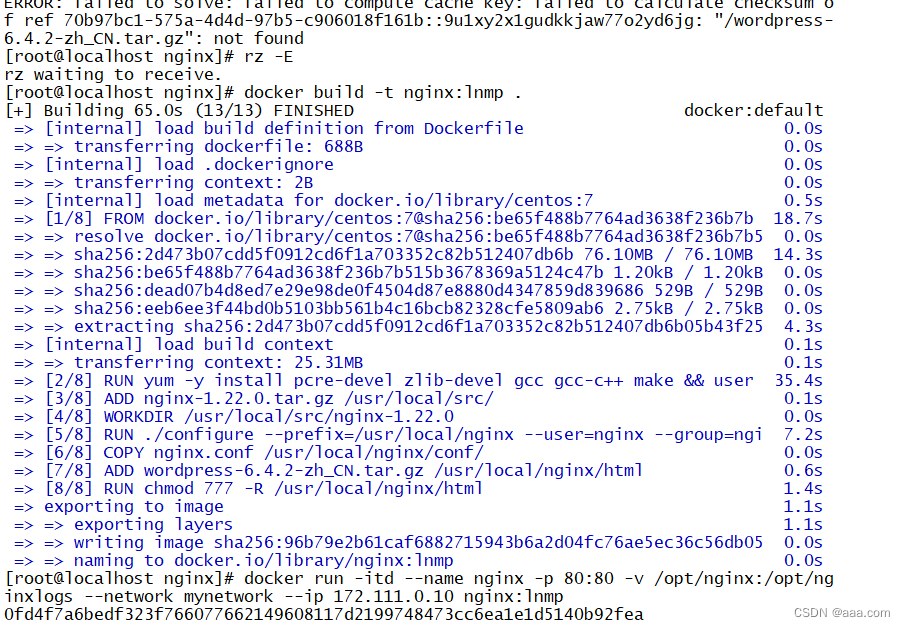
docker build -t nginx:lnmp .

docker images

docker run -itd --name nginx -p 80:80 -v /opt/nginx:/opt/nginxlogs --network mynetwork --ip 172.111.0.10 nginx:lnmp

docker ps
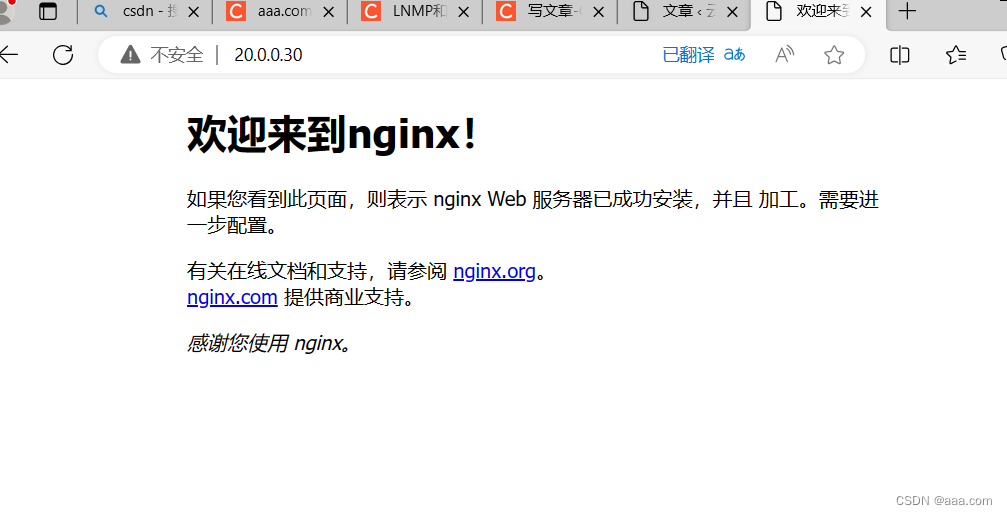
curl 20.0.0.20
浏览器访问

nginx部署到此结束,下面我们来部署mysql

mysql的dockerfile
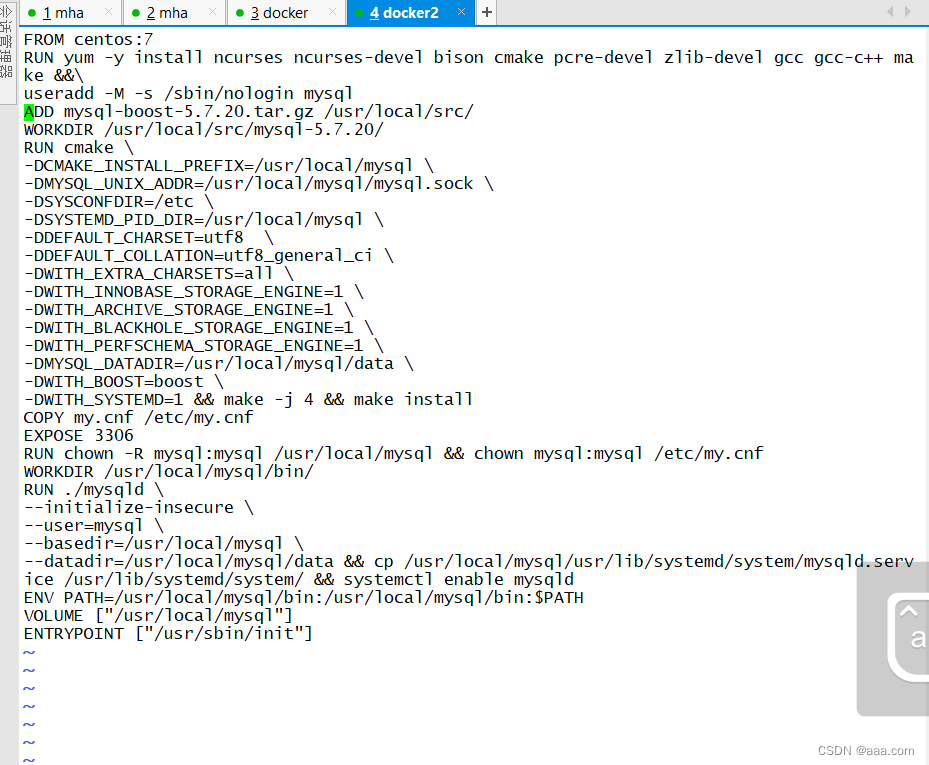
FROM centos:7
RUN yum -y install ncurses ncurses-devel bison cmake pcre-devel zlib-devel gcc gcc-c++ make &&\
useradd -M -s /sbin/nologin mysql
ADD mysql-boost-5.7.20.tar.gz /usr/local/scr/
WORKDIR /usr/local/src/mysql-5.7.20/
RUN cmake \
-DCMAKE_INSTALL_PREFIX=/usr/local/mysql \
-DMYSQL_UNIX_ADDR=/usr/local/mysql/mysql.sock \
-DSYSCONFDIR=/etc \
-DSYSTEMD_PID_DIR=/usr/local/mysql \
-DDEFAULT_CHARSET=utf8  \
-DDEFAULT_COLLATION=utf8_general_ci \
-DWITH_EXTRA_CHARSETS=all \
-DWITH_INNOBASE_STORAGE_ENGINE=1 \
-DWITH_ARCHIVE_STORAGE_ENGINE=1 \
-DWITH_BLACKHOLE_STORAGE_ENGINE=1 \
-DWITH_PERFSCHEMA_STORAGE_ENGINE=1 \
-DMYSQL_DATADIR=/usr/local/mysql/data \
-DWITH_BOOST=boost \
-DWITH_SYSTEMD=1 && make -j 4 && make install
COPY my.cnf /etc/my.cnf
EXPOSE 3306
RUN chown -R mysql:mysql /usr/local/mysql && chown mysql:mysql /etc/my.cnf
WORKDIR /usr/local/mysql/bin/
RUN ./mysqld \
--initialize-insecure \
--user=mysql \
--basedir=/usr/local/mysql \
--datadir=/usr/local/mysql/data && cp /usr/local/mysql/usr/lib/systemd/system/mysqld.service /usr/lib/systemd/system/ && systemctl enable mysqld
ENV PATH=/usr/local/mysql/bin:/usr/local/mysql/bin:$PATH
VOLUME ["/usr/local/mysql"]
ENTRYPOINT ["/usr/sbin/init"]
mysql的my.cnf

[client]
port = 3306
socket=/usr/local/mysql/mysql.sock

 [mysqld]
user = mysql
basedir=/usr/local/mysql
datadir=/usr/local/mysql/data
port = 3306
character-set-server=utf8
pid-file = /usr/local/mysql/mysqld.pid
socket=/usr/local/mysql/mysql.sock
bind-address = 0.0.0.0
skip-name-resolve
max_connections=2048
default-storage-engine=INNODB
max_allowed_packet=16M
server-id = 1

sql_mode=NO_ENGINE_SUBSTITUTION,STRICT_TRANS_TABLES,NO_AUTO_CREATE_USER,NO_AUTO_VALUE_ON_ZERO,NO_ZERO_IN_DATE,NO_ZERO_DATE,ERROR_FOR_DIVISION_BY_ZERO,PIPES_AS_CONCAT,ANSI_QUOTES
配置文件都配置完成,接下来就是创建镜像,容器(基于自定义网段)
docker run -itd --name mysql -p 3306:3306 --privileged -v /opt/mysql1:/opt/mysql --net mywork --ip 171.111.0.20 mysql:lnmp


docker exec -it mysql bash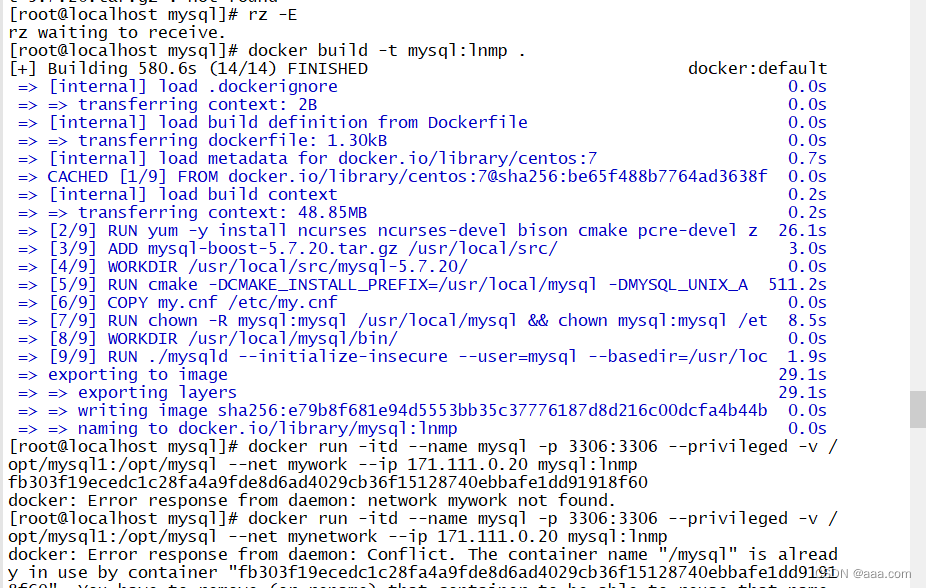
最后,给数据库赋权
mysql> grant all privileges on wordpress.* to 'wordpress'@'%' identified by '123456';
Query OK, 0 rows affected, 1 warning (0.00 sec)

mysql> grant all privileges on *.* to 'root'@'%' identified by '123456' 56';
Query OK, 0 rows affected, 1 warning (0.00 sec)

mysql> flush privileges;
Query OK, 0 rows affected (0.00 sec)


到此,mysql部分配置完成
PHP部署

php的dockerfile
FROM centos:7
RUN yum -y install gd \
libjpeg libjpeg-devel \
libpng libpng-devel \
freetype freetype-devel \
libxml2 libxml2-devel \
zlib zlib-devel \
curl curl-devel \
openssl openssl-devel \
gcc gcc-c++ make pcre-devel && useradd -M -s /sbin/nologin nginx
ADD php-7.1.10.tar.bz2 /usr/local/src
WORKDIR /usr/local/src/php-7.1.10
RUN ./configure \
--prefix=/usr/local/php \
--with-mysql-sock=/usr/local/mysql/mysql.sock \
--with-mysqli \
--with-zlib \
--with-curl \
--with-gd \
--with-jpeg-dir \
--with-png-dir \
--with-freetype-dir \
--with-openssl \
--enable-fpm \
--enable-mbstring \
--enable-xml \
--enable-session \
--enable-ftp \
--enable-pdo \
--enable-tokenizer \
--enable-zip && make -j 4 && make install
ENV PATH /usr/local/php/bin:/usr/local/php/sbin:$PATH
COPY php.ini /usr/local/php/lib
COPY php-fpm.conf /usr/local/php/etc/
COPY www.conf /usr/local/php/etc/php-fpm.d/
EXPOSE 9000
ENTRYPOINT ["/usr/local/php/sbin/php-fpm","-F"]
php-fpm.conf配置---进程服务配置文件
[root@localhost php]# vim php-fpm.conf

--17行--去掉";"注释
pid = run/php-fpm.pid
php的www.conf配置-----扩展配置文件
oot@localhost php]# vim www.conf

;   content length:       0
;   user:                 -
;   script:               /home/fat/web/docs/php/test_mem.php
;   last request cpu:     0.00
;   last request memory:  0
;
; Note: There is a real-time FPM status monitoring sample web page available
;       It's available in: /usr/local/php/share/php/fpm/status.html
;
; Note: The value must start with a leading slash (/). The value can be
;       anything, but it may not be a good idea to use the .php extension or it
;       may conflict with a real PHP file.
; Default Value: not set
;pm.status_path = /status

; The ping URI to call the monitoring page of FPM. If this value is not set, no
; URI will be recognized as a ping page. This could be used to test from outside
; that FPM is alive and responding, or to
; - create a graph of FPM availability (rrd or such);
; - remove a server from a group if it is not responding (load balancing);
; - trigger alerts for the operating team (24/7).
; Note: The value must start with a leading slash (/). The value can be
;       anything, but it may not be a good idea to use the .php extension or it
;       may conflict with a real PHP file.
; Default Value: not set
;ping.path = /ping

; This directive may be used to customize the response of a ping request. The
; response is formatted as text/plain with a 200 response code.
; Default Value: pong
;ping.response = pong

; The access log file
; Default: not set
;access.log = log/$pool.access.log

; The access log format.
; The following syntax is allowed
;  %%: the '%' character
;  %C: %CPU used by the request
;      it can accept the following format:
;      - %{user}C for user CPU only
;      - %{system}C for system CPU only
;      - %{total}C  for user + system CPU (default)
;  %d: time taken to serve the request
;      it can accept the following format:
;      - %{seconds}d (default)
;      - %{miliseconds}d
;      - %{mili}d
;      - %{microseconds}d
;      - %{micro}d
;  %e: an environment variable (same as $_ENV or $_SERVER)
;      it must be associated with embraces to specify the name of the env
;      variable. Some exemples:
;      - server specifics like: %{REQUEST_METHOD}e or %{SERVER_PROTOCOL}e
;      - HTTP headers like: %{HTTP_HOST}e or %{HTTP_USER_AGENT}e
;  %f: script filename
;  %l: content-length of the request (for POST request only)
;  %m: request method
;  %M: peak of memory allocated by PHP
;      it can accept the following format:
;      - %{bytes}M (default)
;      - %{kilobytes}M
;      - %{kilo}M
;      - %{megabytes}M
;      - %{mega}M
;  %n: pool name
;  %o: output header
;      it must be associated with embraces to specify the name of the header:
;      - %{Content-Type}o
;      - %{X-Powered-By}o
;      - %{Transfert-Encoding}o
;      - ....
;  %p: PID of the child that serviced the request
;  %P: PID of the parent of the child that serviced the request
;  %q: the query string
;  %Q: the '?' character if query string exists
;  %r: the request URI (without the query string, see %q and %Q)
;  %R: remote IP address
;  %s: status (response code)
;  %t: server time the request was received
;      it can accept a strftime(3) format:
;      %d/%b/%Y:%H:%M:%S %z (default)
;      The strftime(3) format must be encapsuled in a %{<strftime_format>}t tag
;      e.g. for a ISO8601 formatted timestring, use: %{%Y-%m-%dT%H:%M:%S%z}t
;  %T: time the log has been written (the request has finished)
;      it can accept a strftime(3) format:
;      %d/%b/%Y:%H:%M:%S %z (default)
;      The strftime(3) format must be encapsuled in a %{<strftime_format>}t tag
;      e.g. for a ISO8601 formatted timestring, use: %{%Y-%m-%dT%H:%M:%S%z}t
;  %u: remote user
;
; Default: "%R - %u %t \"%m %r\" %s"
;access.format = "%R - %u %t \"%m %r%Q%q\" %s %f %{mili}d %{kilo}M %C%%"

; The log file for slow requests
; Default Value: not set
; Note: slowlog is mandatory if request_slowlog_timeout is set
;slowlog = log/$pool.log.slow

; The timeout for serving a single request after which a PHP backtrace will be
; dumped to the 'slowlog' file. A value of '0s' means 'off'.
; Available units: s(econds)(default), m(inutes), h(ours), or d(ays)
; Default Value: 0
;request_slowlog_timeout = 0

; The timeout for serving a single request after which the worker process will
; be killed. This option should be used when the 'max_execution_time' ini option
; does not stop script execution for some reason. A value of '0' means 'off'.
; Available units: s(econds)(default), m(inutes), h(ours), or d(ays)
; Default Value: 0
;request_terminate_timeout = 0

; Set open file descriptor rlimit.
; Default Value: system defined value
;rlimit_files = 1024

; Set max core size rlimit.
; Possible Values: 'unlimited' or an integer greater or equal to 0
; Default Value: system defined value
;rlimit_core = 0

; Chroot to this directory at the start. This value must be defined as an
; absolute path. When this value is not set, chroot is not used.
; Note: you can prefix with '$prefix' to chroot to the pool prefix or one
; of its subdirectories. If the pool prefix is not set, the global prefix
; will be used instead.
; Note: chrooting is a great security feature and should be used whenever
;       possible. However, all PHP paths will be relative to the chroot
;       (error_log, sessions.save_path, ...).
; Default Value: not set
;chroot =

; Chdir to this directory at the start.
; Note: relative path can be used.
; Default Value: current directory or / when chroot
;chdir = /var/www

; Redirect worker stdout and stderr into main error log. If not set, stdout and
; stderr will be redirected to /dev/null according to FastCGI specs.
; Note: on highloaded environement, this can cause some delay in the page
; process time (several ms).
; Default Value: no
;catch_workers_output = yes

; Clear environment in FPM workers
; Prevents arbitrary environment variables from reaching FPM worker processes
; by clearing the environment in workers before env vars specified in this
; pool configuration are added.
; Setting to "no" will make all environment variables available to PHP code
; via getenv(), $_ENV and $_SERVER.
; Default Value: yes
;clear_env = no

; Limits the extensions of the main script FPM will allow to parse. This can
; prevent configuration mistakes on the web server side. You should only limit
; FPM to .php extensions to prevent malicious users to use other extensions to
; execute php code.
; Note: set an empty value to allow all extensions.
; Default Value: .php
;security.limit_extensions = .php .php3 .php4 .php5 .php7

; Pass environment variables like LD_LIBRARY_PATH. All $VARIABLEs are taken from
; the current environment.
; Default Value: clean env
;env[HOSTNAME] = $HOSTNAME
;env[PATH] = /usr/local/bin:/usr/bin:/bin
;env[TMP] = /tmp
;env[TMPDIR] = /tmp
;env[TEMP] = /tmp

; Additional php.ini defines, specific to this pool of workers. These settings
; overwrite the values previously defined in the php.ini. The directives are the
; same as the PHP SAPI:
;   php_value/php_flag             - you can set classic ini defines which can
;                                    be overwritten from PHP call 'ini_set'.
;   php_admin_value/php_admin_flag - these directives won't be overwritten by
;                                     PHP call 'ini_set'
; For php_*flag, valid values are on, off, 1, 0, true, false, yes or no.

; Defining 'extension' will load the corresponding shared extension from
; extension_dir. Defining 'disable_functions' or 'disable_classes' will not
; overwrite previously defined php.ini values, but will append the new value
; instead.

; Note: path INI options can be relative and will be expanded with the prefix
; (pool, global or /usr/local/php)

; Default Value: nothing is defined by default except the values in php.ini and
;                specified at startup with the -d argument
;php_admin_value[sendmail_path] = /usr/sbin/sendmail -t -i -f www@my.domain.com
;php_flag[display_errors] = off
;php_admin_value[error_log] = /var/log/fpm-php.www.log
;php_admin_flag[log_errors] = on
;php_admin_value[memory_limit] = 32M
~
~
php.ini----主配置文件
--1170行--修改
mysqli.default_socket = /usr/local/mysql/mysql.sock
--939行--取消注释,修改
date.timezone = Asia/Shanghai
以上php的配置文件完成,接下来就是创建 镜像和容器
docker build -t php:lnmp .

docker run -itd --name php -p 9000:9000 --volumes-from nignx --volumes-from mysql --network --ip 172.111.0.30 php:lnmp


docker exec -it php bash
最后去浏览器登录

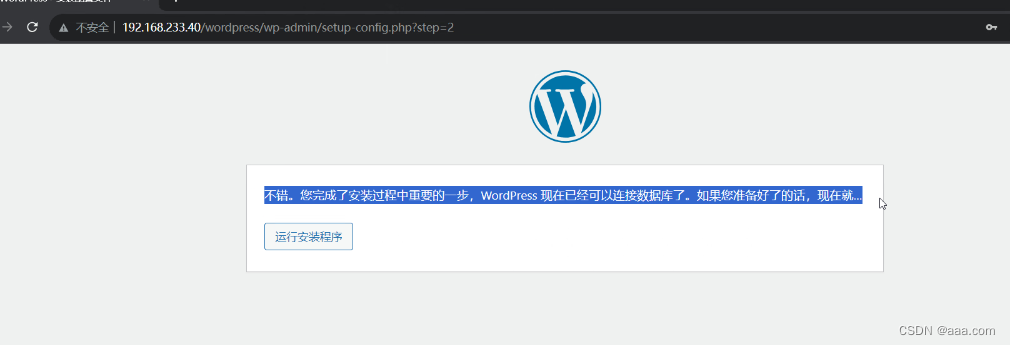
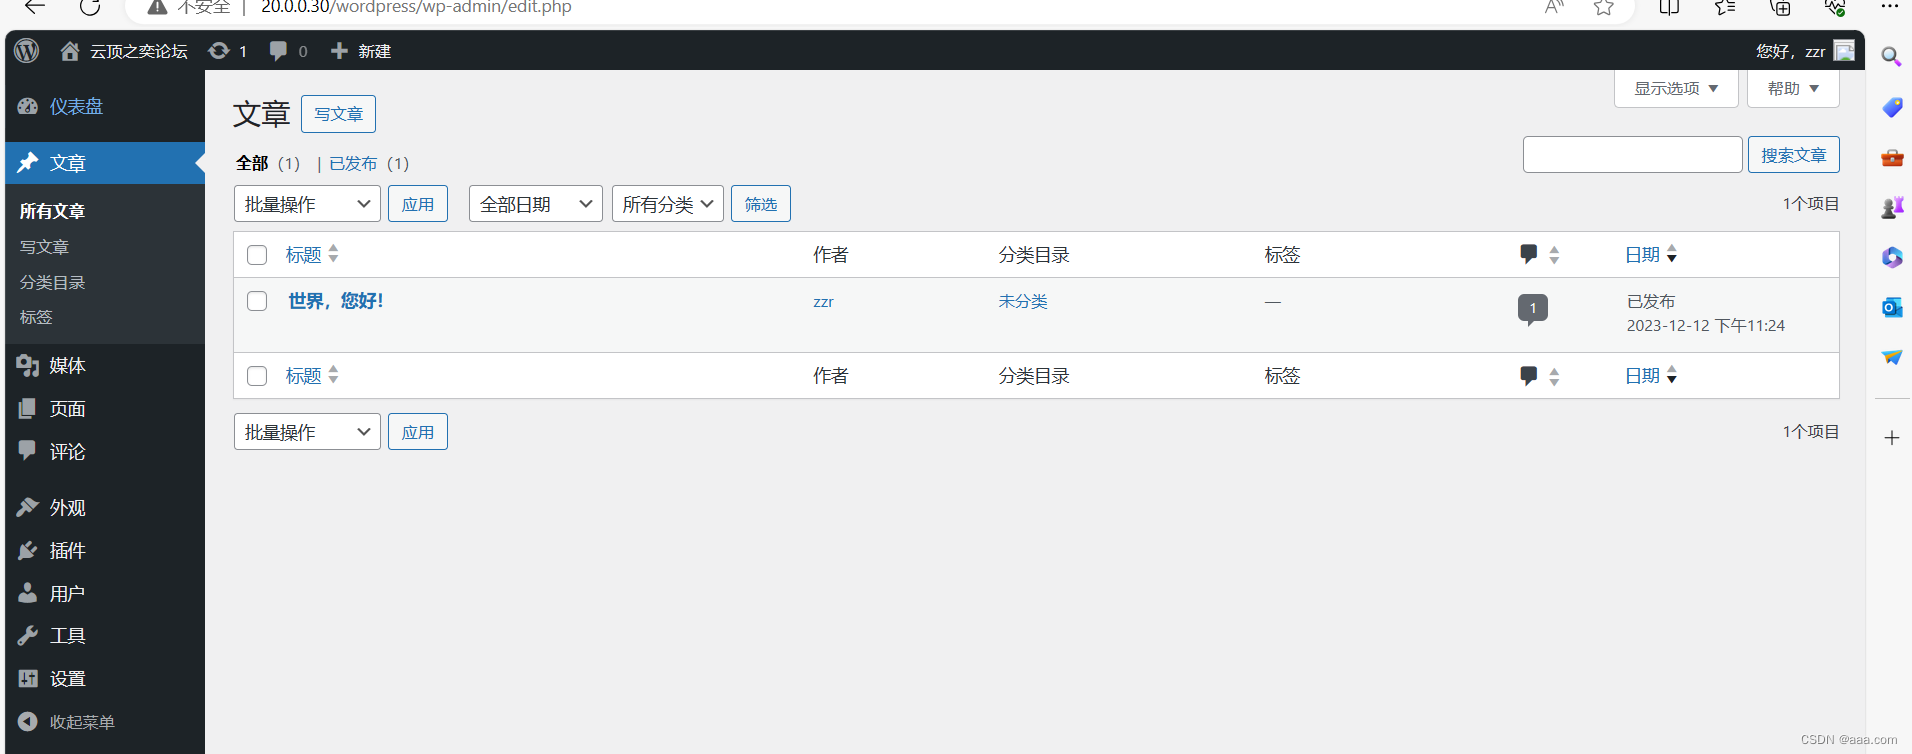
至此,论坛搭建完毕
文章来源:https://blog.csdn.net/qq_51506982/article/details/134950917
本文来自互联网用户投稿,该文观点仅代表作者本人,不代表本站立场。本站仅提供信息存储空间服务,不拥有所有权,不承担相关法律责任。 如若内容造成侵权/违法违规/事实不符,请联系我的编程经验分享网邮箱:veading@qq.com进行投诉反馈,一经查实,立即删除!
本文来自互联网用户投稿,该文观点仅代表作者本人,不代表本站立场。本站仅提供信息存储空间服务,不拥有所有权,不承担相关法律责任。 如若内容造成侵权/违法违规/事实不符,请联系我的编程经验分享网邮箱:veading@qq.com进行投诉反馈,一经查实,立即删除!