Android使用Jetpack WindowManager来开发可折叠设备的探索
一、背景
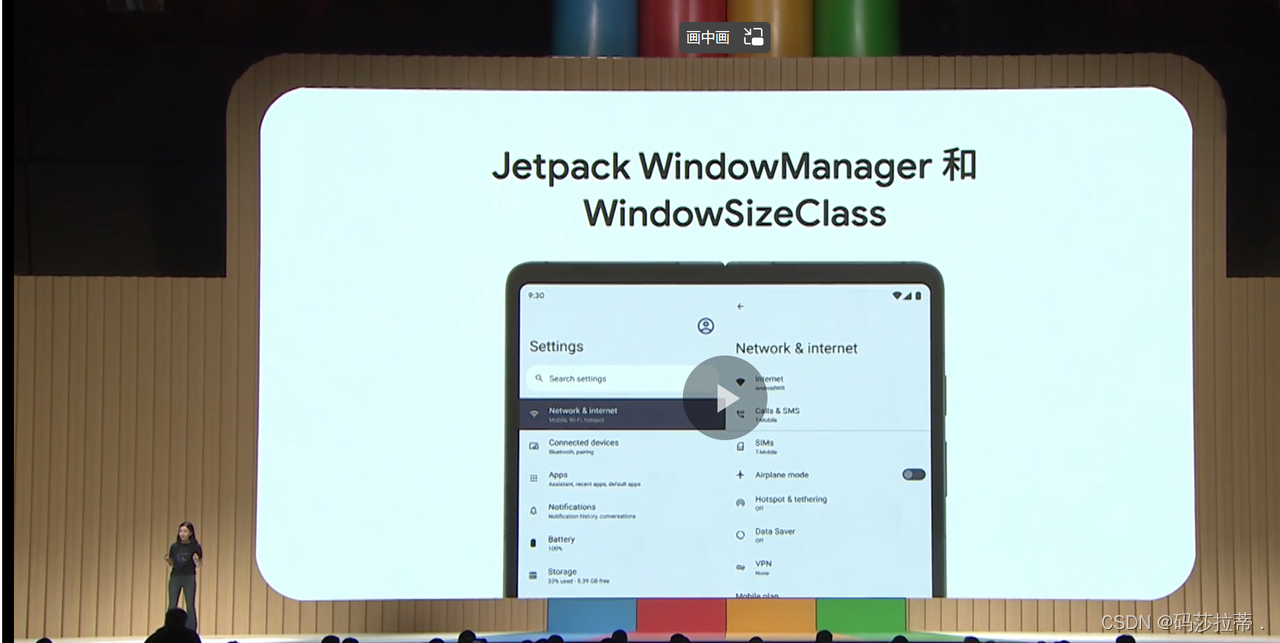
我们在Google开发者大会上,看到Jetpack WindowManager和WindowSizeClass这些技术,如下图。
那这里不得不说折叠屏手机了
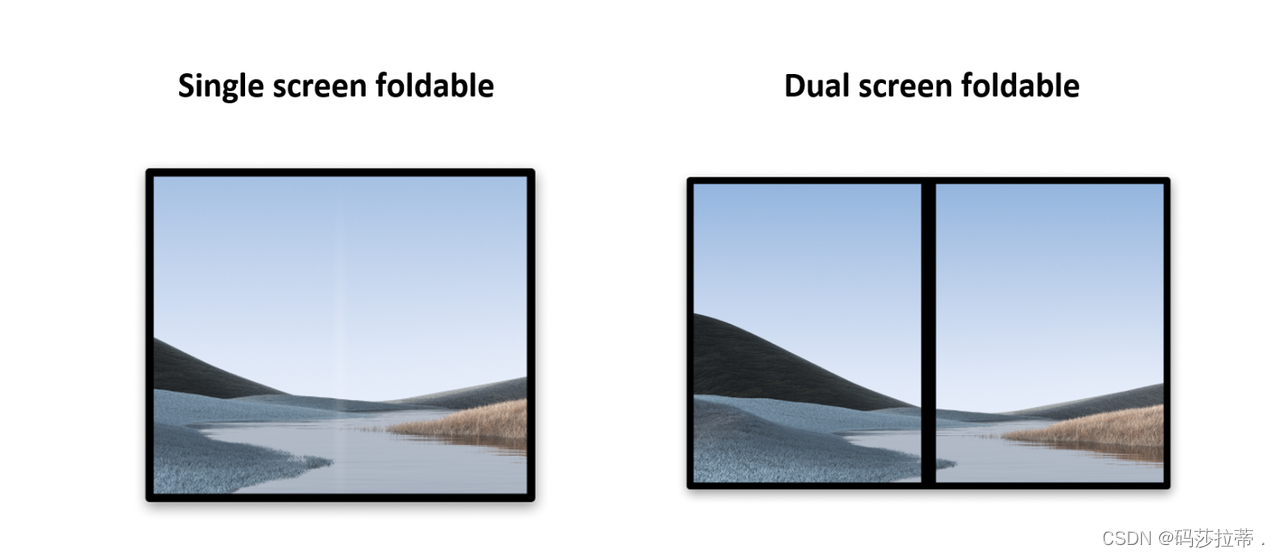
-
在其中一个显示区域中运行一个应用。
-
同时运行两个应用,各位于一个显示区域中(在
multi-window模式下)。 -
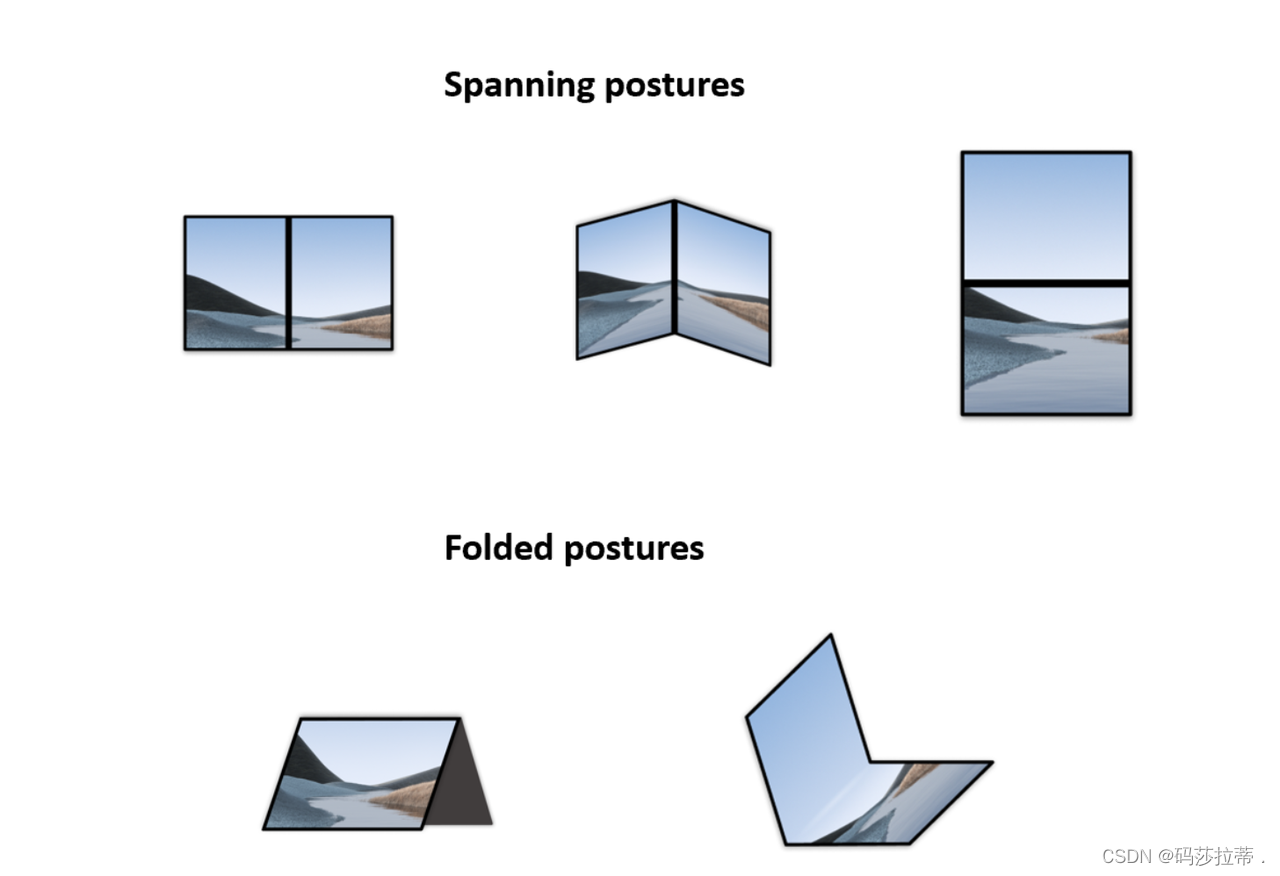
可折叠设备还支持不同的折叠状态。折叠状态可用来以不同的方式显示内容
折叠屏手机有哪些优势呢?
-
更大的屏幕空间
-
更高的灵活性
-
更好的移动性
-
更高的科技含量
随着人们对生活品质的越来越高,单屏幕手机已经难以满足部分需求,折叠屏手机也越来越受欢迎,能给用户带来与众不同的体验,Jetpack WindowManager和WindowSizeClass就是折叠屏手机开发所需要的技术,有了这些技术,可以帮我们更好的开发折叠屏。
二、Jetpack WindowManager的简单了解
WindowManager的功能,包括对响应式UI的支持、检测屏幕变化的回调适配器以及窗口测试API。但Jetpack WindowManager还提供了对新型设备的支持,如可折叠设备和Chrome OS等窗口环境,是一个现代的、以Kotlin为首的库,它支持新的设备形态因素,并提供 "类似AppCompat "的功能,以构建具有响应式用户界面的应用程序。
主要的API
新的WindowManager APIs包括以下内容。
WindowLayoutInfo:包含了一个窗口的显示特征,例如窗口是否包含了折叠或铰链
FoldingFeature:使你能够监测可折叠设备的折叠状态,以确定设备的姿势
WindowMetrics:提供当前窗口的指标或整体显示的指标
Jetpack WindowManager与安卓系统没有捆绑,允许更快地迭代API,以支持快速发展的设备市场,并使应用程序开发人员能够采用库的更新,而不必等待最新的安卓版本。
三、Jetpack WindowManager的简单使用
首先我们需要到官网先下载好Android studio,把开发环境搞好。
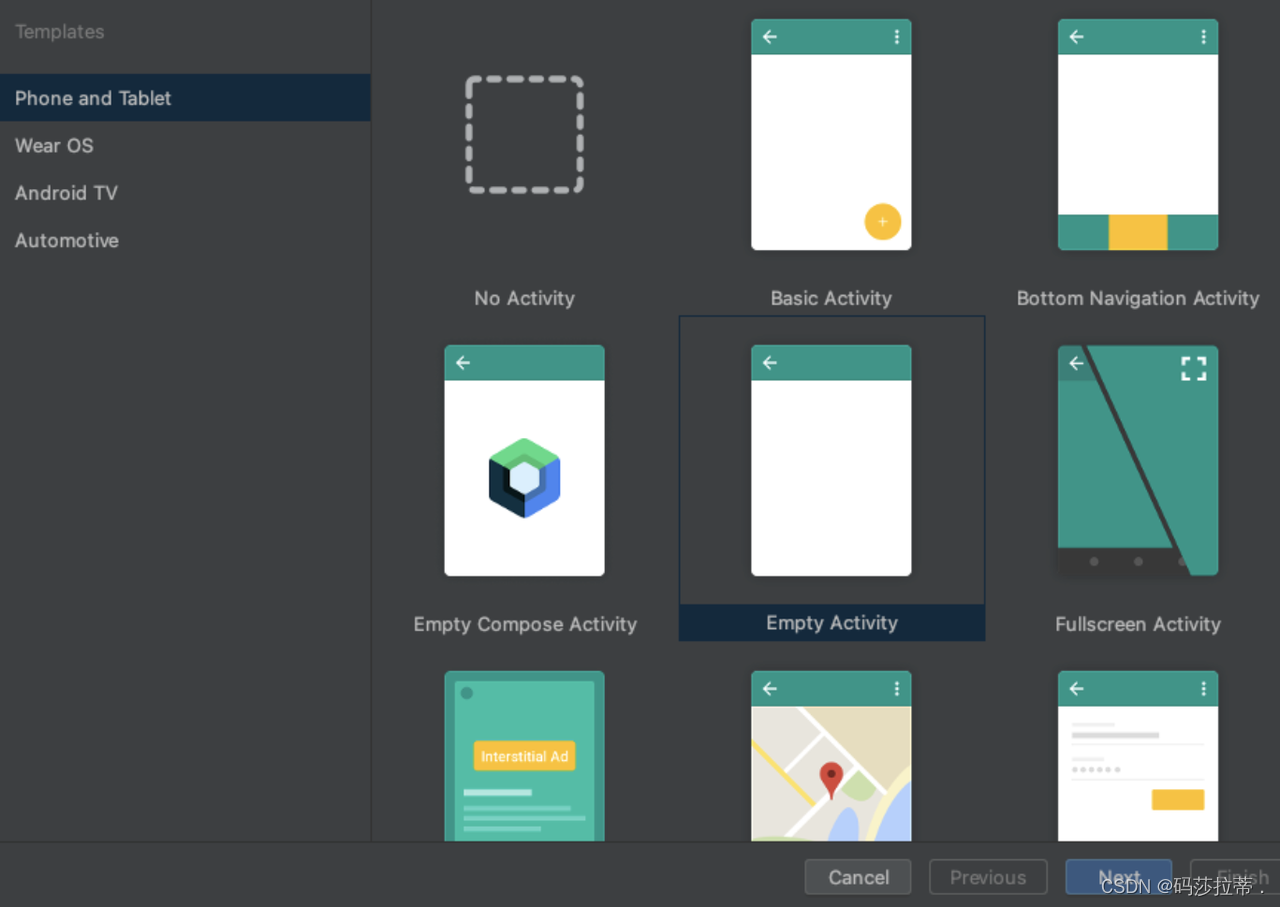
1)、创建一个新项目
加入部分依赖
dependencies {
    ext.windowmanager_version = "1.0.0"

    implementation "androidx.window:window:$windowmanager_version"
    androidTestImplementation "androidx.window:window-testing:$windowmanager_version"

    // Needed to use lifecycleScope to collect the WindowLayoutInfo flow
    implementation "androidx.lifecycle:lifecycle-runtime-ktx:2.4.0"
}
2)、使用 WindowManager
通过 WindowManager 的 WindowInfoTracker 接口访问窗口功能。
打开 MainActivity.kt 源文件并调用 WindowInfoTracker.getOrCreate(this@MainActivity),以初始化与当前 activity 相关联的 WindowInfoTracker 实例:
import androidx.window.layout.WindowInfoTracker

private lateinit var windowInfoTracker: WindowInfoTracker

override fun onCreate(savedInstanceState: Bundle?) {
        super.onCreate(savedInstanceState)

        windowInfoTracker = WindowInfoTracker.getOrCreate(this@MainActivity)
}
3)、设置应用界面
通过 Jetpack WindowManager,我们能够获取窗口指标、布局和显示配置的相关信息。让我们在主 activity 布局中显示这些信息(针对每项信息分别使用一个 TextView)。
为此,我们需要一个 ConstraintLayout,其中包含三个 TextView,并在屏幕上居中。
打开 activity_main.xml 文件,然后粘贴以下内容:
<?xml version="1.0" encoding="utf-8"?>
<androidx.constraintlayout.widget.ConstraintLayout xmlns:android="http://schemas.android.com/apk/res/android"
   xmlns:app="http://schemas.android.com/apk/res-auto"
   xmlns:tools="http://schemas.android.com/tools"
   android:id="@+id/constraint_layout"
   android:layout_width="match_parent"
   android:layout_height="match_parent"
   tools:context=".MainActivity">

    <TextView
        android:id="@+id/window_metrics"
        android:layout_width="wrap_content"
        android:layout_height="wrap_content"
        android:padding="20dp"
        tools:text="Window metrics"
        android:textSize="20sp"
        app:layout_constraintBottom_toTopOf="@+id/layout_change"
        app:layout_constraintStart_toStartOf="parent"
        app:layout_constraintTop_toTopOf="parent"
        app:layout_constraintVertical_chainStyle="packed" />

    <TextView
        android:id="@+id/layout_change"
        android:layout_width="wrap_content"
        android:layout_height="wrap_content"
        android:padding="20dp"
        tools:text="Layout change"
        android:textSize="20sp"
        app:layout_constrainedWidth="true"
        app:layout_constraintBottom_toTopOf="@+id/configuration_changed"
        app:layout_constraintStart_toStartOf="parent"
        app:layout_constraintTop_toBottomOf="@+id/window_metrics" />

    <TextView
        android:id="@+id/configuration_changed"
        android:layout_width="wrap_content"
        android:layout_height="wrap_content"
        android:padding="20dp"
        tools:text="Using one logic/physical display - unspanned"
        android:textSize="20sp"
        app:layout_constraintBottom_toBottomOf="parent"
        app:layout_constraintStart_toStartOf="parent"
        app:layout_constraintTop_toBottomOf="@+id/layout_change" />

</androidx.constraintlayout.widget.ConstraintLayout>
4)、直观呈现 WindowMetrics 信息
在 MainActivity 的 onCreate 方法中,我们将调用一个将在后续步骤中实现的函数。该函数将用于获取和显示 WindowMetrics 信息。首先,在 onCreate 方法中添加 obtainWindowMetrics() 调用:
MainActivity.kt
override fun onCreate(savedInstanceState: Bundle?) {
   super.onCreate(savedInstanceState)
   binding = ActivityMainBinding.inflate(layoutInflater)
   setContentView(binding.root)

   windowInfoTracker = WindowInfoTracker.getOrCreate(this@MainActivity)

   obtainWindowMetrics()
}
obtainWindowMetrics 方法:
import androidx.window.layout.WindowMetricsCalculator

private fun obtainWindowMetrics() {
   val wmc = WindowMetricsCalculator.getOrCreate()
   val currentWM = wmc.computeCurrentWindowMetrics(this).bounds.flattenToString()
   val maximumWM = wmc.computeMaximumWindowMetrics(this).bounds.flattenToString()
   binding.windowMetrics.text =
       "CurrentWindowMetrics: ${currentWM}\nMaximumWindowMetrics: ${maximumWM}"
}
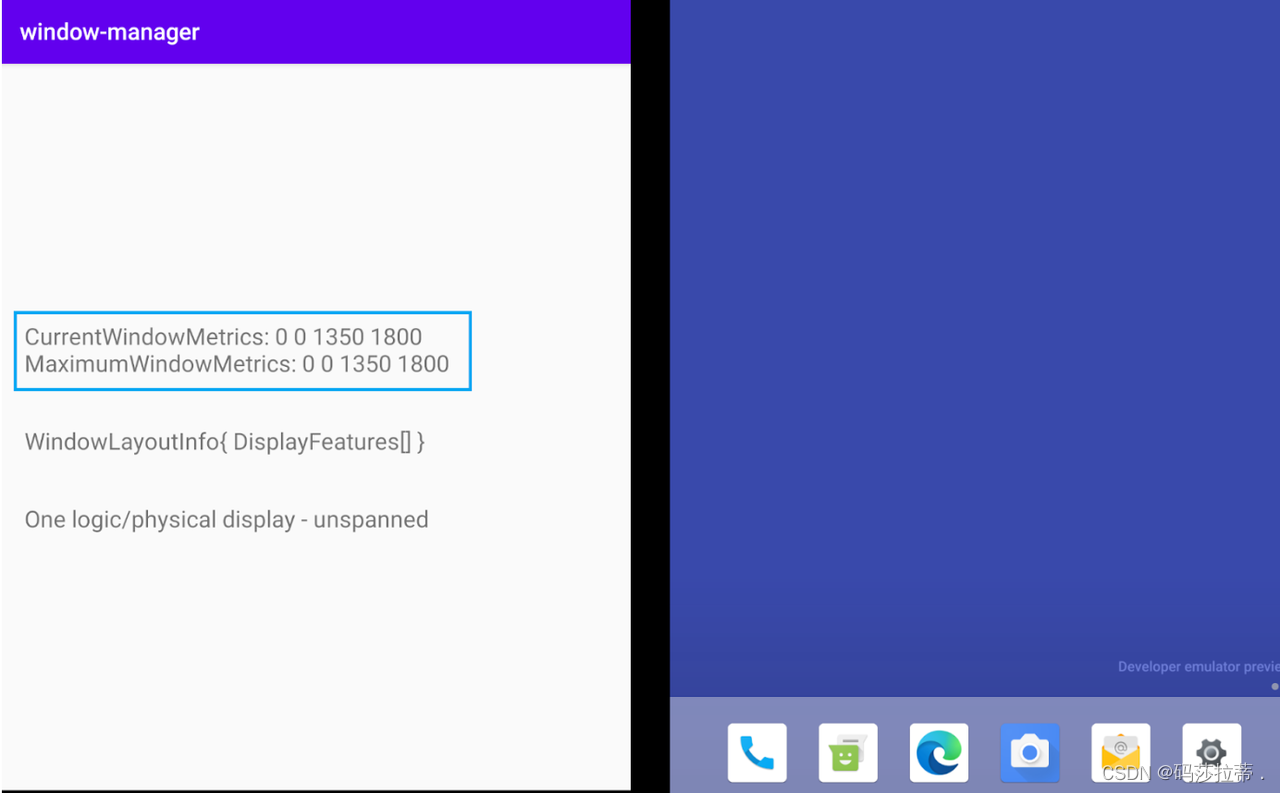
运行该应用。根据您使用的可折叠设备,将得到不同的结果。例如,在双屏设备模拟器中(如下图所示),您会得到与模拟器所镜像的设备尺寸对应的 CurrentWindowMetrics。还可以查看应用在单屏模式下运行时的指标:
当应用跨显示屏显示时,窗口指标会发生变化(如下图所示),因此它们现在反映的应用所用窗口区域比之前大:
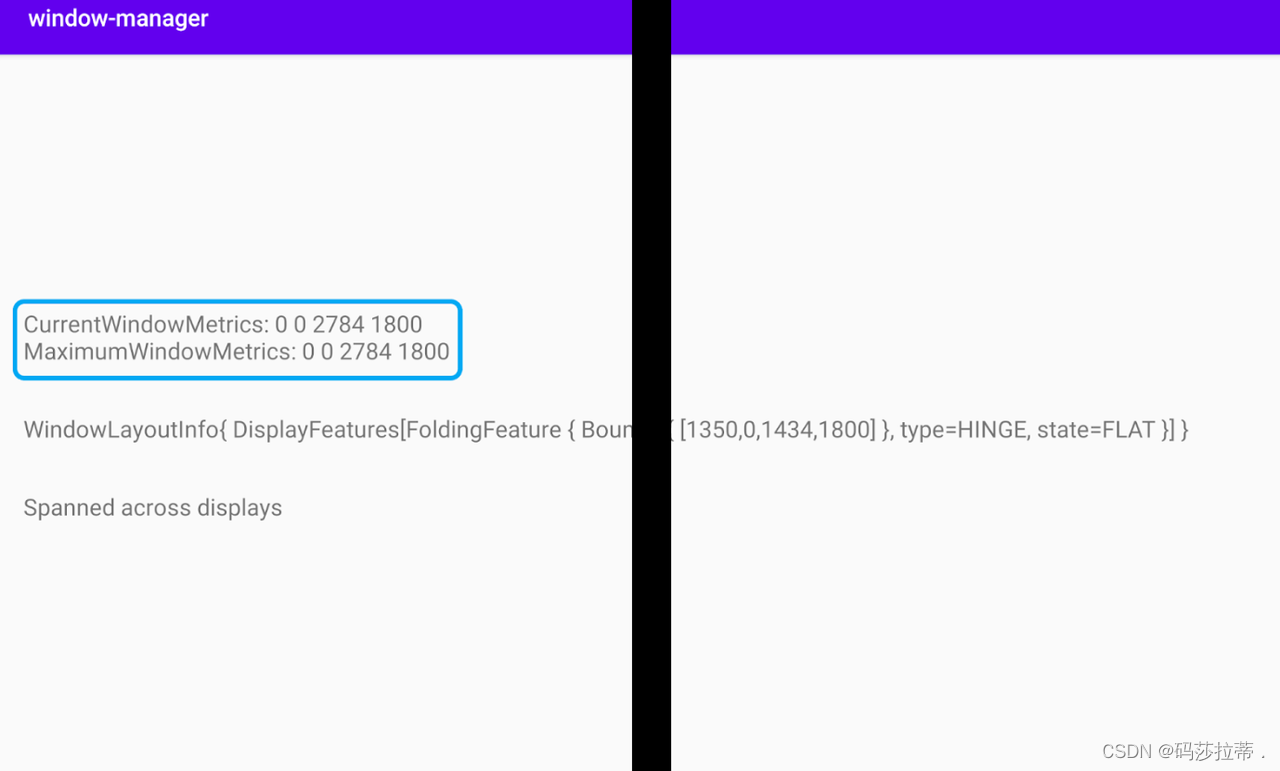
由于该应用在单屏和双屏设备上始终运行并占满整个显示区域,因此当前窗口指标和最大窗口指标的值相同。
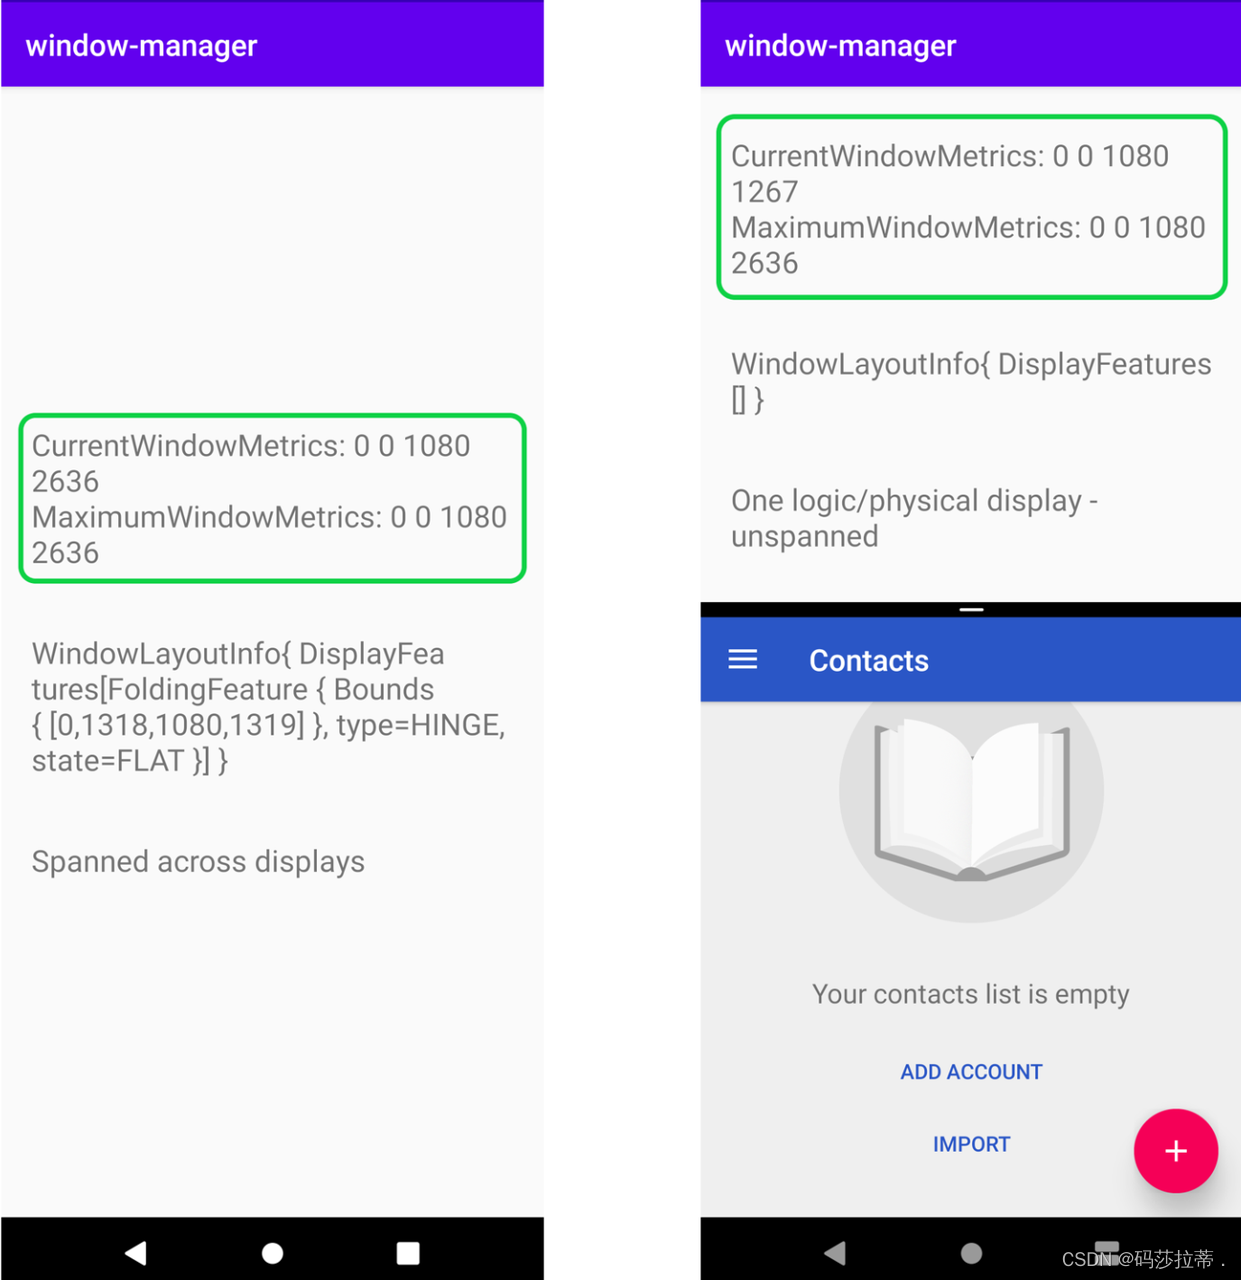
在有水平折叠边的可折叠设备模拟器中,这些值在应用跨整个物理显示屏运行时和在多窗口模式下运行时会有所不同:
5)、使用 Jetpack WindowManager 进行测试
在任何模拟器或设备上测试可折叠设备的折叠状态,对于测试如何将界面元素放置在 FoldingFeature 周围是非常有用的。WindowManger 附带了一个非常实用的工件,以用于进行插桩测试。我们来看看该工件的使用方式。应用 build.gradle 文件中,我们不仅添加了主 WindowManager 依赖项,还添加了测试工件:androidx.window:window-testing
window-testing 工件附带有一个名为 WindowLayoutInfoPublisherRule 的实用的新 TestRule,它可以帮助您使用一系列 WindowLayoutInfo 值进行测试。借助 WindowLayoutInfoPublisherRule,您可以按需推送不同的 WindowLayoutInfo 值。
为了使用它,并在此基础上创建一个示例以帮助您使用此新工件来测试界面,我们将更新由 Android Studio 模板创建的测试类。将 ExampleInstrumentedTest 类中的所有代码替换为以下代码:
import androidx.test.ext.junit.rules.ActivityScenarioRule
import androidx.test.ext.junit.runners.AndroidJUnit4
import androidx.window.testing.layout.WindowLayoutInfoPublisherRule
import org.junit.Rule
import org.junit.rules.RuleChain
import org.junit.rules.TestRule
import org.junit.runner.RunWith

@RunWith(AndroidJUnit4::class)
class MainActivityTest {
    private val activityRule = ActivityScenarioRule(MainActivity::class.java)
    private val publisherRule = WindowLayoutInfoPublisherRule()

    @get:Rule
    val testRule: TestRule

    init {
        testRule = RuleChain.outerRule(publisherRule).around(activityRule)
    }
}
我们来创建一项测试,用于检查相应实现是否正确无误。创建一项名为 testText_is_left_of_Vertical_FoldingFeature 的测试:
@Test
fun testText_is_left_of_Vertical_FoldingFeature() {
    activityRule.scenario.onActivity { activity ->
        val hinge = FoldingFeature(
            activity = activity,
            state = FoldingFeature.State.FLAT,
            orientation = FoldingFeature.Orientation.VERTICAL,
            size = 2
        )
        val expected = TestWindowLayoutInfo(listOf(hinge))
        publisherRule.overrideWindowLayoutInfo(expected)
    }
    onView(withId(R.id.layout_change)).check(
        PositionAssertions.isCompletelyLeftOf(withId(R.id.folding_feature))
    )
}
我们可以在设备或模拟器上运行测试,以检查应用的行为是否符合预期。这个测试无需使用可折叠设备或模拟器即可运行。
四、总结
可折叠和双屏设备不再是实验性的或未来主义的--大的显示区域和额外的姿势具有被证实的用户价值,而且现在有更多的设备可以供你的用户使用。可折叠设备和双屏设备代表了智能手机的自然进化。对于安卓开发者来说,他们提供了进入一个正在增长的高端市场的机会,这也得益于设备制造商的重新关注,而我们使用Jetpack WindowManager和WindowSizeClass来促进可折叠手机的发展,Google带来的开发工具真的越来越高效便捷。
想要进一步了解谷歌最新开发产品和工具的小伙伴,我给大家推荐CSDN专题页上的专题回放视频。https://marketing.csdn.net/p/8b1b4b3f5f0fe4c3cdf1c2d5e42a05c3
此外还可以前往 Google 开发者在线课程进一步巩固知识点,提高自己的开发技能。https://developers.google.cn/learn/pathways?hl=zh-cn&utm_source=csdn
本文来自互联网用户投稿,该文观点仅代表作者本人,不代表本站立场。本站仅提供信息存储空间服务,不拥有所有权,不承担相关法律责任。 如若内容造成侵权/违法违规/事实不符,请联系我的编程经验分享网邮箱:veading@qq.com进行投诉反馈,一经查实,立即删除!