【无标题】从0到1 搭建一个vue3+Django项目
目录
基础环境版本:
python: 3.9.9
pip: 23.3.1
django: 4.2.7
node: 18.14.0
npm: 9.3.1
vue: 3.3.8
vite: 5.0.0
工具: vs code
一、后端项目python django
- 创建项目:
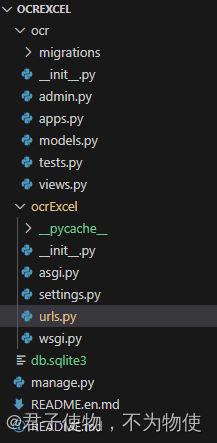
django-admin startproject corExcel- 进入文件夹中 创建App:
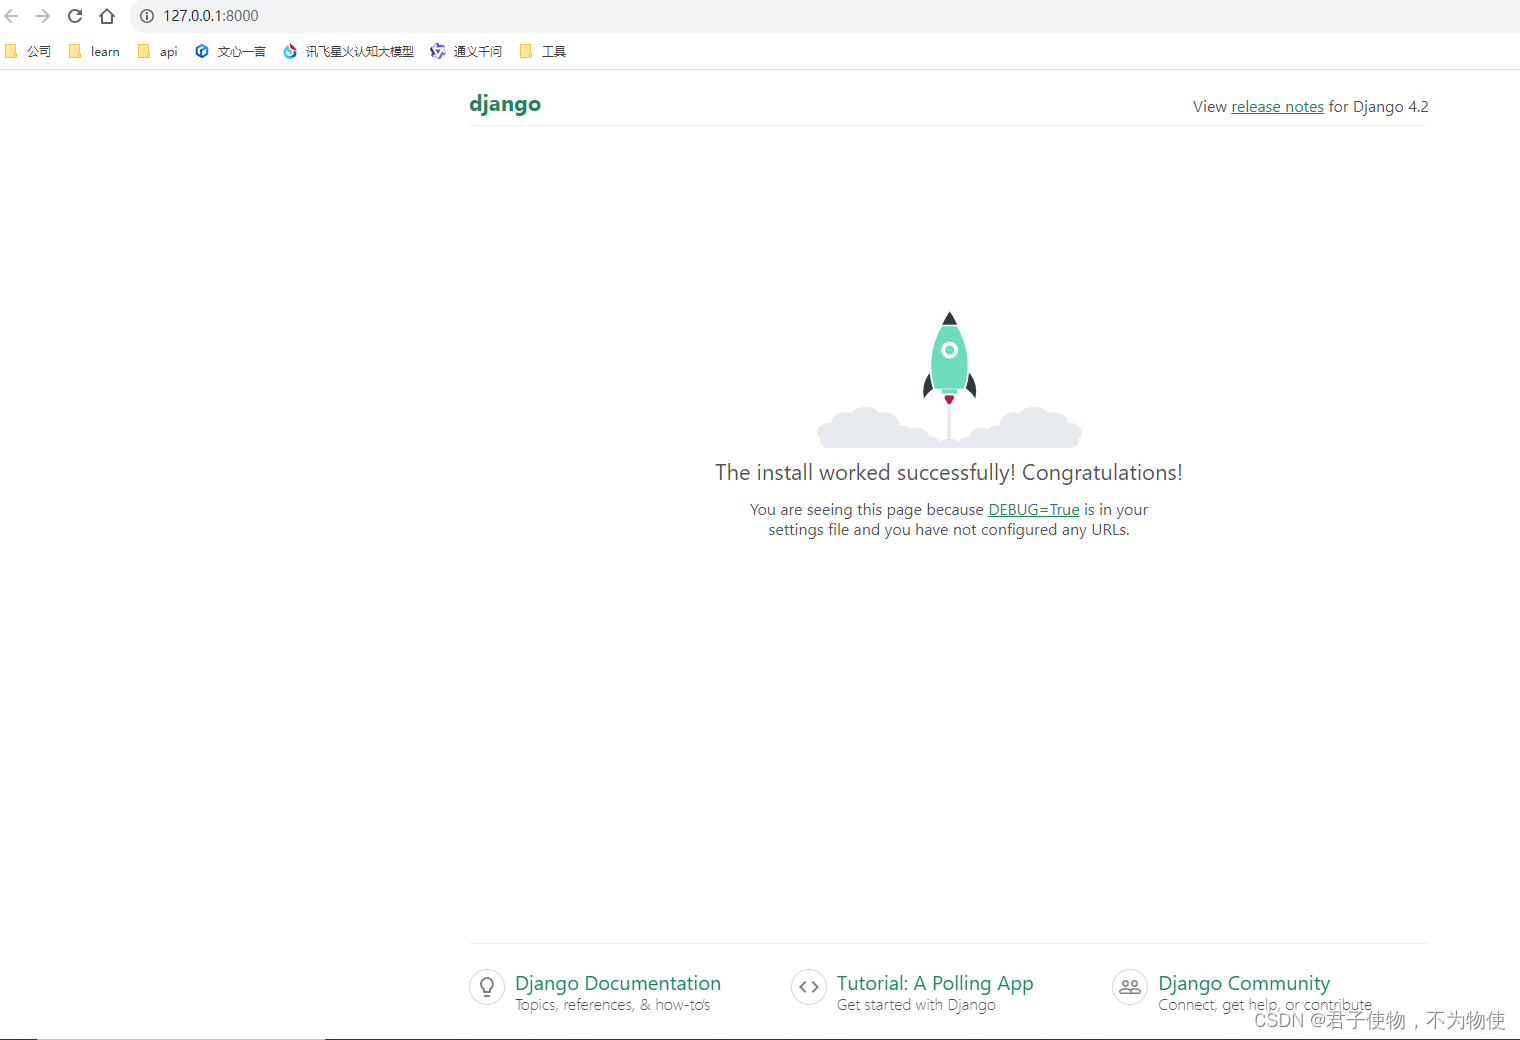
python manage.py startapp ocr- 运行:python manage.py runserver
二、前端项目vite+vue3
- 根据需求创建项目
npm create vite@latest ocr-excel-ui --template vue
- 进入文件夹安装依赖:npm install
- 启动:npm run dev
以下已用code打开项目
三、后端配置
3.1 将路由指向app
(此处app指ocr,使用python manage.py startapp ocr 创建 下不提示)
ocrEcxel/urls.py
from django.contrib import admin
from django.urls import path, include

urlpatterns = [
    path('admin/', admin.site.urls),
    path("api/", include("ocr.urls")),	# api为前端的接口路径
]
3.2 app下创建urls.py, 写入路由
此时app中并没有urls.py 所以需要新建,再写入代码
ocr/urls.py
from django.urls import path

from . import views

urlpatterns = [
    path("test", views.test, name="index"),	# test路径 对应views中的test函数,看下一步
]
3.3 views写入test函数
ocr/views.py
from django.shortcuts import render
from django.http import HttpResponse


# Create your views here.
def test(request):
    return HttpResponse("Test, HelloWorld.")	# 测试接口,这里直接返回一段话
3.4 启动服务,访问路由
python manage.py runserver

http://127.0.0.1:8000/api/test
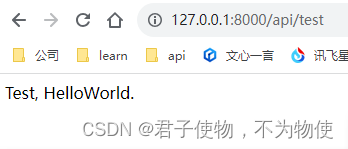
到此后端接口基本通了,接下来配置前端项目
四、前端配置
4.1 安装一些工具库及创建文件
4.1.1 安装需要用的三方库
npm install element-plus 	# UI
npm install vue-router 		# 路由
npm install axios			# axios
npm install sass			# sass

#或者
npm install element-plus vue-router axios sass

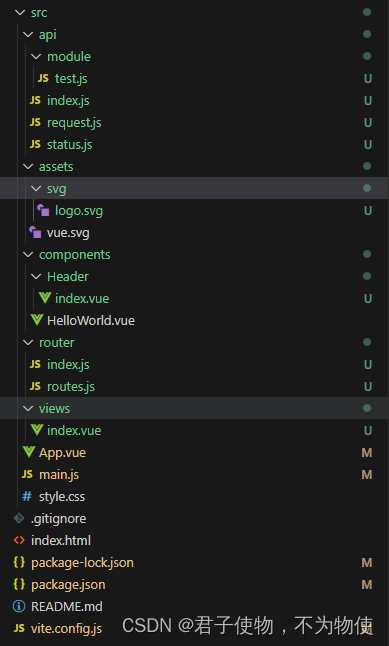
4.1.2 创建文件
> src
	> api			// 接口
		- index.js
		- request.js
		- status.js
		> module
			- test.js
	> assets		// 资源
		> svg
	> components	// 组件
		> Header
			- index.js
	> router		// 路由
		- index.js
		- routes.js
	> views			// 页面
		- index.vue
如图
4.2 配置、写代码
4.2.1 vite.config.js 参考
import { defineConfig } from 'vite'
import vue from '@vitejs/plugin-vue'
import path from 'path'

// https://vitejs.dev/config/
export default defineConfig({
  plugins: [vue()],

  base: './',   // 在生产中服务时的基本公共路径
  publicDir: 'public',  // 静态资源服务的文件夹, 默认"public"
  resolve: {
    alias: {
      "@": path.resolve(__dirname, './src'), // 这里是将src目录配置别名为 @ 方便在项目中导入src目录下的文件
      "api": path.resolve(__dirname, './src/api'), // 这里是将src/api目录配置别名为 api 方便在项目中引入接口
    }
  },

  // 本地运行配置,及反向代理配置
  server: {
    host: '0.0.0.0', // 指定服务器主机名
    port: 3000, // 指定服务器端口
    open: true, // 在服务器启动时自动在浏览器中打开应用程序
    strictPort: false, // 设为 false 时,若端口已被占用则会尝试下一个可用端口,而不是直接退出
    https: false, // 是否开启 https
    cors: true, // 为开发服务器配置 CORS。默认启用并允许任何源
    proxy: { // 为开发服务器配置自定义代理规则
      // 选项写法
      '/api': {
        target: 'http://127.0.0.1:8000', //代理接口
        changeOrigin: true,
        // rewrite: (path) => path.replace(/^\/api/, '')  // 重写路径
      }
    }
  }
})
4.2.2 src/main.js
import { createApp } from 'vue'
import './style.css'
import App from './App.vue'

import ElementPlus from 'element-plus'
import 'element-plus/dist/index.css'
import zhCn from 'element-plus/es/locale/lang/zh-cn'

import router from './router'


const app = createApp(App)
app.use(ElementPlus, {local: zhCn}) // element-plus 国际化

app.use(router) // 路由

app.mount('#app')
4.2.3 请求封装 参考
src/api/request.js
import axios from 'axios';
import { showMessage } from "./status";   // 引入状态码文件
import { ElMessage } from 'element-plus'  // 引入el 提示框,这个项目里用什么组件库这里引什么

// 设置接口超时时间
axios.defaults.timeout = 60000;

//http request 拦截器
axios.interceptors.request.use(
    config => {
        // 配置请求头
        config.headers = {
            //'Content-Type':'application/x-www-form-urlencoded',   // 传参方式表单
            'Content-Type': 'application/json;charset=UTF-8',        // 传参方式json
            'token': '80c483d59ca86ad0393cf8a98416e2a1'              // 这里自定义配置,这里传的是token
        };
        return config;
    },
    error => {
        return Promise.reject(error);
    }
);

//http response 拦截器
axios.interceptors.response.use(
    response => {
        return response;
    },
    error => {
        const { response } = error;
        if (response) {
            // 请求已发出,但是不在2xx的范围
            let message = showMessage(response.status);           // 传入响应码,匹配响应码对应信息
            ElMessage.warning(message);
            return Promise.reject(response.data);
        } else {
            ElMessage.warning('网络连接异常,请稍后再试!');
        }
    }
);

// 封装 GET POST 请求并导出
export default function request(url = '', params = {}, type = 'POST') {
    //设置 url params type 的默认值
    return new Promise((resolve, reject) => {
        let promise
        if (type.toUpperCase() === 'GET') {
            promise = axios({
                url,
                params
            })
        } else if (type.toUpperCase() === 'POST') {
            promise = axios({
                method: 'POST',
                url,
                data: params
            })
        }
        //处理返回
        promise.then(res => {
            resolve(res)
        }).catch(err => {
            reject(err)
        })
    })
}
src/api/status.js
export const showMessage = (status) => {
    let message = "";
    switch (status) {
        case 400:
            message = "请求错误(400)";
            break;
        case 401:
            message = "未授权,请重新登录(401)";
            break;
        case 403:
            message = "拒绝访问(403)";
            break;
        case 404:
            message = "请求出错(404)";
            break;
        case 408:
            message = "请求超时(408)";
            break;
        case 500:
            message = "服务器错误(500)";
            break;
        case 501:
            message = "服务未实现(501)";
            break;
        case 502:
            message = "网络错误(502)";
            break;
        case 503:
            message = "服务不可用(503)";
            break;
        case 504:
            message = "网络超时(504)";
            break;
        case 505:
            message = "HTTP版本不受支持(505)";
            break;
        default:
            message = `连接出错(${status})!`;
    }
    return `${message},请检查网络或联系管理员!`;
};
src/api/index.js
import test from './module/test.js'

export default {
    ...test,
}
src/api/module/test.js
import request from 'api/request'

export default {
    /**
     * Test
     */
    async testApi(params) {
      let url = `/api/test`;
      return await request(url, params, 'GET');
    },
}
4.2.4 页面菜单
src/components/Header/index.vue
<template>
    <el-menu :default-active="activeIndex" class="el-menu-demo" mode="horizontal" :ellipsis="false" @select="handleSelect">
        <el-menu-item index="/">
            <img style="width: 100px" src="@/assets/svg/logo.svg" alt="Element logo" />
        </el-menu-item>
        <div class="flex-grow" />
        <el-menu-item index="/about">Processing Center</el-menu-item>
        <el-sub-menu index="/other">
            <template #title>Workspace</template>
            <el-menu-item index="2-1">item one</el-menu-item>
            <el-menu-item index="2-2">item two</el-menu-item>
            <el-menu-item index="2-3">item three</el-menu-item>
            <el-sub-menu index="2-4">
                <template #title>item four</template>
                <el-menu-item index="2-4-1">item one</el-menu-item>
                <el-menu-item index="2-4-2">item two</el-menu-item>
                <el-menu-item index="2-4-3">item three</el-menu-item>
            </el-sub-menu>
        </el-sub-menu>
    </el-menu>
</template>

<script lang="ts" setup>
import { ref } from 'vue'
import { useRouter } from 'vue-router'

let router = useRouter();

const activeIndex = ref('/') // 首页
const handleSelect = (key: string, keyPath: string[]) => {
    router.push(keyPath[0])	// 点击跳转
}
</script>

<style>
.flex-grow {
    flex-grow: 1;
}
</style>
4.2.5 页面
src/views/index.vue
<template>
    <el-button @click="handleClick">
        请求test
    </el-button>
</template>

<script setup>
import api from 'api/index';

let handleClick = async () => {
    let res = await api.testApi();
    console.log(res);
}
</script>
4.2.6 路由 参考
src/router/index.js
// 导入router所需的方法
import { createRouter, createWebHistory } from 'vue-router'

// 导入路由页面的配置
import routes from './routes'

// 路由参数配置
const router = createRouter({
    // 使用hash(createWebHashHistory)模式,(createWebHistory是HTML5历史模式,支持SEO)
    history: createWebHistory(),
    routes: routes,
})

// 全局前置守卫,这里可以加入用户登录判断
router.beforeEach((to, from, next) => {
    // 继续前进 next()
    // 返回 false 以取消导航
    next()
})

// 全局后置钩子,这里可以加入改变页面标题等操作
router.afterEach((to, from) => {
    const _title = to.meta.title
    if (_title) {
        window.document.title = _title
    }
})

// 导出默认值
export default router
src/router/routes
const routes = [
    {
        path: '/',
        name: 'index',
        title: '首页',
        component: () => import('@/views/index.vue'), //.vue不能省略
    }
]
export default routes
4.2.7 logo
logo
保存这个图标 放入src/assets/svg
4.2.8 App.vue
src/App.vue
<script setup>
import Header from '@/components/Header/index.vue'
</script>

<template>
  <Header></Header>
  <router-view />
</template>

<style scoped>
</style>
4.3 启动前端项目、测试接口联通性
npm run dev

浏览器打开,触发请求,成功返回

五、问题
5.1 跨域
方法1:vite.config.js配置前端代理
 // 本地运行配置,及反向代理配置
  server: {
    host: '0.0.0.0', // 指定服务器主机名
    port: 3000, // 指定服务器端口
    open: true, // 在服务器启动时自动在浏览器中打开应用程序
    strictPort: false, // 设为 false 时,若端口已被占用则会尝试下一个可用端口,而不是直接退出
    https: false, // 是否开启 https
    cors: true, // 为开发服务器配置 CORS。默认启用并允许任何源
    proxy: { // 为开发服务器配置自定义代理规则
      // 选项写法
      '/api': {
        target: 'http://127.0.0.1:8000', //代理接口
        changeOrigin: true,
        // rewrite: (path) => path.replace(/^\/api/, '')  // 重写路径
      }
    }
  }
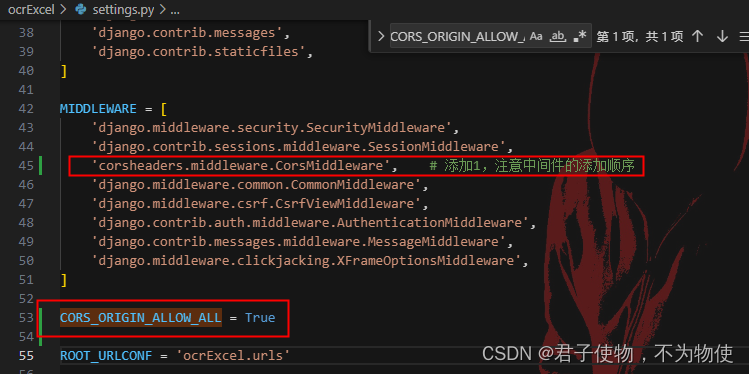
方法2:后端解除限制
pip install django-cors-headers
MIDDLEWARE = [
    'django.middleware.security.SecurityMiddleware',
    'django.contrib.sessions.middleware.SessionMiddleware',
    'corsheaders.middleware.CorsMiddleware',    # 添加1,注意中间件的添加顺序
    'django.middleware.common.CommonMiddleware',
    'django.middleware.csrf.CsrfViewMiddleware',
    'django.contrib.auth.middleware.AuthenticationMiddleware',
    'django.contrib.messages.middleware.MessageMiddleware',
    'django.middleware.clickjacking.XFrameOptionsMiddleware',
]
CORS_ORIGIN_ALLOW_ALL = True
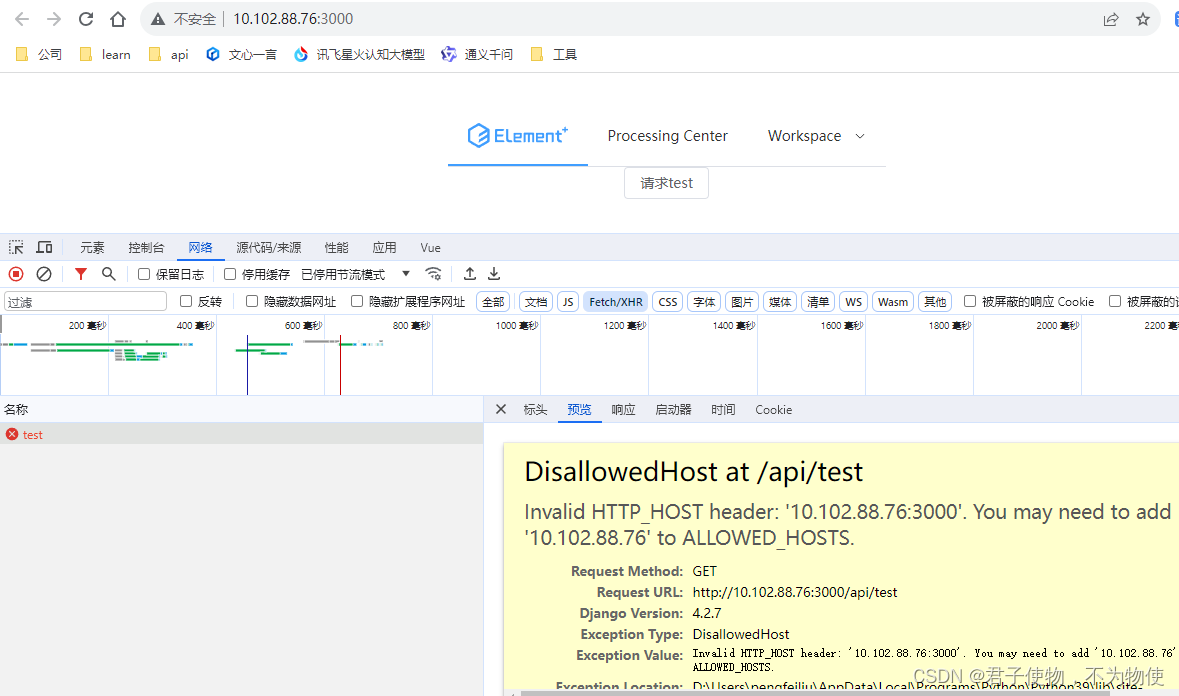
5.2 不允许访问
DisallowedHost at /api/test
Invalid HTTP_HOST header: ‘10.102.88.76:3000’. You may need to add ‘10.102.88.76’ to ALLOWED_HOSTS.
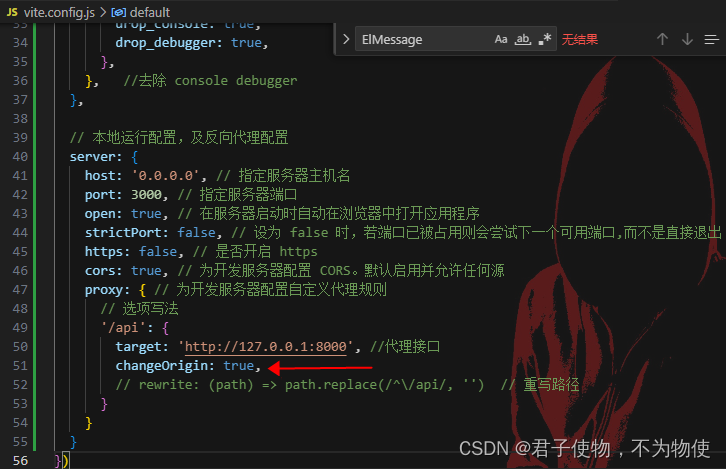
解决:
方法1:在前端代理
vite.config.js中加上配置:changeOrigin: true,
方法2:在后端加入白名单
setting.py中的 ALLOWED_HOSTS数组中 加上自己IP或 ‘*’ (全部允许)

六、vue项目部署到Django
6.1 前端打包
npm run build
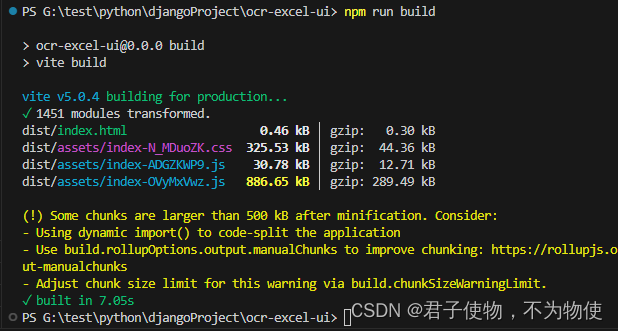
此时在项目中出现了打包后的dist文件夹
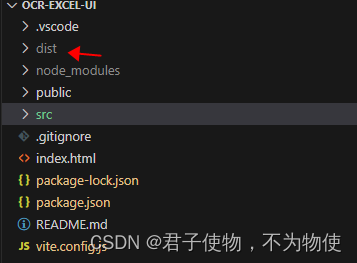
6.2 将打包好的文件夹放到django项目中
6.2.1 新建一个templates文件夹,放入前端打包文件
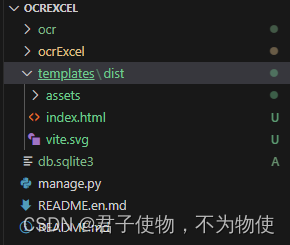
6.3 修改ocrExcel/urls.py
from django.contrib import admin
from django.urls import path, include
from django.views.generic import TemplateView

urlpatterns = [
    path('admin/', admin.site.urls),
    path("api/", include("ocr.urls")),	# api为前端的接口路径
    path('', TemplateView.as_view(template_name="index.html")), #
]
6.4 修改setting.py
6.4.1 找到TEMPLATES,在DIRS中加入os.path.join(BASE_DIR, 'templates/dist')
如下
TEMPLATES = [
    {
        'BACKEND': 'django.template.backends.django.DjangoTemplates',
        'DIRS': [os.path.join(BASE_DIR, 'templates/dist')],
        'APP_DIRS': True,
        'OPTIONS': {
            'context_processors': [
                'django.template.context_processors.debug',
                'django.template.context_processors.request',
                'django.contrib.auth.context_processors.auth',
                'django.contrib.messages.context_processors.messages',
            ],
        },
    },
]
6.4.2 找到STATIC_URL,修改
STATIC_URL = 'static/' 修改为: STATIC_URL = 'assets/'
再加个配置,总体如下
STATIC_URL = 'assets/' # 注意静态文件的路径
STATICFILES_DIRS = [
    os.path.join(BASE_DIR, "templates/dist/assets"),    # 添加2,注意静态文件的路径
]
6.5 启动Django
python manage.py runserver
访问:出现了页面

发送一个请求试试:

成功了,顺利返回
就这样结束了吗?还没有,还有个坑,这时候我们点击菜单的“Processing Center”,到 http://127.0.0.1:8000/about
可以正常跳转过来
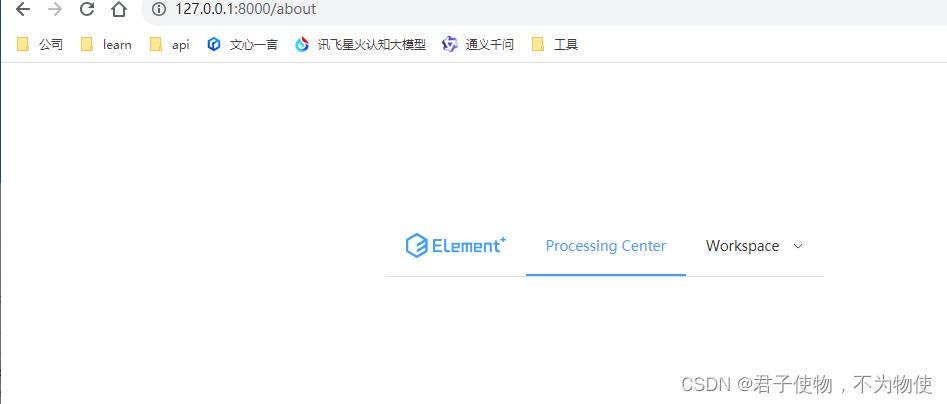
但是,如果这时候刷新页面会出现什么呢?
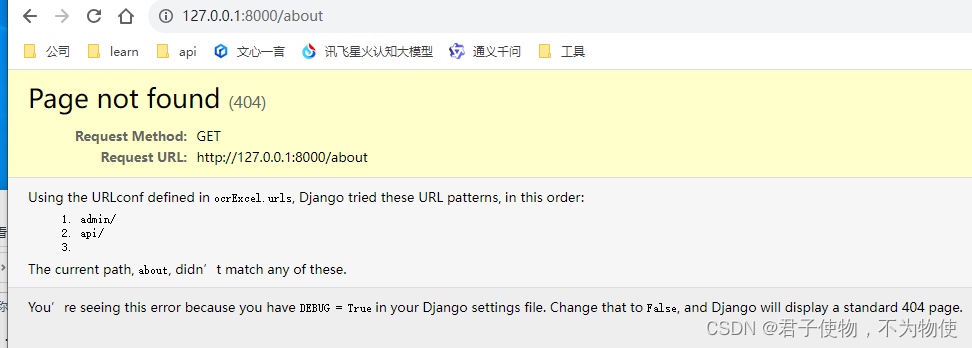
怎么一刷新页面就404了
因为vue是单页面应用,这时候在/about下刷新页面,django会认为这是一个后端请求,而urls.py中又找不到相应的路由,就报了404
解决方式就是修改一下6.3步的urls.py 文件
"""
from django.contrib import admin
from django.urls import path, include, re_path
from django.views.generic import TemplateView

urlpatterns = [
    path('admin/', admin.site.urls),
    path("api/", include("ocr.urls")),	# api为前端的接口路径
    re_path("", TemplateView.as_view(template_name="index.html")),	# vue是单页面应用,将其余所有路由转到vue
]
将所有非admin、api开头的请求都转到vue,就可以自由刷新页面了,这样也存在一个问题,就是后端没有404的情况了,这就需要交给前端处理。创建一个404的页面,前端没有路由时重定向到404页面。
结语
就先到这里吧,架子搭好,开始写代码了,后面遇到什么问题再更新
本文来自互联网用户投稿,该文观点仅代表作者本人,不代表本站立场。本站仅提供信息存储空间服务,不拥有所有权,不承担相关法律责任。 如若内容造成侵权/违法违规/事实不符,请联系我的编程经验分享网邮箱:veading@qq.com进行投诉反馈,一经查实,立即删除!
