SpringBoot配置Swagger2与Swagger3
swagger是什么?
在平时开发中,一个好的API文档可以减少大量的沟通成本,还可以帮助新加入项目的同事快速上手业务。大家都知道平时开发时,接口变化总是很多,有了变化就要去维护,也是一件比较头大的事情。尤其是现在前后端分离情况,更容易造成文档和代码不一致。这时,我们可以通过Swagger2来使接口规范,方便维护。
Swagger 是一款自动生成在线文档 + 接口调试的工具。在 WEB 开发中不可否认的是我们需要给客户端提供 API 接口,这个时候需要借助 postman、rap 等工具 进行调试,以便于接口能正常交付给客户端人员,用过其它工具的应该知道一个 POST 请求一堆参数是非常枯燥且烦人的事情,而 swagger 就是让你摆脱这种束缚感....
Swagger是一款RESTFUL接口的文档在线自动生成+功能测试功能软件。Swagger是一个规范和完整的框架,用于生成、描述、调用和可视化RESTful风格的Web服务。目标是使客户端和文件系统作为服务器以同样的速度来更新文件的方法,参数和模型紧密集成到服务器。
这个解释简单点来讲就是说,swagger是一款可以根据resutful风格生成的生成的接口开发文档,并且支持做测试的一款中间软件。
为什么要使用swaager?
对于后端开发人员来说
-
不用再手写WiKi接口拼大量的参数,避免手写错误
-
对代码侵入性低,采用全注解的方式,开发简单
-
方法参数名修改、增加、减少参数都可以直接生效,不用手动维护
-
缺点:增加了开发成本,写接口还得再写一套参数配置
对于前端开发来说
-
后端只需要定义好接口,会自动生成文档,接口功能、参数一目了然
-
联调方便,如果出问题,直接测试接口,实时检查参数和返回值,就可以快速定位是前端还是后端的问题
对于测试
-
对于某些没有前端界面UI的功能,可以用它来测试接口
-
操作简单,不用了解具体代码就可以操作
-
操作简单,不用了解具体代码就可以操作
Swagger说明
Swagger是一款Restful接口的文档在线自动生成和功能测试功能软件。 Swagger是一个规范和完整的框架,用于生成、描述、调用和可视化Restful风格的Web服务。总体目标是使客户端和文件系统作为服务器以同样的速度来更新文件的方法,参数和模型紧密集成到服务器端的代码,允许API来始终保持同步。
?
springboot 集成 Swagger2
1.?新建springboot工程,编写pom.xml
 <!-- https://mvnrepository.com/artifact/io.springfox/springfox-swagger2 -->
        <dependency>
            <groupId>io.springfox</groupId>
            <artifactId>springfox-swagger2</artifactId>
            <version>2.9.2</version>
        </dependency>
        <!-- https://mvnrepository.com/artifact/io.springfox/springfox-swagger-ui -->
        <dependency>
            <groupId>io.springfox</groupId>
            <artifactId>springfox-swagger-ui</artifactId>
            <version>2.9.2</version>
        </dependency>
2.编写controller
package com.ly.controller;

import org.springframework.web.bind.annotation.GetMapping;
import org.springframework.web.bind.annotation.RestController;

@RestController
public class TCon {

    @GetMapping("/hello")
    public String test(){
        return "hello";
    }
}
3.编写配置
?记得设置 端口号 server.port=8001
package com.ly.config;

import org.springframework.context.annotation.Configuration;
import org.springframework.web.servlet.config.annotation.ResourceHandlerRegistry;
import org.springframework.web.servlet.config.annotation.WebMvcConfigurer;
import springfox.documentation.swagger2.annotations.EnableSwagger2;

@Configuration
@EnableSwagger2  //开启swagger2
public class SwaggerConfig  implements WebMvcConfigurer {

    @Override
    public void addResourceHandlers(ResourceHandlerRegistry registry) {
        registry.addResourceHandler("/**").addResourceLocations("classpath:/static/");
        registry.addResourceHandler("swagger-ui.html")
                .addResourceLocations("classpath:/META-INF/resources/");
        registry.addResourceHandler("/webjars/**")
                .addResourceLocations("classpath:/META-INF/resources/webjars/");
    }
}
4.编写启动类
package com.ly;


import org.springframework.boot.SpringApplication;
import org.springframework.boot.autoconfigure.SpringBootApplication;
import org.springframework.web.servlet.config.annotation.EnableWebMvc;
import springfox.documentation.swagger2.annotations.EnableSwagger2;

@SpringBootApplication
@EnableWebMvc   //增加该注解 开启
public class VueBootApp {
    public static void main(String[] args) {
        SpringApplication.run(VueBootApp.class,args);
    }
}
5.测试
由于上面的图片中的信息 有些事官方的,如果想改为自己公司的,则需要编写配置类
配置?Swagger的bean 实例 Docket
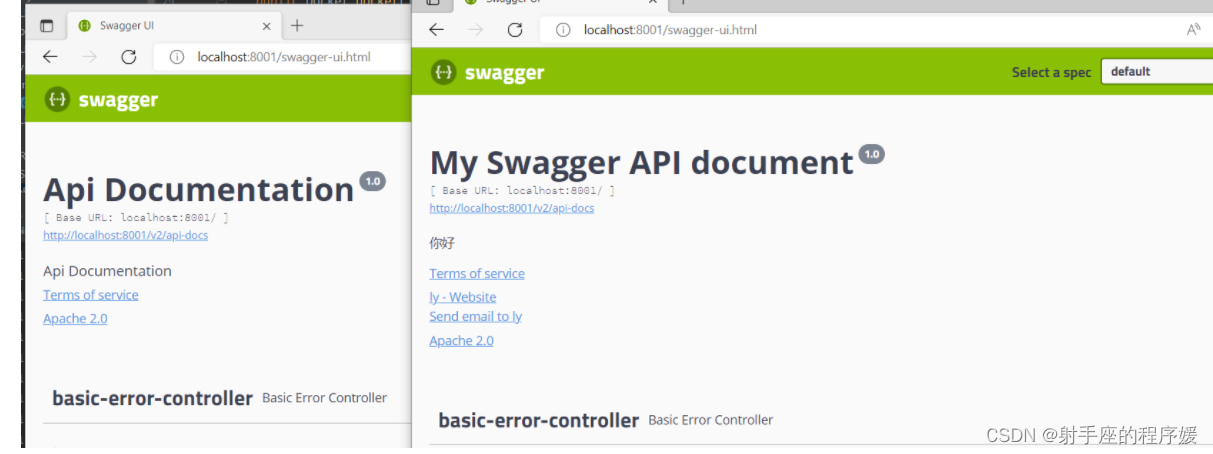
package com.ly.config; import org.springframework.context.annotation.Bean; import org.springframework.context.annotation.Configuration; import org.springframework.web.servlet.config.annotation.ResourceHandlerRegistry; import org.springframework.web.servlet.config.annotation.WebMvcConfigurer; import springfox.documentation.service.ApiInfo; import springfox.documentation.service.Contact; import springfox.documentation.spi.DocumentationType; import springfox.documentation.spring.web.plugins.Docket; import springfox.documentation.swagger2.annotations.EnableSwagger2; import java.util.ArrayList; @Configuration @EnableSwagger2 //开启swagger2 public class SwaggerConfig implements WebMvcConfigurer { @Override public void addResourceHandlers(ResourceHandlerRegistry registry) { registry.addResourceHandler("/**").addResourceLocations("classpath:/static/"); registry.addResourceHandler("swagger-ui.html") .addResourceLocations("classpath:/META-INF/resources/"); registry.addResourceHandler("/webjars/**") .addResourceLocations("classpath:/META-INF/resources/webjars/"); } @Bean public Docket docket(){ return new Docket(DocumentationType.SWAGGER_2) .apiInfo(apiInfo()) //.enable(false) //是否启动swagger ,如果为false 则不可以使用 swagger .select() .apis(RequestHandlerSelectors.basePackage("com.ly.controller")) //指定扫描的包 //.paths(PathSelectors.ant("/api/**")) //路径 过滤 .build(); } private ApiInfo apiInfo(){ return new ApiInfo("My Swagger API document", "你好", "1.0", "http://www.baidu.com", new Contact("ly", "http://www.baidu.com", "aaa@qq.com"), //作者信息 "Apache 2.0", "http://www.apache.org/licenses/LICENSE-2.0", new ArrayList()); } }再次运行localhost:8001/swagger-ui.html ?

实体类也可以进行配置
import io.swagger.annotations.ApiModel;
import io.swagger.annotations.ApiModelProperty;
import lombok.AllArgsConstructor;
import lombok.Data;
import lombok.NoArgsConstructor;
import java.io.Serializable;
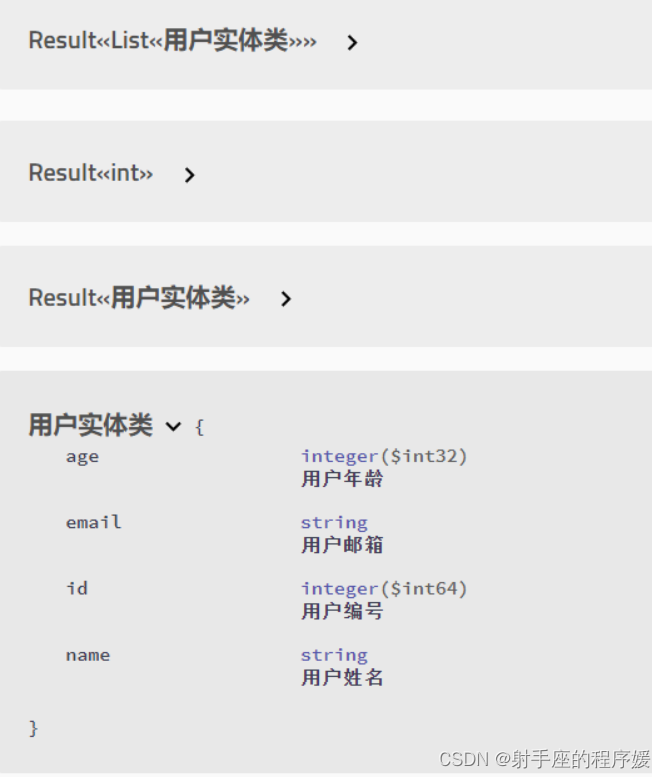
@ApiModel("用户实体类")
@Data
@NoArgsConstructor
@AllArgsConstructor
public class User implements Serializable {
@ApiModelProperty("用户编号")
private Long id;
@ApiModelProperty("用户姓名")
private String name;
@ApiModelProperty("用户年龄")
private int age;
@ApiModelProperty("用户邮箱")
private String email;
}?
package com.ly.controller;


import com.ly.entity.User;
import com.ly.service.UserService;
import com.ly.util.Result;
import com.ly.util.StateCode;
import io.swagger.annotations.Api;
import io.swagger.annotations.ApiImplicitParam;
import io.swagger.annotations.ApiOperation;
import io.swagger.annotations.ApiParam;
import org.springframework.beans.factory.annotation.Autowired;
import org.springframework.web.bind.annotation.*;

import java.util.ArrayList;
import java.util.List;

@Api("vue控制类")
@RestController
@CrossOrigin   //允许跨域
public class VueController {

    @Autowired
    private UserService userService;

    @ApiOperation("修改用户信息")
    @PutMapping("/user")
    public Result<User> update(@RequestBody User user){
        userService.update(user);
        return new Result(StateCode.OK,StateCode.UPDATE_SUCCESS,user);
    }
    @ApiOperation("删除用户信息")
    @ApiImplicitParam(name = "id",value = "要删除的编号",required = true,paramType = "Long")
    @DeleteMapping("/user/{id}")
    public Result<Integer> del(@PathVariable("id") Long id){
        System.out.println("----------del---"+ id);
        userService.delById(id);
        return new Result(StateCode.OK,StateCode.QUERY_SUCCESS,null);
    }
    @ApiOperation("按照主键查询用户信息")
    @ApiImplicitParam(name = "id",value = "查询的编号",required = true,paramType = "Long")
    @GetMapping("/user/{id}")
    public Result<User> findByID( @PathVariable("id") Long id){

        User user = userService.findById(id);
        return new Result(StateCode.OK,StateCode.QUERY_SUCCESS,user);
    }


    @ApiOperation("查询全部用户信息")
    @GetMapping("/user")
    public Result<List<User>> findAll(){
        List<User> list = userService.findAll();
        return new Result(StateCode.OK,StateCode.QUERY_SUCCESS,list);
    }


    @PostMapping("/user")
    public Result<User> add(@RequestBody User user){
        Long id = userService.save(user);
        user.setId(id);
        return new Result<User>(StateCode.OK,StateCode.SAVE_SUCCESS,user);
    }

}
?
springboot 集成swagger3
?
在需要 添加swagger3 的 module 中增加依赖
? <dependency>
? ? ? ? ? ? ?<groupId>io.springfox</groupId>
? ? ? ? ? ? ?<artifactId>springfox-boot-starter</artifactId>
? ? ? ? ? ? ?<version>3.0.0</version>
? ? ? ? ?</dependency>
swagger2 需要2个依赖, swagger3 需要1个
编写 配置类
?package com.config;
??
?import org.springframework.context.annotation.Bean;
?import org.springframework.context.annotation.Configuration;
?import springfox.documentation.builders.PathSelectors;
?import springfox.documentation.builders.RequestHandlerSelectors;
?import springfox.documentation.oas.annotations.EnableOpenApi;
?import springfox.documentation.service.ApiInfo;
?import springfox.documentation.service.Contact;
?import springfox.documentation.spi.DocumentationType;
?import springfox.documentation.spring.web.plugins.Docket;
??
?import java.util.ArrayList;
??
?@Configuration
?@EnableOpenApi
?public class SwaggerConfig {
??
? ? ?@Bean
? ? ?public Docket docket(){
? ? ? ? ?return new Docket(DocumentationType.OAS_30)
? ? ? ? ? ? ? ?  .apiInfo(apiInfo())
? ? ? ? ? ? ? ?  .select()
? ? ? ? ? ? ? ? ?//扫描指定路径下的文件
? ? ? ? ? ? ? ?  .apis(RequestHandlerSelectors.basePackage("com.controller"))
? ? ? ? ? ? ? ? ?//指定路径处理,PathSelectors.any() 代表 不过滤任何路径
? ? ? ? ? ? ? ? ?//.paths(PathSelectors.any())
? ? ? ? ? ? ? ?  .build();
? ?  }
??
? ? ?private ApiInfo apiInfo(){
? ? ? ? ?return new ApiInfo("My Swagger API document",
? ? ? ? ? ? ? ? ?"你好",
? ? ? ? ? ? ? ? ?"1.0",
? ? ? ? ? ? ? ? ?"http://www.baidu.com",
? ? ? ? ? ? ? ? ?new Contact("ly", "http://www.baidu.com", "aaa@qq.com"), ?//作者信息
? ? ? ? ? ? ? ? ?"Apache 2.0",
? ? ? ? ? ? ? ? ?"http://www.apache.org/licenses/LICENSE-2.0",
? ? ? ? ? ? ? ? ?new ArrayList());
? ?  }
?}
??
修改配置文件
?
spring:
?  mvc:
? ?  pathmatch:
? ? ?  matching-strategy: ant_path_matcher ? #swagger 使用
修改 控制层
?package com.controller;
??
??
?import com.entity.Product;
?import com.service.ProductService;
?import io.swagger.annotations.Api;
?import io.swagger.annotations.ApiOperation;
?import io.swagger.annotations.ApiParam;
?import org.springframework.beans.factory.annotation.Autowired;
?import org.springframework.web.bind.annotation.GetMapping;
?import org.springframework.web.bind.annotation.PathVariable;
?import org.springframework.web.bind.annotation.RestController;
??
?@Api(tags = "provider控制类")
?@RestController
?public class IndexController {
??
??
? ? ?@Autowired
? ? ?private ProductService productService;
??
??
? ? ?@ApiOperation("按照编号查询")
? ? ?@GetMapping("/test/{id}")
? ? ?public Product test(@ApiParam(value = "编号",required = true,example = "1") @PathVariable("id") int id){
? ? ? ? ?return productService.findById(id);
? ?  }
??
?}
??
?@Data
?@AllArgsConstructor
?@NoArgsConstructor
?@ApiModel("用户实体类")
?public class User {
? ? ?@ApiModelProperty(value = "姓名", required = true, example = "村雨遥")
? ? ?private String name;
??
? ? ?@ApiModelProperty(value = "年龄", required = true, example = "20")
? ? ?private Integer age;
?}查看并测试接口
启动我们的项目,然后在浏览器中访问如下地址,就可以访问项目的接口文档了。
访问上面的地址后,如果出现下面的界面,则说明集成 Swagger3 就成功了。
这里也要注意一点,Swagger2 中的接口访问地址是:
这里 Swagger2 和 Swagger3 是不同的,这里大家一定要注意,

可以进行测试了.
本文来自互联网用户投稿,该文观点仅代表作者本人,不代表本站立场。本站仅提供信息存储空间服务,不拥有所有权,不承担相关法律责任。 如若内容造成侵权/违法违规/事实不符,请联系我的编程经验分享网邮箱:veading@qq.com进行投诉反馈,一经查实,立即删除!