通过一道CTF题目来认识一下Frida
本文作者:杉木@涂鸦智能安全实验室
Frida
https://github.com/frida/frida
Frida是一个动态代码插入工具,可用于各种应用程序的调试和逆向工程。它提供了多种安装选项,包括Python和Node.js绑定,并提供了详细的命令行参数和选项。Frida还提供了一个服务器端,可以在目标执行环境(如手机)上安装和运行。此外,Frida还提供了多种工具,如frida-apk、frida-compile和frida-ps。Frida的Python库提供了丰富的功能,可以通过Python脚本调用。最后,文档通过一个CTF题目示例展示了如何使用Frida进行调试和逆向工程。
Install
pip install frida-tools # CLI tools
pip install frida       # Python bindings
npm install frida       # Node.js bindings
usage: frida [options] target

positional arguments:
  args                  extra arguments and/or target

optional arguments:
  -h, --help            show this help message and exit
  -D ID, --device ID    connect to device with the given ID
  -U, --usb             connect to USB device
  -R, --remote          connect to remote frida-server
  -H HOST, --host HOST  connect to remote frida-server on HOST
  --certificate CERTIFICATE
                        speak TLS with HOST, expecting CERTIFICATE
  --origin ORIGIN       connect to remote server with “Origin” header set to ORIGIN
  --token TOKEN         authenticate with HOST using TOKEN
  --keepalive-interval INTERVAL
                        set keepalive interval in seconds, or 0 to disable (defaults to -1 to auto-select based on
                        transport)
  --p2p                 establish a peer-to-peer connection with target
  --stun-server ADDRESS
                        set STUN server ADDRESS to use with --p2p
  --relay address,username,password,turn-{udp,tcp,tls}
                        add relay to use with --p2p
  -f TARGET, --file TARGET
                        spawn FILE
  -F, --attach-frontmost
                        attach to frontmost application
  -n NAME, --attach-name NAME
                        attach to NAME
  -N IDENTIFIER, --attach-identifier IDENTIFIER
                        attach to IDENTIFIER
  -p PID, --attach-pid PID
                        attach to PID
  -W PATTERN, --await PATTERN
                        await spawn matching PATTERN
  --stdio {inherit,pipe}
                        stdio behavior when spawning (defaults to “inherit”)
  --aux option          set aux option when spawning, such as “uid=(int)42” (supported types are: string, bool, int)
  --realm {native,emulated}
                        realm to attach in
  --runtime {qjs,v8}    script runtime to use
  --debug               enable the Node.js compatible script debugger
  --squelch-crash       if enabled, will not dump crash report to console
  -O FILE, --options-file FILE
                        text file containing additional command line options
  --version             show program's version number and exit
  -l SCRIPT, --load SCRIPT
                        load SCRIPT
  -P PARAMETERS_JSON, --parameters PARAMETERS_JSON
                        parameters as JSON, same as Gadget
  -C USER_CMODULE, --cmodule USER_CMODULE
                        load CMODULE
  --toolchain {any,internal,external}
                        CModule toolchain to use when compiling from source code
  -c CODESHARE_URI, --codeshare CODESHARE_URI
                        load CODESHARE_URI
  -e CODE, --eval CODE  evaluate CODE
  -q                    quiet mode (no prompt) and quit after -l and -e
  -t TIMEOUT, --timeout TIMEOUT
                        seconds to wait before terminating in quiet mode
  --pause               leave main thread paused after spawning program
  -o LOGFILE, --output LOGFILE
                        output to log file
  --eternalize          eternalize the script before exit
  --exit-on-error       exit with code 1 after encountering any exception in the SCRIPT
  --kill-on-exit        kill the spawned program when Frida exits
  --auto-perform        wrap entered code with Java.perform
  --auto-reload         Enable auto reload of provided scripts and c module (on by default, will be required in the
                        future)
  --no-auto-reload      Disable auto reload of provided scripts and c module
frida server
前面是一些frida的客户端和一些工具类,以及js的工具;接下来是在执行环境下的服务端安装;
https://github.com/frida/frida/releases
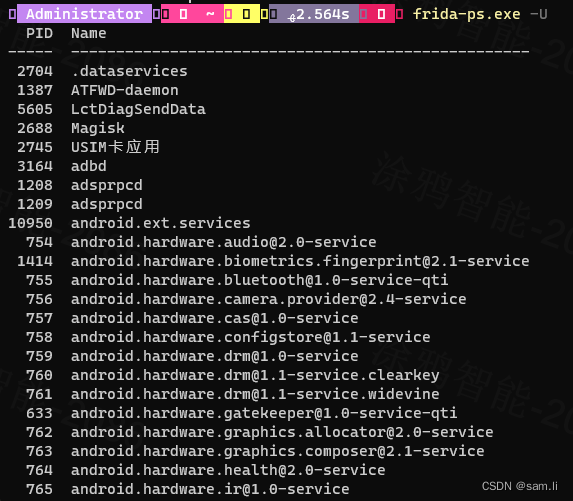
先看本地的frida客户端版本;

登录到执行环境下,也就是手机查看环境,下载对应的版本和环境的frida-server,并移动到手机上执行;


进行端口转发;

一开始传到下载目录下面,没有执行权限;

要传到/data/local/tmp目录,然后修改文件权限,再执行;
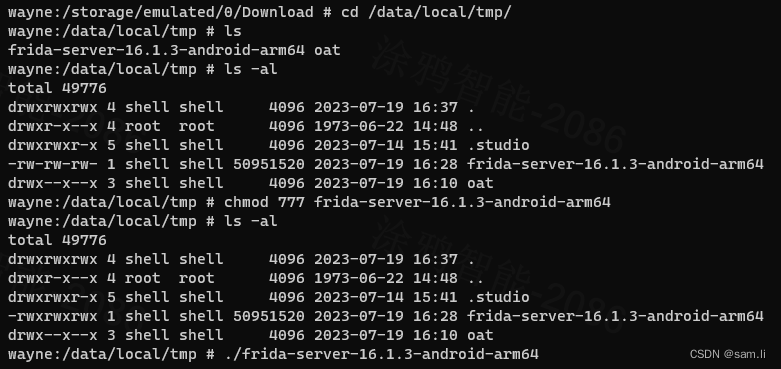
如果运行不了,关闭liunx的SELinux: echo 0 > /sys/fs/selinux/enforce。
frida工具

frida-apk
usage: frida-apk [options] path.apk

positional arguments:
  apk                   apk file

optional arguments:
  -h, --help            show this help message and exit
  -O FILE, --options-file FILE
                        text file containing additional command line options
  --version             show program's version number and exit
  -o OUTPUT, --output OUTPUT
                        output path
frida-compile
usage: frida-compile [options] <module>

positional arguments:
  module                TypeScript/JavaScript module to compile

optional arguments:
  -h, --help            show this help message and exit
  -O FILE, --options-file FILE
                        text file containing additional command line options
  --version             show program's version number and exit
  -o OUTPUT, --output OUTPUT
                        write output to <file>
  -w, --watch           watch for changes and recompile
  -S, --no-source-maps  omit source-maps
  -c, --compress        compress using terser
  -v, --verbose         be verbose
frida-ps
usage: frida-ps [options]

optional arguments:
  -h, --help            show this help message and exit
  -D ID, --device ID    connect to device with the given ID
  -U, --usb             connect to USB device
  -R, --remote          connect to remote frida-server
  -H HOST, --host HOST  connect to remote frida-server on HOST
  --certificate CERTIFICATE
                        speak TLS with HOST, expecting CERTIFICATE
  --origin ORIGIN       connect to remote server with “Origin” header set to ORIGIN
  --token TOKEN         authenticate with HOST using TOKEN
  --keepalive-interval INTERVAL
                        set keepalive interval in seconds, or 0 to disable (defaults to -1 to auto-select based on transport)
  --p2p                 establish a peer-to-peer connection with target
  --stun-server ADDRESS
                        set STUN server ADDRESS to use with --p2p
  --relay address,username,password,turn-{udp,tcp,tls}
                        add relay to use with --p2p
  -O FILE, --options-file FILE
                        text file containing additional command line options
  --version             show program's version number and exit
  -a, --applications    list only applications
  -i, --installed       include all installed applications
  -j, --json            output results as JSON
frida API
先看看python的frida库有哪些能力;


通过一道CTF题来认识一下frida
题目文件查看文章绑定的资源。
一道看雪的题目,打开APP执行一下看看;

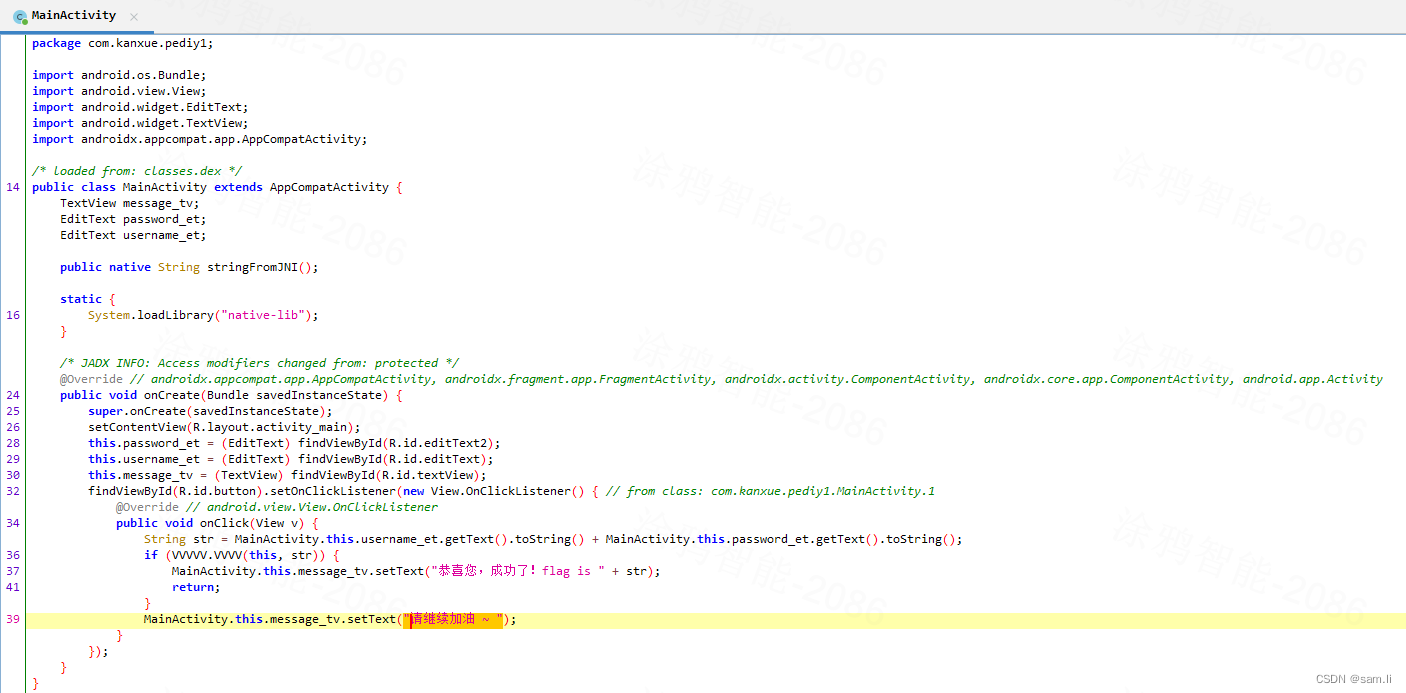
有了关键字,反编译app后搜索一下,就在main中,可以清晰的看到入口处理逻辑;
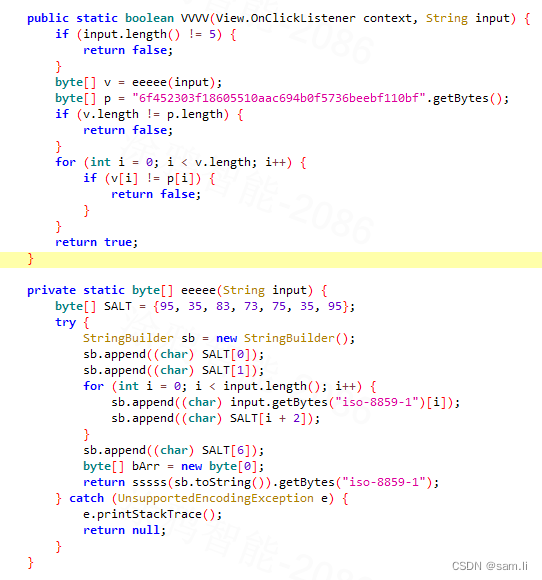
主要处理逻辑在这个vvvv里面,只有vvvv通过验证,就会返回flag;进去vvvv里面看看;
有两个判断条件,一个是两个地方输入的长度总共要等于5;一个是要和bytes§一样;也就是说返回跟”6f452303f18605510aac694b0f5736beebf110bf“一样的内容就可以通过,这里为了学习如何使用frida,就先绕过验证;因为要拿flag的话,需要进行爆破,从题目提示得知,5位数字,然后经过eeee处理后等于bytes§就是对应的flag了;
先试着简单打印我们输入的内容;
function main(){
		//frida的main函数入口
    Java.perform(function() {
				//获取包名类方法
        Java.use("com.kanxue.pediy1.VVVVV").VVVV.implementation = function(x,y){
            //hook逻辑
						var result = this.VVVV(x,y);
            console.log("x,y,result:",x,y,result);
            return result;
        }
    })
}
setImmediate(main)
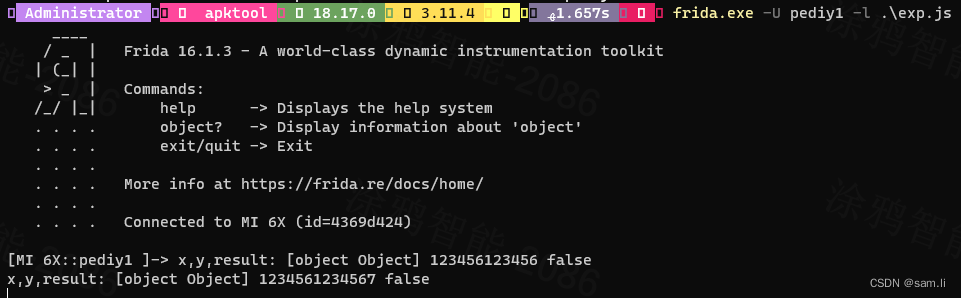
当然frida支持多种方式调用,上面是js脚本,可以直接用frida命令的方式调用;
也可以使用python的frida库调用js的方式来执行,如下;
import frida

# 1. 用户输入目标进程名称
target_process = input("请输入目标进程名称:")

# 2. 通过进程名称附加到目标进程
process = frida.get_usb_device().attach(target_process)

# 3. 读取JavaScript文件内容
with open("exp.js", "r") as file:
    js_code = file.read()

# 4. 创建一个Frida脚本
script = process.create_script(js_code)

# 5. 定义回调函数,用于处理脚本的消息
def on_message(message, data):
    print("[*] Message:", message)

# 6. 注册回调函数
script.on("message", on_message)

# 7. 加载并运行脚本
script.load()

# 8. 保持脚本运行,直到手动停止
input("[!] Press Enter to stop...")

# 9. 分离脚本并关闭Frida会话
script.unload()
process.detach()

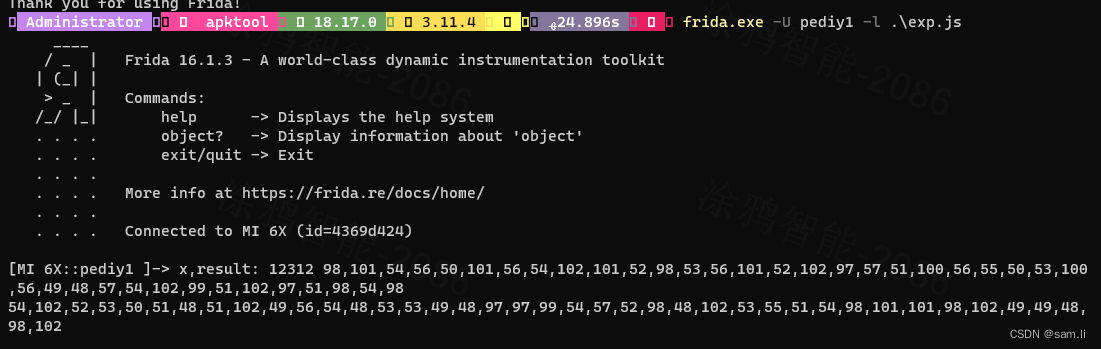
思路是通过篡改eeee函数执行结果,让eeee返回跟bytes§一样的内容即可让程序验证通过;
function main(){
    Java.perform(function() {
        Java.use("com.kanxue.pediy1.VVVVV").eeeee.implementation = function(x){
            var result = this.eeeee(x);
            console.log("x,result:",x,result);
            var v = result;
            v = Java.use("java.lang.String").$new("6f452303f18605510aac694b0f5736beebf110bf").getBytes();
            console.log(v);
            return v;
        }
    })
}
setImmediate(main)

上面只是绕过了程序验证,并非题目实际的flag,要获得真实flag还需要对5位数字进行爆破;
下面是爆破flag的脚本;
function firethehome(){
    Java.perform(function(){
        var VVVVV_Class = Java.use("com.kanxue.pediy1.VVVVV")
        console.log("VVVVV_Class:", VVVVV_Class)
        VVVVV_Class.eeeee.implementation=function(x){
                var result = this.eeeee(x);
                console.log("VVVVV.eeeee is hook! x ,result",x,JSON.stringify(result));
                return result;
        }
        var ByteString = Java.use("com.android.okhttp.okio.ByteString");
        console.log(ByteString);
        var pSign = Java.use("java.lang.String").$new("6f452303f18605510aac694b0f5736beebf110bf").getBytes();
        console.log( ByteString.of(pSign).hex());
       // 爆破5位
        for(var i = 9999;i<100000;i++){
            console.log("i="+i);
            var v =  Java.use("java.lang.String").$new(String(i));
            var vSign = VVVVV_Class.eeeee(v);
            console.log("vSign:",ByteString.of(vSign).hex());
            if(ByteString.of(vSign).hex() == ByteString.of(pSign).hex()){
                console.log("i="+i);
                break;
            }
        }
    })
}
setImmediate(firethehome)
[原创]举杯邀Frida,对影成三题-Android安全-看雪-安全社区|安全招聘|kanxue.com
漏洞悬赏计划:涂鸦智能安全响应中心(https://src.tuya.com)欢迎白帽子来探索。
本文来自互联网用户投稿,该文观点仅代表作者本人,不代表本站立场。本站仅提供信息存储空间服务,不拥有所有权,不承担相关法律责任。 如若内容造成侵权/违法违规/事实不符,请联系我的编程经验分享网邮箱:veading@qq.com进行投诉反馈,一经查实,立即删除!