云计算:OpenStack 分布式架构添加NFS存储(单控制节点与多计算节点)
2024-01-02 20:06:31
目录
?一、实验
1.环境
(1) 主机
表1 主机
| 主机 | 架构 | IP | 备注 |
| controller | 控制节点 | 192.168.204.210 | 已部署 |
| compute01 | 计算节点1 | 192.168.204.211? | 已部署 |
| compute02 | 计算节点2 | 192.168.204.212 | 已部署 |
| storage01 | 存储节点1 | 192.168.204.221 | 已部署 |
| storage02 | 存储节点2 | 192.168.204.222 | |
| nas | nfs节点 | 192.168.204.229 |
(2)官网
OpenStack Docs: OpenStack Installation Guide for Red Hat Enterprise Linux and CentOS
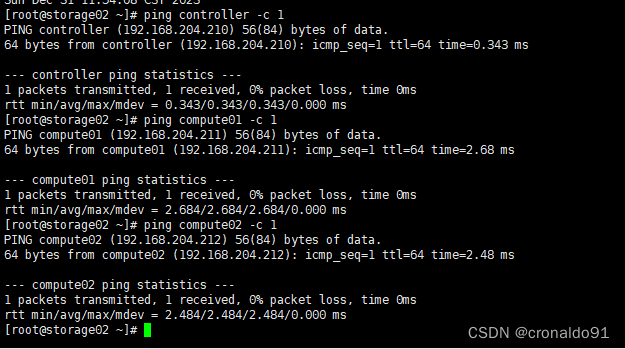
(3)存储节点2网络
?①存储节点2? ping?控制节点、计算节点1 、 计算节点2
 ?
?
(4)存储节点2 时间同步
①?存储节点2
[root@storage02 ~]# yum install -y chrony
 ?
?
[root@storage02 ~]# vim /etc/chrony.conf
[root@storage02 ~]# systemctl restart chronyd.service && systemctl enable chronyd.service![]() ?
? ?
?
?③测试
[root@controller ~]# date

[root@compute01 ~]# date

[root@compute02 ~]# date

[root@storage01 ~]# date

[root@storage02 ~]# date![]() ?
?
![]()
?![]()
?
![]()
?
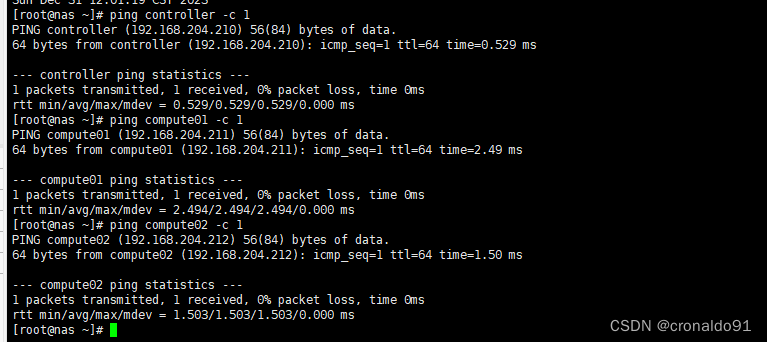
?(5)nfs节点网络
?①存储节点2? ping?控制节点、计算节点1 、 计算节点2
 ?
?
(6)nfs节点时间同步
①?nfs节点
[root@nas ~]# yum install -y chrony
?
[root@nas ~]# vim /etc/chrony.conf
[root@nas ~]# systemctl restart chronyd.service && systemctl enable chronyd.service ??
??
?③测试
[root@controller ~]# date

[root@compute01 ~]# date

[root@compute02 ~]# date

[root@storage01 ~]# date

[root@storage02 ~]# date

[root@nas ~]# date
?
?
?
?
 、
、


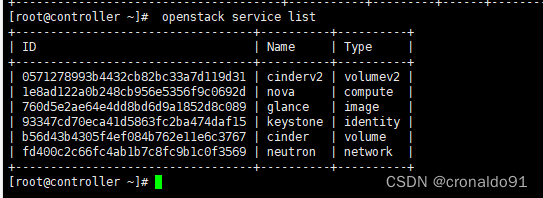
(7) 控制节点查看(目前已部署controller、compute01、compute02与storage01)
# neutron agent-list

# cinder service-list

2.安装并配置NFS节点
(1)安装软件包
# yum install nfs-utils.x86_64 -y![]()

(2)创建共享目录
# mkdir /data

# echo "/data 192.168.204.0/24(rw,async,no_root_squash,no_all_squash)" > /etc/exports

# systemctl restart rpcbind nfs
3.安装并配置存储节点storage02
(1)安装软件包
# yum install openstack-cinder targetcli python-keystone  -y

# yum install nfs-utils.x86_64 -y![]()

(2)查看共享
# showmount -e 192.168.204.229
(3)备份修改cinder配置文件/etc/cinder/cinder.conf


①修改配置文件
[DEFAULT]
rpc_backend = rabbit
auth_strategy = keystone
my_ip = 192.168.204.222
glance_api_servers = http://controller:9292
enabled_backends = nfs
[BACKEND]
[BRCD_FABRIC_EXAMPLE]
[CISCO_FABRIC_EXAMPLE]
[COORDINATION]
[FC-ZONE-MANAGER]
[KEYMGR]
[cors]
[cors.subdomain]
[database]
connection = mysql+pymysql://cinder:CINDER_DBPASS@controller/cinder
[keystone_authtoken]
auth_uri = http://controller:5000
auth_url = http://controller:35357
memcached_servers = controller:11211
auth_type = password
project_domain_name = default
user_domain_name = default
project_name = service
username = cinder
password = CINDER_PASS
[matchmaker_redis]
[oslo_concurrency]
lock_path = /var/lib/cinder/tmp
[oslo_messaging_amqp]
[oslo_messaging_notifications]
[oslo_messaging_rabbit]
rabbit_host = controller
rabbit_userid = openstack
rabbit_password = RABBIT_PASS
[oslo_middleware]
[oslo_policy]
[oslo_reports]
[oslo_versionedobjects]
[ssl]
[nfs]
volume_driver = cinder.volume.drivers.nfs.NfsDriver
nfs_share_config = /etc/cinder/nfs_shares
volume_backend_name = nfs
② 添加共享文件配置并重启服务


(4)查看

(5)新增存储类型nfs

(6)关联后端nfs存储

4.使用NFS存储
(1)登录系统

(2)创建卷

(3)创建中

(4)控制节点查看

(5)查看磁盘使用情况

(6)扩展卷

(7)扩展为3G

(8)扩展中

(9)完成

(10) 存储节点2查看

(11)控制节点查看

(12)查看存储节点2挂载情况

(13)查看后端nfs存储

(14)查看服务列表
文章来源:https://blog.csdn.net/cronaldo91/article/details/135334267
本文来自互联网用户投稿,该文观点仅代表作者本人,不代表本站立场。本站仅提供信息存储空间服务,不拥有所有权,不承担相关法律责任。 如若内容造成侵权/违法违规/事实不符,请联系我的编程经验分享网邮箱:veading@qq.com进行投诉反馈,一经查实,立即删除!
本文来自互联网用户投稿,该文观点仅代表作者本人,不代表本站立场。本站仅提供信息存储空间服务,不拥有所有权,不承担相关法律责任。 如若内容造成侵权/违法违规/事实不符,请联系我的编程经验分享网邮箱:veading@qq.com进行投诉反馈,一经查实,立即删除!