LaTex插入图片
2023-12-25 12:26:56
一、插入图片
在.tex文件开头导入相应的宏包
\documentclass{article}
\usepackage{graphicx} % 导入图像的宏包、单图
\usepackage{subfigure} % 导入图像的宏包、子图
\graphicspath{{./images/}} % 告诉 LaTeX 这篇文档中的图片所存储的位置是主文档所在目录下的 images 文件夹。需要注意的是,目录的结尾也需要一个斜杠,并且路径是被包含在双大括号之间。

% 你还可以设置多个路径,如果文档的图片被存储在多个文件夹中。例如,如果有两个文件夹images1和images2,使用下面的命令:\graphicspath{ {./images1/}{./images2/} }
文中插入教程:
子图插入:(\includegraphics{1.jpg}是真正插入图片的那个命令,可以有后缀,也可以直接文件名)
\documentclass{article}
\usepackage{graphicx}
\usepackage{subfigure}
\graphicspath{ {./images/} }

\begin{document}
	The universe is immense and it seems to be homogeneous, in a large scale, everywhere we look at.

	\begin{figure}
		\centering % 表示居中
		\subfigure[An example of an individual figure sub-caption.]{%
			\resizebox*{5cm}{!}{\includegraphics{1.jpg}}}\hspace{5pt}
		\subfigure[A slightly shorter sub-caption.]{%
			\resizebox*{5cm}{!}{\includegraphics{1.jpg}}}
		\caption{Example of a two-part figure with individual sub-captions
			showing that captions are flush left and justified if greater
			than one line of text.} \label{sample-figure}
	\end{figure}

	There's a picture of a galaxy above
\end{document}
插入单图:
\documentclass{article}
\usepackage{graphicx}
\usepackage{subfigure}
\graphicspath{ {./images/} }

\begin{document}
	The universe is immense and it seems to be homogeneous, in a large scale, everywhere we look at.

	\begin{figure}
		\centering % 表示居中
		\includegraphics[height=4.5cm,width=9.5cm]{1.jpg}
		\caption{Example of a two-part figure with individual sub-captions
			showing that captions are flush left and justified if greater
			than one line of text.} \label{sample-figure}
	\end{figure}

	There's a picture of a galaxy above
\end{document}
可以使用?\includegraphics[width=1\linewidth]{1.jpg}?获得相对高宽。
1)改变图片的大小、旋转图片
命令\includegraphics[scale=1.5]{1.jpg}会把图片lion-logo插入到文档中,额外的参数scale=1.5会把图片的大小变为原本的1.5倍。
也可以指定图片的长宽:\includegraphics[width=3cm, height=4cm]{1.jpg}
2)标签和交叉引用
与LaTeX文档中的许多其他元素相同(例如公式、表格等),图片也可以在文本中被引用。你只需要简单地对其添加一个标签就可以了,然后使用这个标签来在文本中引用这个图片。
\begin{figure}[h]
    \centering
    \includegraphics[width=0.25\textwidth]{1.jpg}
    \caption{a nice plot}
    \label{sample-figure}
\end{figure}

As you can see in the figure \ref{sample-figure}, the
function grows near 0. Also, in the page \pageref{sample-figure}
is the same example.\label{sample-figure}这个命令设置了图片的标签。\pageref{sample-figure}这个命令会输出图片所在的页数。
3)插入单排多图无小标题共享大标题
\documentclass{article}
\usepackage{graphicx}
\usepackage{subfigure}
\graphicspath{ {./images/} }

\begin{document}
	The universe is immense and it seems to be homogeneous, in a large scale, everywhere we look at.

	\begin{figure}
	\subfigure[]{
		\includegraphics[width=2.5cm,height=2.5cm]{1.jpg} \label{Fig.1(b)}
	}
	\hspace{2mm}
	\subfigure[]{
		\includegraphics[width=2.5cm,height=2.5cm]{1.jpg} \label{Fig.1(b)}
	}
	\hspace{2mm}
	\subfigure[]{
		\includegraphics[width=2.5cm,height=2.5cm]{1.jpg} \label{Fig.1(b)}
	}

	\caption{Geographical location and relationship of four types of bike stations }
	\end {figure}

\end{document}
注意:不要有回车enter,否则图片会自动跳到下一行
4)单排变多排
在需要多排图的后面加上?回车?就可以了
\documentclass{article}
\usepackage{graphicx}
\usepackage{subfigure}
\graphicspath{ {./images/} }

\begin{document}
	The universe is immense and it seems to be homogeneous, in a large scale, everywhere we look at.

	\begin{figure}
	\centering
	\subfigure[]{
		\includegraphics[width=2.5cm,height=2.5cm]{1.jpg} \label{Fig.1(b)}
	}
	\hspace{2mm}
	\subfigure[]{
		\includegraphics[width=2.5cm,height=2.5cm]{1.jpg} \label{Fig.1(b)}
	}

	\subfigure[]{
		\includegraphics[width=2.5cm,height=2.5cm]{1.jpg} \label{Fig.1(b)}
	}
	\hspace{2mm}
	\subfigure[]{
		\includegraphics[width=2.5cm,height=2.5cm]{1.jpg} \label{Fig.1(b)}
	}

	\caption{Geographical location and relationship of four types of bike stations }
	\end {figure}

\end{document}

5)图片的位置
Latex提供了一些命令来控制图片的位置。我们可以通过使用\begin{figure}[位置选项]来控制图片的位置。位置选项可以有h、t、b、p、!这五个,分别表示以下含义:
- h:表示放在当前位置,不过有时由于论文的格式限制,可能放不下。
- t:表示放在页面的顶部。
- b:表示放在页面的底部。
- p:表示放在单独一页。
- !:表示可以忽略一些限制,例如允许超过页面上限等。
例子:如用选项 [hbp]就表示允许浮动体出现在环境所在位置、页面底部或单独一页,但不允许出现在一页顶部。
\begin{figure*}[!htb]
...
\end{figure*}换行:和段落类似,空一行就是换行。
居中:\centering
图像位置自适应:[!htb],关于这个的更多描述需要参照latex的图像位置设置之类的,不过该操作是很常用的。
间距设置:\hspace和\vspace。
	\vspace{-0.2cm}  %调整图片与上文的垂直距离
	\setlength{\abovecaptionskip}{-0.2cm}   %调整图片标题与图距离
	\setlength{\belowcaptionskip}{-0.2cm} %调整图片标题与下文距离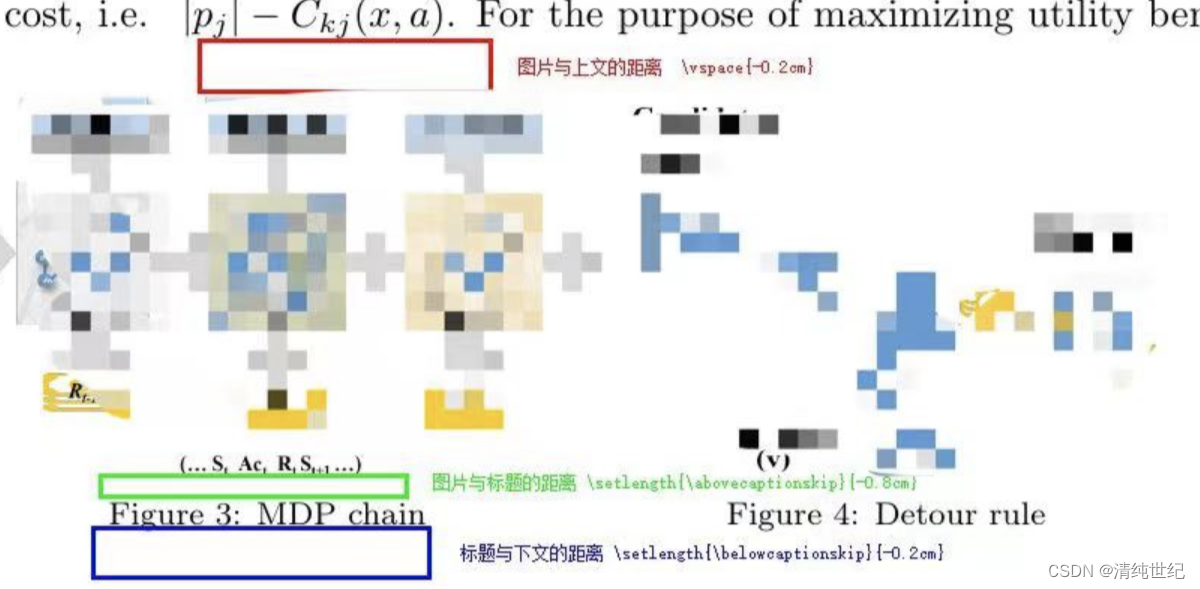
文章来源:https://blog.csdn.net/qq_45100200/article/details/135191515
本文来自互联网用户投稿,该文观点仅代表作者本人,不代表本站立场。本站仅提供信息存储空间服务,不拥有所有权,不承担相关法律责任。 如若内容造成侵权/违法违规/事实不符,请联系我的编程经验分享网邮箱:veading@qq.com进行投诉反馈,一经查实,立即删除!
本文来自互联网用户投稿,该文观点仅代表作者本人,不代表本站立场。本站仅提供信息存储空间服务,不拥有所有权,不承担相关法律责任。 如若内容造成侵权/违法违规/事实不符,请联系我的编程经验分享网邮箱:veading@qq.com进行投诉反馈,一经查实,立即删除!