Ubuntu系统使用Nginx搭建RTMP服务器
2023-12-18 21:47:26
环境:
推流端 rockpi s 主控rk3308 运行ubuntu系统
服务端 ubuntu
播放器 VLC播放器
服务端安装依赖:
apt-get install build-essential libpcre3 libpcre3-dev libssl-dev
创建nginx编译目录:
mkdir my_nginx_rtmp
cd my_nginx_rtmp/
下载 nginx与nginx-rtmp-module包:
wget http://nginx.org/download/nginx-1.21.6.tar.gz
wget https://github.com/arut/nginx-rtmp-module/archive/master.zip
解压缩:
tar -xf nginx-1.21.6.tar.gz
unzip master.zip
编译带nginx-rtmp模块的nginx:
cd nginx-1.21.6/
./configure --with-http_ssl_module --add-module=../nginx-rtmp-module-master
make j4 && make install
检查nginx是否安装完成:
/usr/local/nginx/sbin/nginx -v
将nginx添加到环境变量中:
sudo vi ~/.bashrc

在最后添加:
export PATH=$PATH:/usr/local/nginx/sbin/

添加完成执行source命令:
source ~/.bashrc
修改nginx的配置文件:
vim /usr/local/nginx/conf/nginx.conf

在最后添加:
rtmp {
        server {
                listen 1935;
                chunk_size 4096;

                application live {
                        live on;
                        record off;
                }
        }
}
启动ngnix:
ngnix
查看nginx启动情况:
(base) rog@i7:~$ ps -ef | grep nginx | grep -v grep
rog      1312637    2257  0 15:51 ?        00:00:00 nginx: master process nginx
rog      1314761 1312637  0 16:01 ?        00:00:06 nginx: worker process
查看端口:
(base) rog@i7:~$ netstat -anp | grep nginx
(Not all processes could be identified, non-owned process info
 will not be shown, you would have to be root to see it all.)
tcp        0      0 0.0.0.0:1935            0.0.0.0:*               LISTEN      1312637/nginx: mast
tcp        0      0 0.0.0.0:80            0.0.0.0:*               LISTEN      1312637/nginx: mast
tcp        0      0 192.168.110.30:1935     192.168.110.114:10441   ESTABLISHED 1314761/nginx: work
unix  3      [ ]         STREAM     CONNECTED     22049699 1312637/nginx: mast
unix  3      [ ]         STREAM     CONNECTED     22049700 1312637/nginx: mast
端口80是HTTP服务的默认监听端口,端口1935正是RTMP服务器的默认监听端口
遇到的问题:
 如果缺少zlib库,执行:
sudo apt-get install zlib1g-dev

找不到openssl库,在 ~/.bashrc中添加openssl库位置
export LD_LIBRARY_PATH=/home/rog/anaconda3/lib:$LD_LIBRARY_PATH
source ~/.bashrc

执行nginx如果出现如下错误,将端口号改到1024以后的端口例如8090,修改文件/usr/local/nginx/conf/nginx.conf
nginx: [emerg] bind() to 0.0.0.0:80 failed (13: Permission denied)
测试:
测试视频下载地址:https://www.yingshiguang.com/
ffmpeg -re -i test2.mp4 -vcodec h264 -f flv rtmp://192.168.110.30:1935/live/1          ## X64
ffmpeg -re -i test.mp4 -c copy -f flv rtmp://192.168.110.30:1935/live/1                ## ARM

ffmpeg -re -i /dev/video0 -vcodec h264 -f flv rtmp://192.168.110.30:1935/live/1        ## 摄像头
ffmpeg -i /dev/video0 -vcodec libx264 -acodec aac -tune zerolatency -f flv rtmp://192.168.110.30:1935/live/1

-tune zerolatency  //设置零延时
-preset ultrafast  //--preset的参数主要调节编码速度和质量的平衡,有ultrafast(转码速度最快,视频往往也最模糊)、superfast、veryfast、faster、fast、medium、slow、slower、veryslow、placebo这10个选项,从快到慢
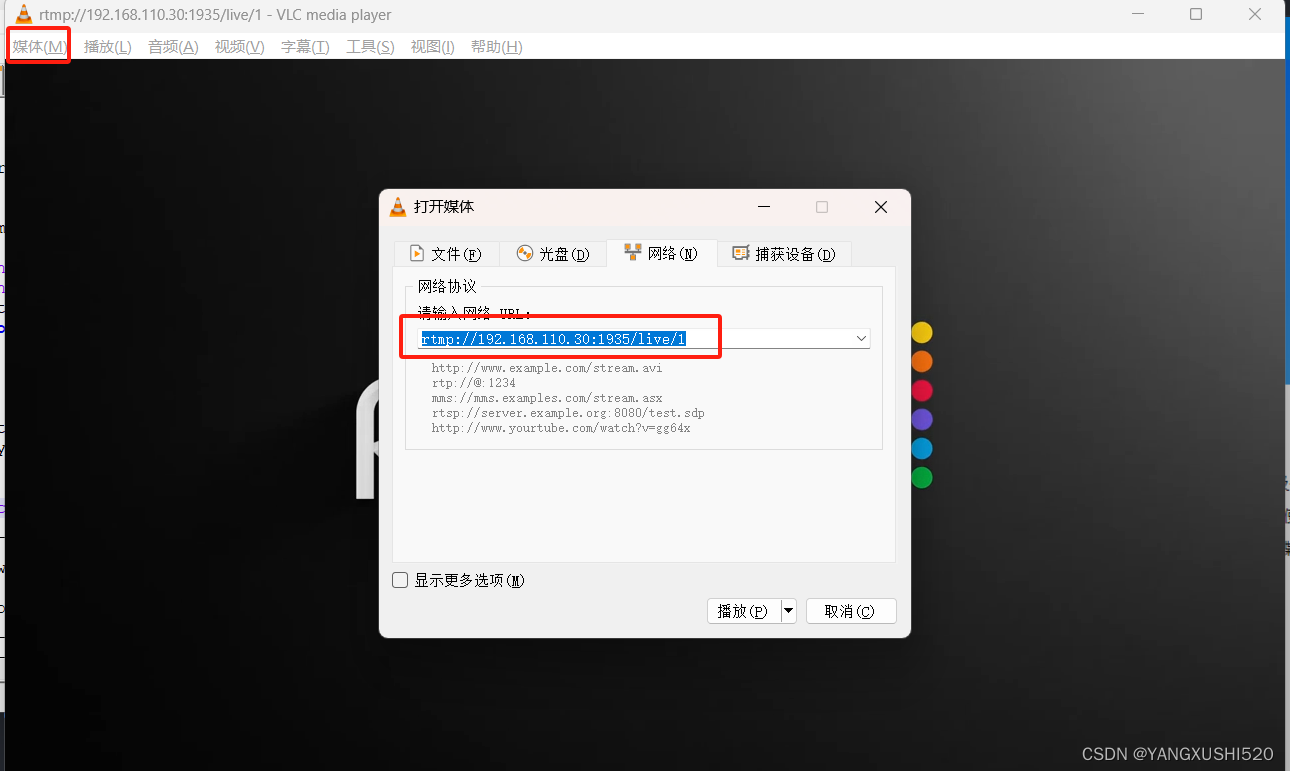
播放器使用VLC:
播放地址同推流地址一样

文章来源:https://blog.csdn.net/yangshixu520/article/details/135068888
本文来自互联网用户投稿,该文观点仅代表作者本人,不代表本站立场。本站仅提供信息存储空间服务,不拥有所有权,不承担相关法律责任。 如若内容造成侵权/违法违规/事实不符,请联系我的编程经验分享网邮箱:veading@qq.com进行投诉反馈,一经查实,立即删除!
本文来自互联网用户投稿,该文观点仅代表作者本人,不代表本站立场。本站仅提供信息存储空间服务,不拥有所有权,不承担相关法律责任。 如若内容造成侵权/违法违规/事实不符,请联系我的编程经验分享网邮箱:veading@qq.com进行投诉反馈,一经查实,立即删除!