Ora2Pg工具迁移Oracle到openGauss
📢📢📢📣📣📣
哈喽!大家好,我是【IT邦德】,江湖人称jeames007,10余年DBA及大数据工作经验
一位上进心十足的【大数据领域博主】!😜😜😜
中国DBA联盟(ACDU)成员,目前服务于工业互联网
擅长主流Oracle、MySQL、PG、高斯及Greenplum运维开发,备份恢复,安装迁移,性能优化、故障应急处理等。
? 如果有对【数据库】感兴趣的【小可爱】,欢迎关注【IT邦德】💞💞💞
??????感谢各位大可爱小可爱!??????
文章目录
前言
本文详细阐述了Ora2Pg工具迁移Oracle到openGauss的全过程。📣 1.前言
随着目前信创产业的发展,部分项目的需求,需要将Oracle过渡到openGauss。这种转变将我从一个经验丰富的Oracle DBA转变为openGauss领域的新人。在经历了这次迁移之后,我觉得有必要分享我在此过程中获得的见解。
本文详细介绍了我的旅程、遇到的挑战以及促进这一转变的ora2og这个不可或缺的工具。我希望分享这些经验将使你的openGauss之旅更加顺利。
从Oracle迁移到openGauss不仅仅是按下一个开关这么简单。这是一个包含一系列步骤的旅程,例如架构转换、数据迁移、应用程序迁移和性能调优。每个阶段都有自己的问题,我需要一个解决方案的工具箱来处理它们。
📣 2.Ora2Pg特点
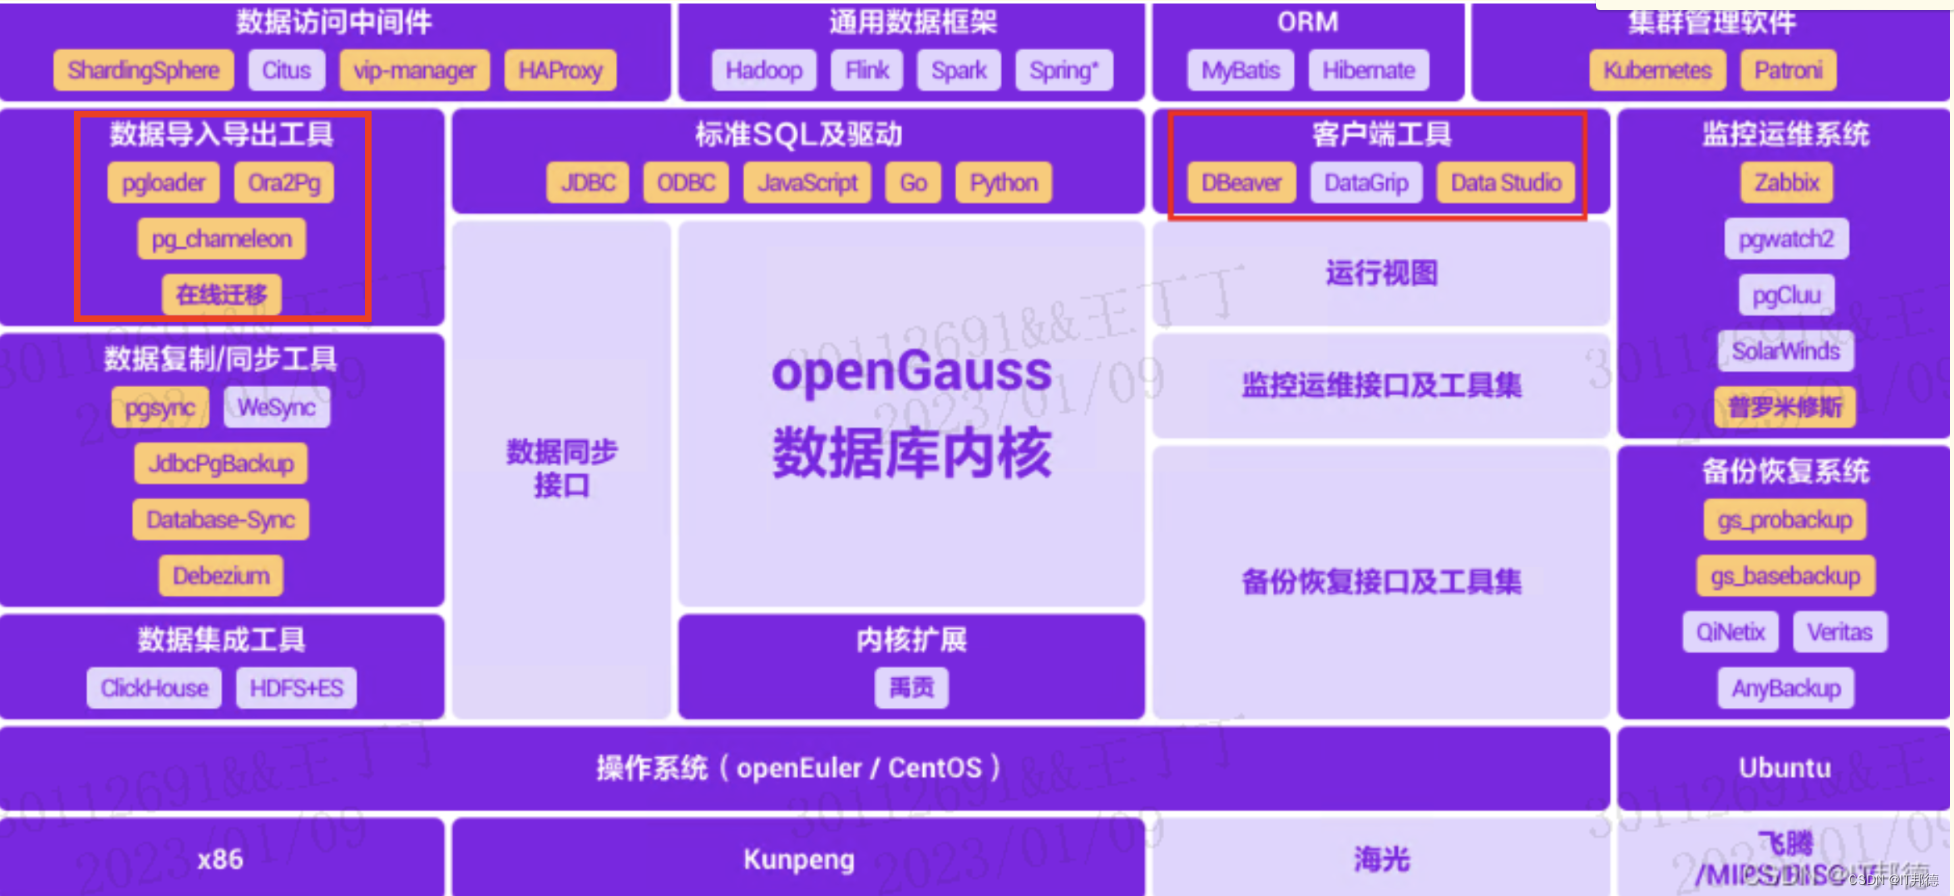
Ora2Pg在openGauss的应用
Ora2Pg主要语言是perl,使用Perl DBI模块,通过DBD:Pg连接PostgreSQL目标数据库,openGauss兼容PostgreSQL的通信协议以及绝大部分语法,因此只需作部分命名上的修改,Ora2Pg同样可应用于openGauss
特点:
支持导出数据库绝大多数对象类型,包括表、视图、序列、索引、外键、约束、函数、存储过程等。
提供PL/SQL到PL/PGSQL语法的自动转换,一定程度避免了人工修正。
可生成迁移报告,包括迁移难度评估、人天估算。
可选对导出数据进行压缩,节约磁盘开销。
配置选项丰富,可自定义迁移行为。
官方网站:https://ora2pg.darold.net/
📣 3.环境准备
? 3.1 安装openGauss
–创建用户组dbgroup
groupadd dbgroup
–创建用户opengauss
创建用户组dbgroup下的普通用户opengauss,并设置普通用户opengauss的密码
useradd -g dbgroup opengauss
passwd opengauss
–解压安装包
mkdir -p /app/openGauss
chmod 755 -R /opt/openGauss-5.0.0-CentOS-64bit.tar.bz2
chown opengauss:dbgroup -R /opt/openGauss-5.0.0-CentOS-64bit.tar.bz2
chmod 755 -R /app/openGauss
chown opengauss:dbgroup -R /app/openGauss
[root@opengauss /]# yum install bzip2
su - opengauss
cd /app/openGauss
tar -jxf /opt/openGauss-5.0.0-CentOS-64bit.tar.bz2 -C /app/openGauss
–安装openGauss
##进入解压后目录下的simpleInstall,执行install.sh脚本安装openGauss
su - opengauss
cd /app/openGauss/simpleInstall
sh install.sh -w “jeames@007” &&source ~/.bashrc
#登录opengauss
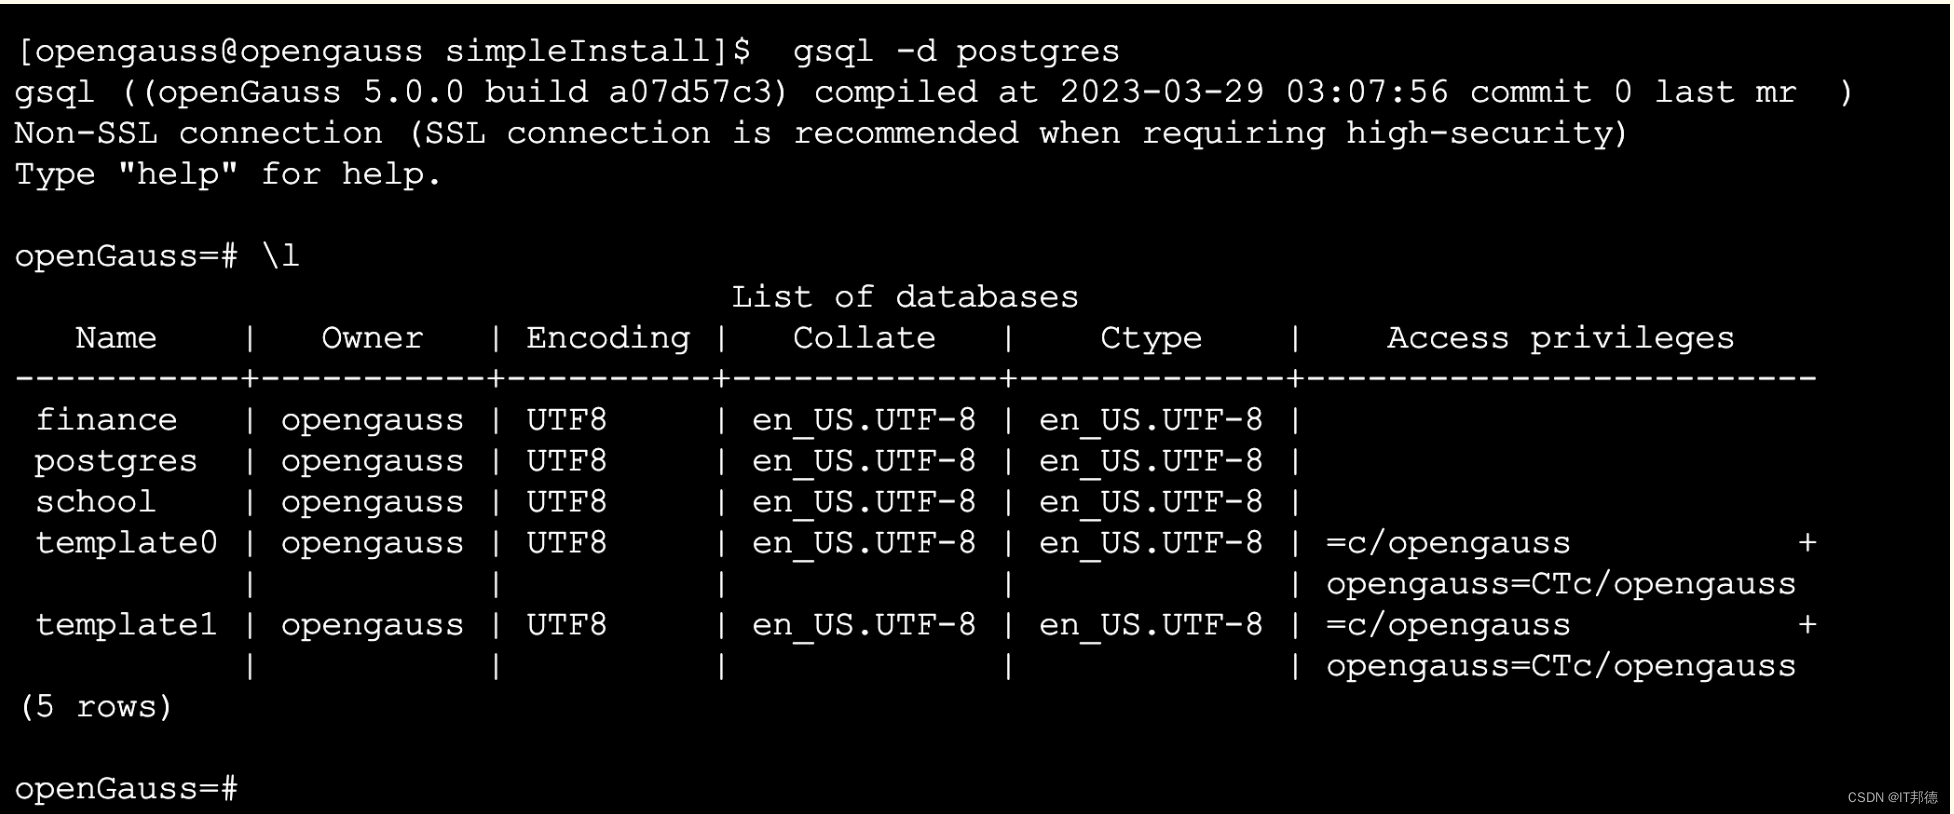
[opengauss@centos79 ~]$ gsql -d postgres
[opengauss@opengauss simpleInstall]$  gsql -d postgres
gsql ((openGauss 5.0.0 build a07d57c3) compiled at 2023-03-29 03:07:56 commit 0 last mr  )
Non-SSL connection (SSL connection is recommended when requiring high-security)
Type "help" for help.

openGauss=# \l
                                   List of databases
   Name    |   Owner   | Encoding |   Collate   |    Ctype    |    Access privileges
-----------+-----------+----------+-------------+-------------+-------------------------
 finance   | opengauss | UTF8     | en_US.UTF-8 | en_US.UTF-8 |
 postgres  | opengauss | UTF8     | en_US.UTF-8 | en_US.UTF-8 |
 school    | opengauss | UTF8     | en_US.UTF-8 | en_US.UTF-8 |
 template0 | opengauss | UTF8     | en_US.UTF-8 | en_US.UTF-8 | =c/opengauss           +
           |           |          |             |             | opengauss=CTc/opengauss
 template1 | opengauss | UTF8     | en_US.UTF-8 | en_US.UTF-8 | =c/opengauss           +
           |           |          |             |             | opengauss=CTc/opengauss
(5 rows)
##编辑 postgresql.conf
[opengauss@centos79 ~]$ cd $GAUSSHOME/data/single_node
修改下面两个参数
listen_addresses = ‘*’
max_connections = 1000
##编辑 pg_hba.conf
文末追加
host all all 0.0.0.0/0 md5
重启openGauss服务
gs_ctl restart -D $GAUSSHOME/data/single_node -Z single_node

? 3.2 安装Oracle
docker run -itd --name jemora11204 -h jemora11204 \
--privileged=true -p 21521:1521 -p 1222:22  -p 21158:1158 \
--network=mynet --ip 172.18.12.30 \
registry.cn-shanghai.aliyuncs.com/techerwang/oracle:ora11g11204 init
📣 4.安装Ora2Pg
? 4.1 依赖安装
1.安装依赖包
Ora2Pg 语言为 perl,故需安装所需 perl 模块。
--root 用户下操作
yum install gcc make net-tools.x86_64
yum install -y perl-ExtUtils-CBuilder perl-ExtUtils-MakeMaker
yum install perl-CPAN

2.安装perl的一些常用模块安装,Ora2Pg 依赖这些软件去连接数据库。
DBI、JSON、DBD:Pg、DBD:Oracle

[root@ora2pg /]# perl -MCPAN -e 'install DBI'
Appending installation info to /usr/lib64/perl5/perllocal.pod
  TIMB/DBI-1.643.tar.gz
  /usr/bin/make install  -- OK


[root@ora2pg /]# perl -MCPAN -e 'install JSON'
Appending installation info to /usr/lib64/perl5/perllocal.pod
  ISHIGAKI/JSON-4.10.tar.gz
  /usr/bin/make install  -- OK


[root@ora2pg /]# yum install postgresql-devel
[root@ora2pg /]# perl -MCPAN -e 'install DBD::Pg'
Appending installation info to /usr/lib64/perl5/perllocal.pod
  TURNSTEP/DBD-Pg-3.17.0.tar.gz
  /usr/bin/make install  -- OK

##安装DBD:Oracle,需要先安装Oracle客户端
https://yum.oracle.com/repo/OracleLinux/OL7/oracle/instantclient/x86_64/


yum install libaio
rpm -ivh oracle-instantclient19.11-basic-19.11.0.0.0-1.x86_64.rpm
rpm -ivh oracle-instantclient19.11-devel-19.11.0.0.0-1.x86_64.rpm
rpm -ivh oracle-instantclient19.11-jdbc-19.11.0.0.0-1.x86_64.rpm
rpm -ivh oracle-instantclient19.11-sqlplus-19.11.0.0.0-1.x86_64.rpm

设置环境变量:
vi /etc/profile
##添加内容
export ORACLE_HOME=/usr/lib/oracle/19.11/client64/
export LD_LIBRARY_PATH=$ORACLE_HOME/lib

[root@ora2pg ~]# source /etc/profile

# 安装DBD:Oracle
yum install perl-Test-Simple
perl -MCPAN -e 'install DBD::Oracle'


使用 perl -MCPAN -e 'install DBD::Oracle' 安装报错了,换了另一种自己编译的方式。
perl -MCPAN -e shell
cpan[1]> get DBD::Oracle
cpan[2]> quit

[root@ora2pg /]# cd /root/.cpan/sources/authors/id/Z/ZA/ZARQUON/
[root@ora2pg ZARQUON]# tar -zxvf DBD-Oracle-1.83.tar.gz
[root@ora2pg ZARQUON]# cd DBD-Oracle-1.83


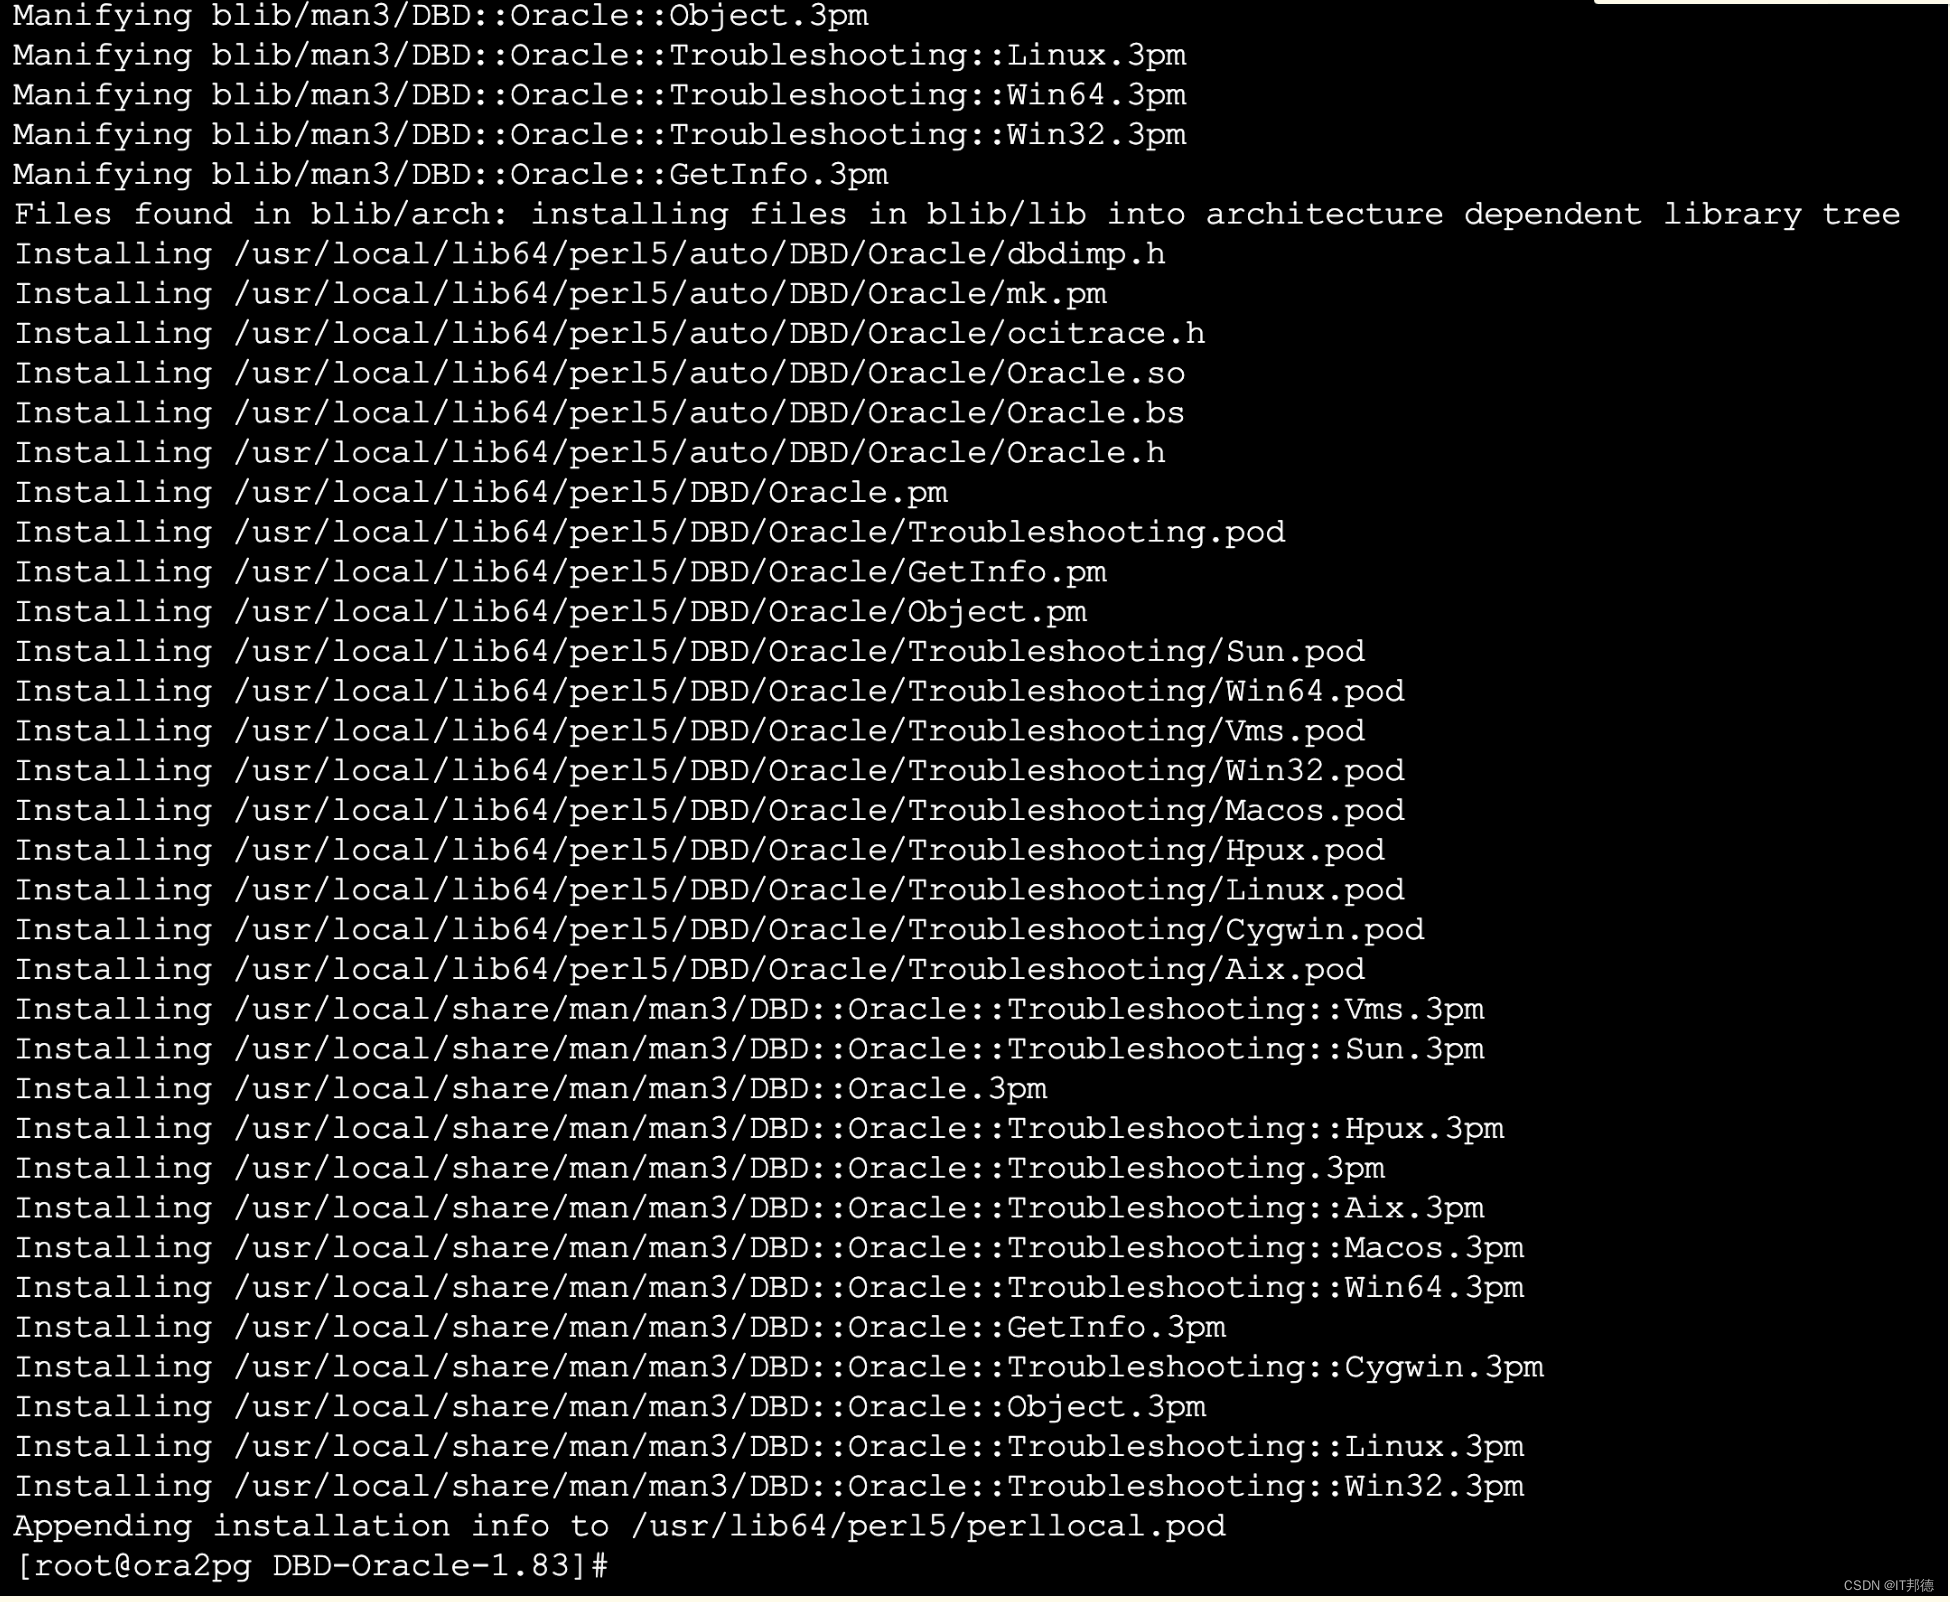
[root@ora2pg DBD-Oracle-1.80]# perl Makefile.PL
[root@ora2pg DBD-Oracle-1.80]# make && make install
? 4.2 正式安装
1.安装包下载
https://github.com/darold/ora2pg/releases/tag/v24.1
[root@ora2pg opt]# mkdir /ora2pg
[root@ora2pg opt]# tar -zxvf ora2pg-24.1.tar.gz
[root@ora2pg opt]# cd ora2pg-24.1
[root@ora2pg ora2pg-24.1]# ll
total 660
-rw-rw-r-- 1 root root 21 Sep 8 11:16 INSTALL
-rw-rw-r-- 1 root root 32472 Sep 8 11:16 LICENSE
-rw-rw-r-- 1 root root 180 Sep 8 11:16 MANIFEST
-rw-rw-r-- 1 root root 74326 Sep 8 11:16 Makefile.PL
-rw-rw-r-- 1 root root 169519 Sep 8 11:16 README
-rw-rw-r-- 1 root root 366059 Sep 8 11:16 changelog
drwxrwxr-x 2 root root 4096 Sep 8 11:16 doc
drwxrwxr-x 3 root root 4096 Sep 8 11:16 lib
drwxrwxr-x 5 root root 4096 Sep 8 11:16 packaging
drwxrwxr-x 2 root root 4096 Sep 8 11:16 scripts
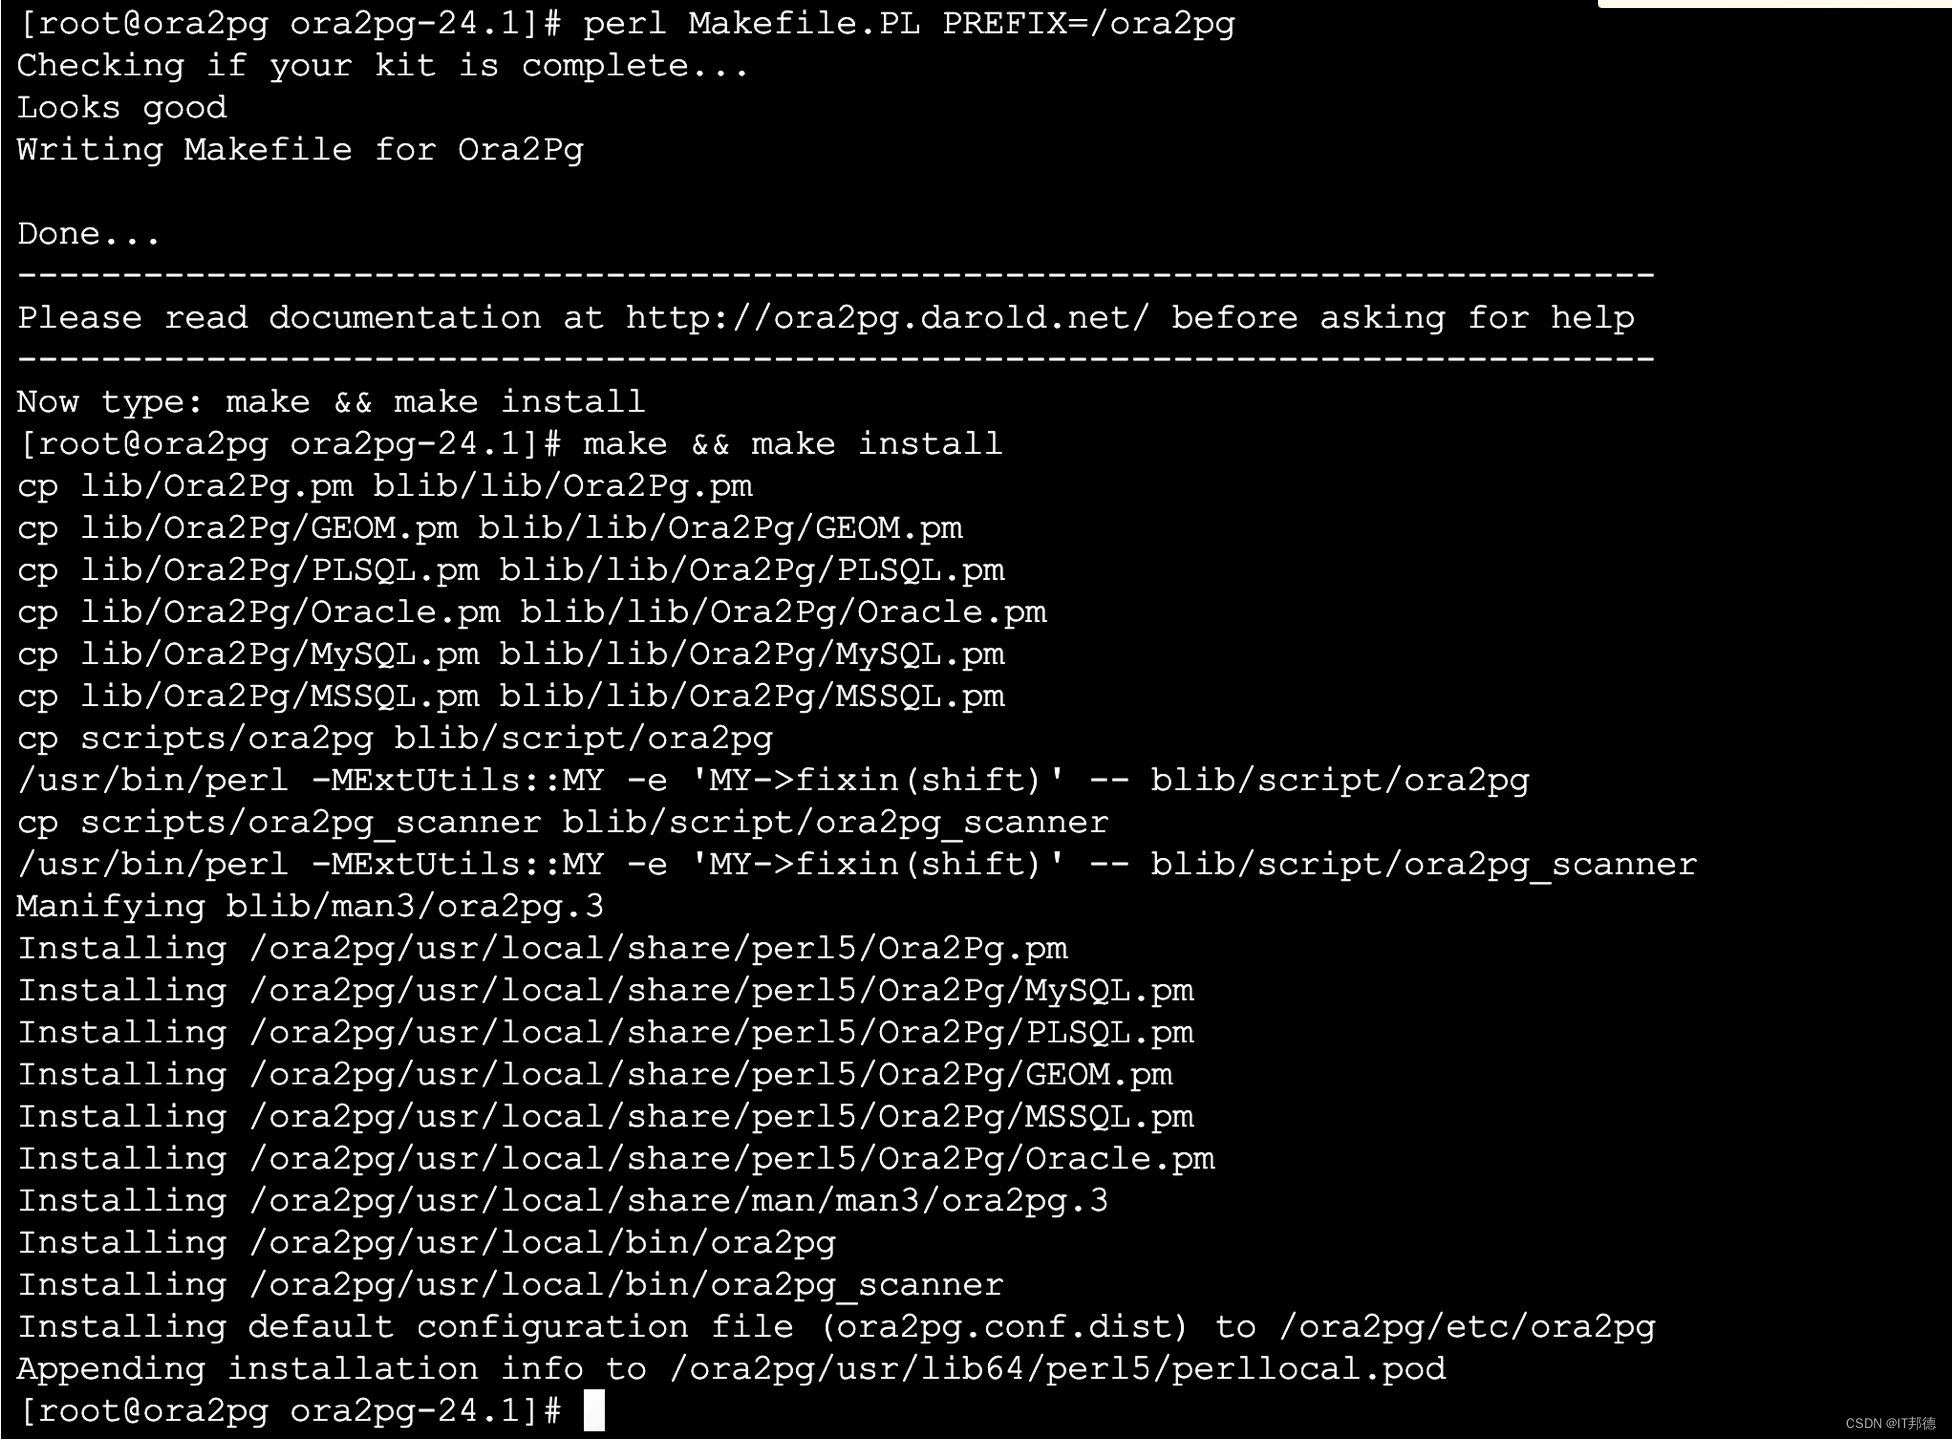
perl Makefile.PL PREFIX=/ora2pg
make && make install
[root@ora2pg ora2pg-24.1]# ll /opt/ora2pg-24.1/lib
total 696
drwxrwxr-x 2 root root 4096 Sep 8 11:16 Ora2Pg
-rw-rw-r-- 1 root root 707565 Sep 8 11:16 Ora2Pg.pm
[root@ora2pg ora2pg-24.1]# ll /ora2pg/usr/local/bin
total 60
-r-xr-xr-x 1 root root 47260 Nov 13 16:07 ora2pg
-r-xr-xr-x 1 root root 10549 Nov 13 16:07 ora2pg_scanner
? 4.3 环境变量
##设置环境变量
vi /etc/profile
export PERL5LIB=/opt/ora2pg-24.1/lib
export PATH=$PATH:/ora2pg/usr/local/bin
source /etc/profile
[root@ora2pg ora2pg-24.1]# ora2pg --help
[root@ora2pg ora2pg-24.1]# ora2pg -v
Ora2Pg v24.1
📣 5.创建迁移项目
[root@ora2pg ora2pg-24.1]# ora2pg --init_project oramig
Creating project oramig.
./oramig/
        schema/
                dblinks/
                directories/
                functions/
                grants/
                mviews/
                packages/
                partitions/
                procedures/
                sequences/
                sequence_values/
                synonyms/
                tables/
                tablespaces/
                triggers/
                types/
                views/
        sources/
                functions/
                mviews/
                packages/
                partitions/
                procedures/
                triggers/
                types/
                views/
        data/
        config/
        reports/

Generating generic configuration file
Creating script export_schema.sh to automate all exports.
Creating script import_all.sh to automate all imports.


说明:
其中主要包含两个脚本export_schema.sh和import_all.sh,后续导出和导入即使用这两个脚本。
schema和sources目录存放各对象的DDL语句,区别在于
1)schema存放PL/SQL语法转化为PL/PGSQL后的语句,
2)sources目录存放转化前PL/SQL的语句

data目录存放表数据文件
config目录包含配置文件ora2pg.conf
reports目录存放迁移报告
📣 6.正式迁移
? 6.1 创建测试表
## Oracle建表
create user jeames identified by oracle;
grant dba to jeames;

create table jeames.test(name char(10));
insert into jeames.test values('opengauss');
create table jeames.machine(name char(20));
insert into jeames.machine values('it');

2.openGauss侧新建数据库mydb和用户tuser

su - opengauss
gs_ctl start -D $GAUSSHOME/data/single_node -Z single_node
gsql -d postgres -r


openGauss=# create database mydb;
openGauss=# CREATE USER test WITH PASSWORD 'adm@23456';
openGauss=# GRANT ALL PRIVILEGES TO test;
openGauss=# alter database mydb owner to test;
? 6.2 配置ora2pg.conf
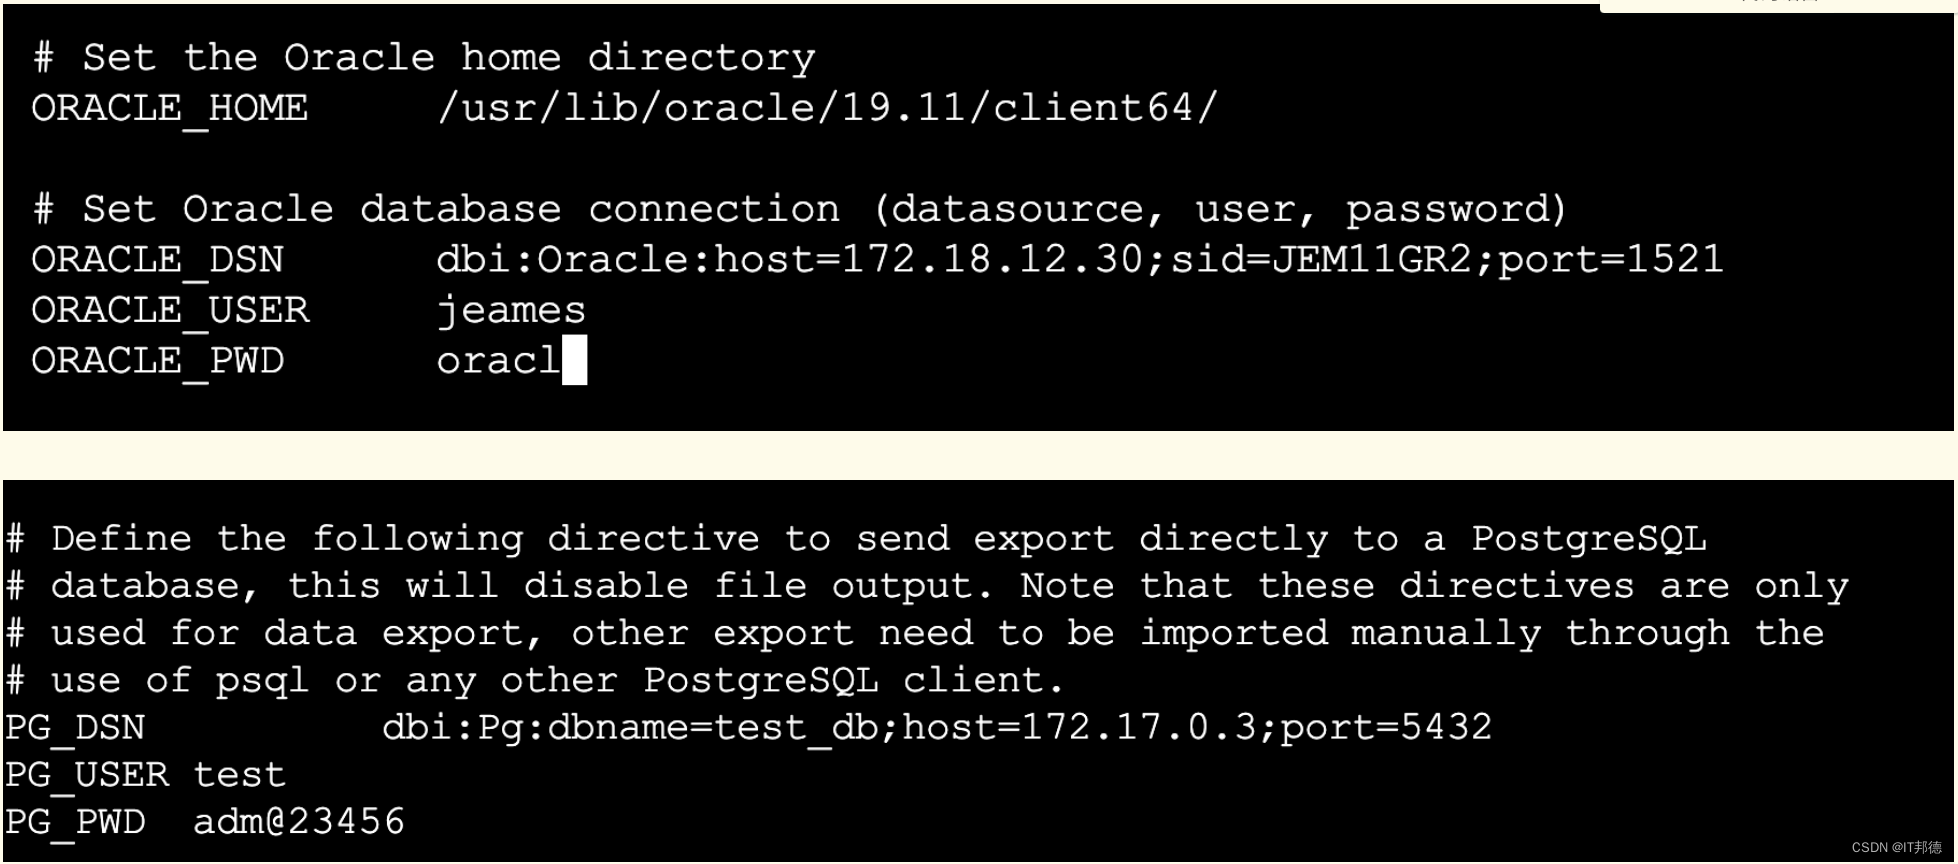
参数文件:
/opt/ora2pg-24.1/oramig/config/ora2pg.conf


ORACLE相关参数:
ORACLE_HOME /u01/app/oracle/product/11.2.0/
ORACLE_DSN dbi:Oracle:host=oracleIP;sid=orcl;port=1521
ORACLE_USER customerchat // 这里用的oracle普通用户和密码
ORACLE_PWD XXXXX
SCHEMA customerchat //一般和用户名一样

openGauss相关参数:
PG_DSN dbi:Pg:dbname=mydb;host=localhost;port=5432
PG_USER tuser
PG_PWD 自己定义的密码
工具自身参数:
DATA_LIMIT 默认是10000,如果oracle服务器内存较小,比如4G以下,可以修改为2500或5000,否则可能会报内存不足。
更多更详细的配置项说明,可查看ora2pg.darold.net官网.


测试一下配置:
执行如下命令会返回连接的Oracle版本号
[root@ora2pg /]# ora2pg -t SHOW_VERSION -c /opt/ora2pg-24.1/oramig/config/ora2pg.conf
Oracle Database 11g Enterprise Edition Release 11.2.0.4.0

SHOW_VERSION : display Oracle version
-c 指定配置文件
? 6.3 表迁移
–修改迁移工具oramig目录下export_schema.sh中导出类型EXPORT_TYPE和SOURCE_TYPE
如果迁移迁表和函数,请做如下修改
vi export_schema.sh
EXPORT_TYPE=“TABLE FUNCTION”
SOURCE_TYPE=“FUNCTION”
[root@ora2pg /]# cd /opt/ora2pg-24.1/oramig/
1.导出
在oramig目录下执行
[root@ora2pg oramig]# cd /opt/ora2pg-24.1/oramig/
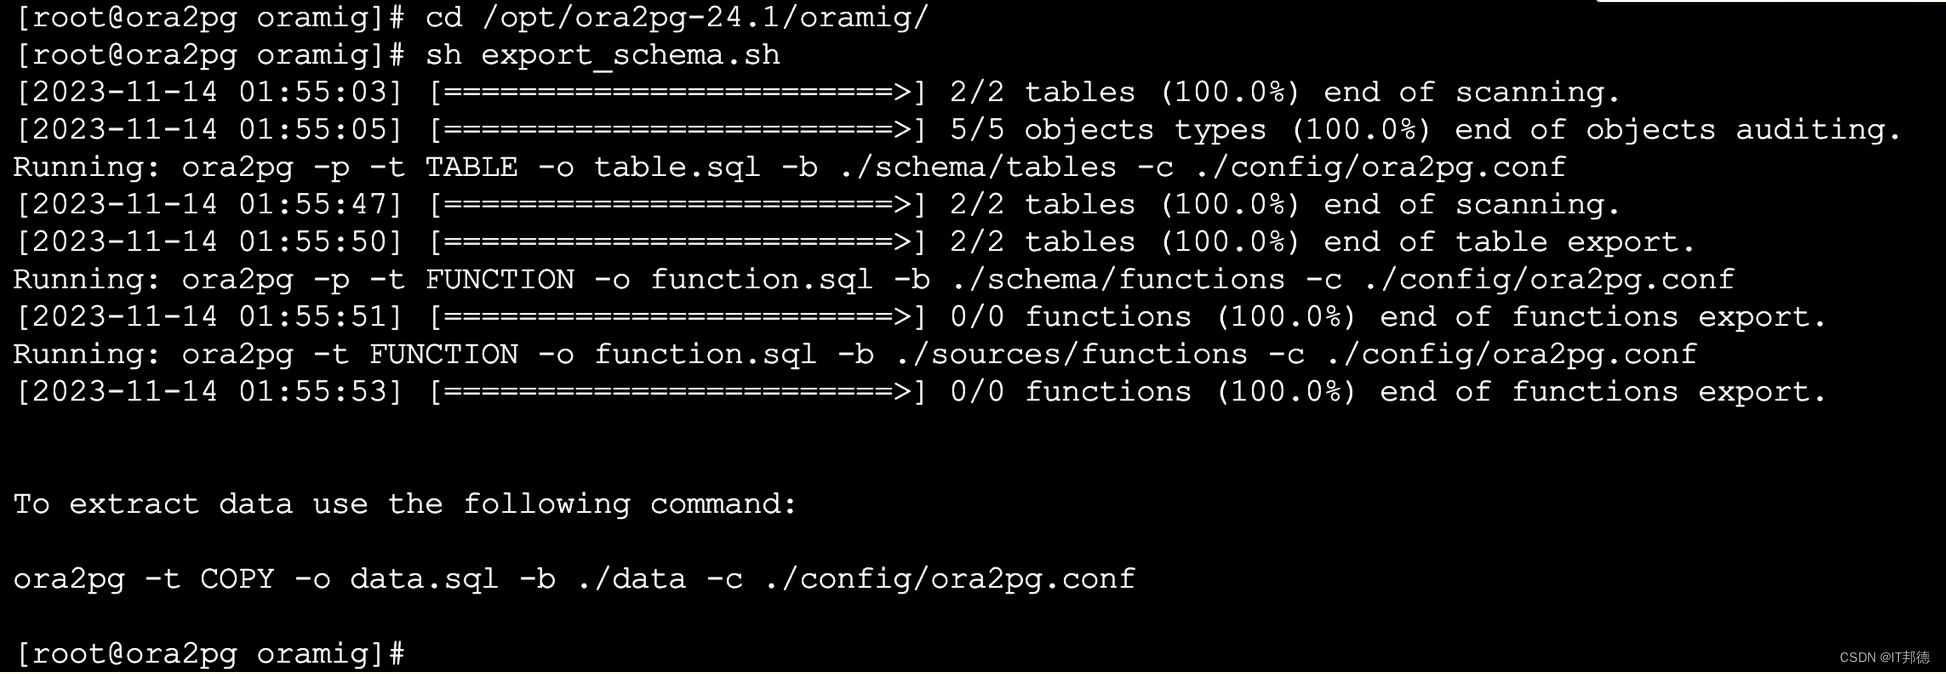
[root@ora2pg oramig]# sh export_schema.sh
[2023-11-14 01:55:03] [>] 2/2 tables (100.0%) end of scanning.
[2023-11-14 01:55:05] [>] 5/5 objects types (100.0%) end of objects auditing.
Running: ora2pg -p -t TABLE -o table.sql -b ./schema/tables -c ./config/ora2pg.conf
[2023-11-14 01:55:47] [>] 2/2 tables (100.0%) end of scanning.
[2023-11-14 01:55:50] [>] 2/2 tables (100.0%) end of table export.
Running: ora2pg -p -t FUNCTION -o function.sql -b ./schema/functions -c ./config/ora2pg.conf
[2023-11-14 01:55:51] [>] 0/0 functions (100.0%) end of functions export.
Running: ora2pg -t FUNCTION -o function.sql -b ./sources/functions -c ./config/ora2pg.conf
[2023-11-14 01:55:53] [>] 0/0 functions (100.0%) end of functions export.
To extract data use the following command:
ora2pg -t COPY -o data.sql -b ./data -c ./config/ora2pg.conf
注意:执行导出脚本,等待迁移完成。结束后在schema和sources的子目录下生成对应类型的DDL文件,并在末尾给出导出表数据的命令。
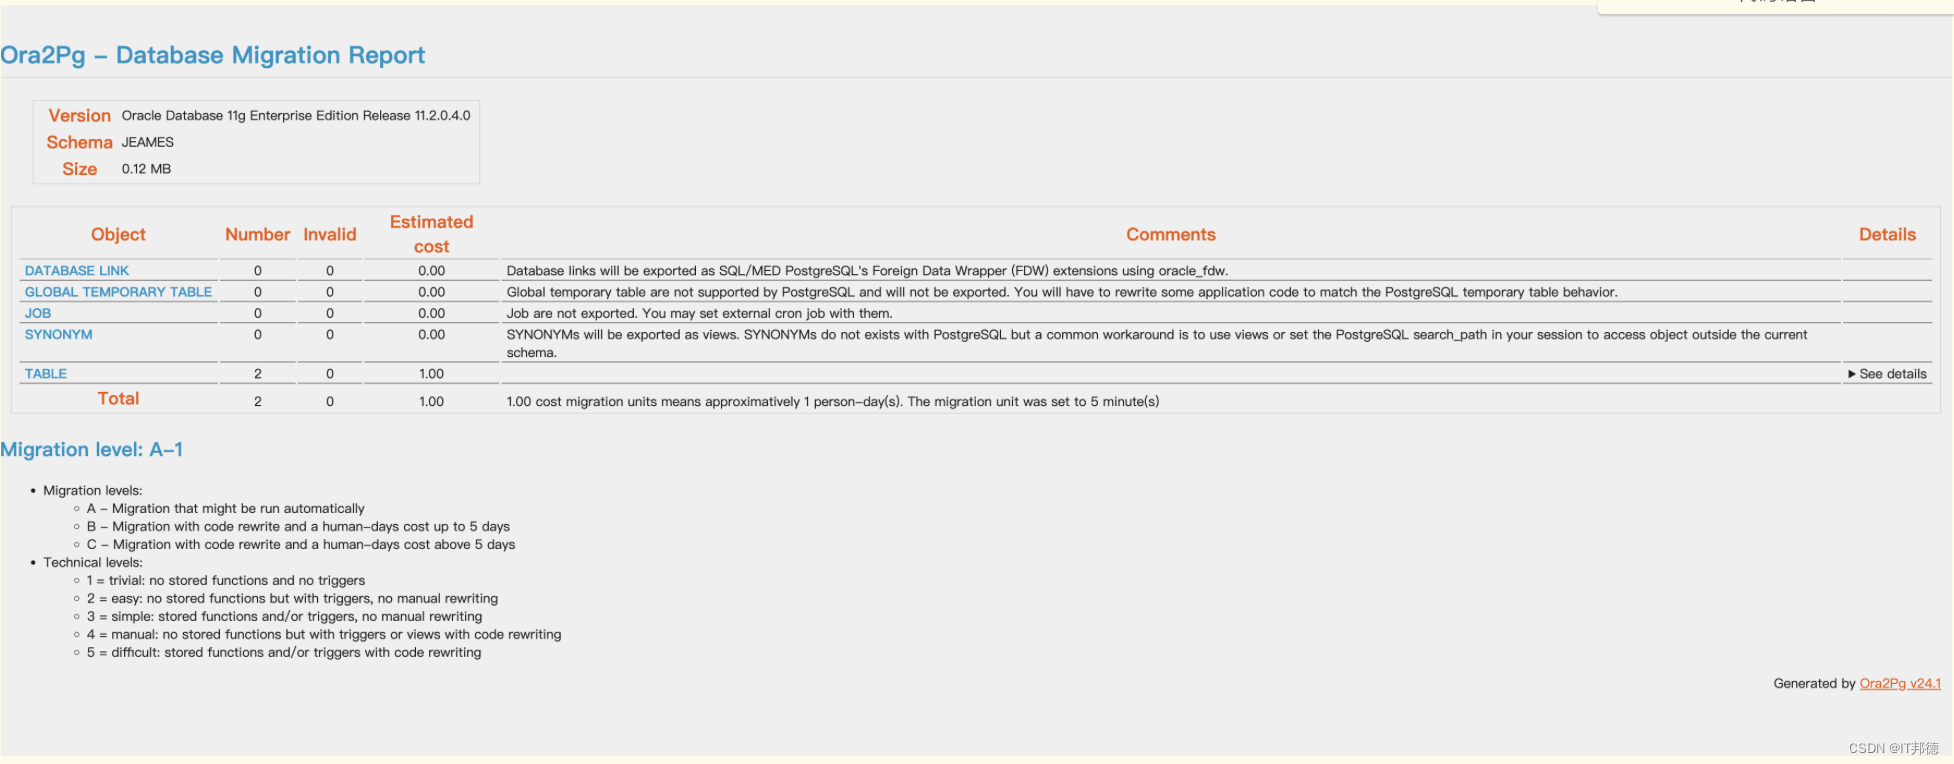
同时reports目录下也生成html格式的迁移报告
cd /opt/ora2pg-24.1/oramig/reports
--导入,还是在oramig目录下执行导入
导入之前需要具备以下要求:
1.先在openGauss库中创建数据库,并在该数据库下创建用户,把mydb属主设为该用户
import_all.sh中使用PostgreSQL特有的createuser和createdb创建用户和数据库
2.为了使用openGauss命令行工具gsql,需要将数据库的bin和lib加在操作系统的环境变量PATH和LD_LIBRARY_PATH中
vi /etc/profile

export GAUSSHOME=/app/openGauss
export PATH=$GAUSSHOME/bin:$PATH
export LD_LIBRARY_PATH=$GAUSSHOME/lib:$LD_LIBRARY_PATH

gsql -U test -d mydb –h 172.18.12.60 -p 5432 -W adm@23456

3.将import_all.sh里的psql修改为gsql
cd /opt/ora2pg-24.1/oramig/

4.当使用普通用户导入数据时,可增加一个执行该脚本的选项,指定用户密码,避免频繁输入密码
sh import_all.sh -d mydb -o test –h 172.18.12.60 -p 5432 –f
注:执行导入脚本,表示使用用户test登录名为mydb的数据库,ip和端口分别是172.18.12.60和5432,-f选项表示跳过用户和数据库是否需要创建的检查。

本文来自互联网用户投稿,该文观点仅代表作者本人,不代表本站立场。本站仅提供信息存储空间服务,不拥有所有权,不承担相关法律责任。 如若内容造成侵权/违法违规/事实不符,请联系我的编程经验分享网邮箱:veading@qq.com进行投诉反馈,一经查实,立即删除!