自定义充电量按照百分比变化如何实现?(储能、自定义组件)
2023-12-15 10:40:28
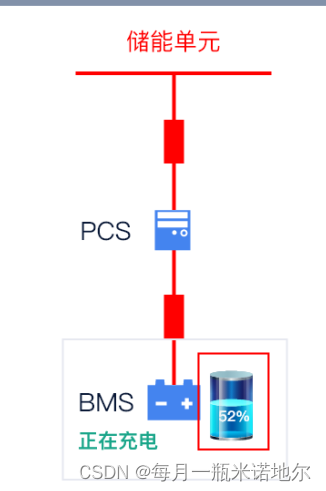
首先看需求:

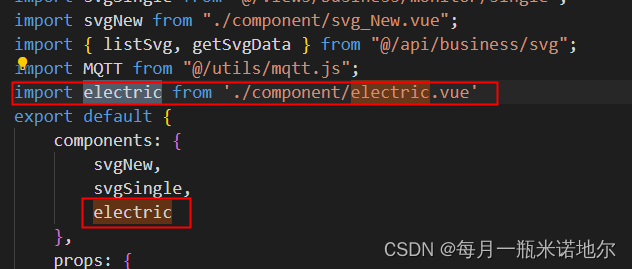
想要实现如上图所示的充电量变化的一个动态效果。我们可以首先在页面div盒子里定义一个组价,在组建内部去进行相应代码的编写,代码如下:


electric组件代码:
<template>
    <div class="electric_container">
        <div class="background" :class="'background_' + skin">
            <div class="bg_small" :class="'bg_small_' + skin" :style="{ 'height': percent + '%' }">
                <div class="electric_number">{{ percent }}</div>
            </div>
        </div>
    </div>
</template>
<script>
export default {
    props: {
        percent: {
            type: Number,
            default: 0
        },
        skin: {
            type: Number,
            default: 1   // 1= 蓝色  2= 红色
        }
    },
    data() {
        return {
            percentInt: null
        }
    },
    created() {

    }
}
</script>
<style scoped lang="scss">
.electric_container {
    width: 100%;
    padding-bottom: 125%;
    position: relative;
    // background-color: pink;

}

.background {
    height: 100%;
    width: 100%;
    background-image: url(../../../assets/images/bg_big.png);
    background-size: 100% auto;
    background-repeat: repeat-y;
    display: flex;
    align-items: flex-end;
    position: absolute;
}

.background::before {
    content: "";
    border-radius: 0 2px 2px 0;
    position: absolute;
    left: 0;
    top: -11.3%;
    width: 100%;
    padding-bottom: 22.5%;
    background-image: url(../../../assets/images/electric_top.png);
    background-repeat: no-repeat;
    background-size: 100% 100%;
    z-index: 1;
    /* background: -webkit-linear-gradient(left top, #0081ff, #22cce2); */
}

.background::after {
    content: "";
    border-radius: 0 2px 2px 0;
    position: absolute;
    left: 0;
    bottom: -11.3%;
    width: 100%;
    padding-bottom: 22.5%;
    background-image: url(../../../assets/images/bottom.png);
    background-repeat: no-repeat;
    background-size: 100% 100%;
    z-index: 0;
    /* background: -webkit-linear-gradient(left top, #0081ff, #22cce2); */
}

.bg_small {
    position: relative;
    /* height: 50%; */
    width: 100%;
    background: url(../../../assets/images/bg_small.png) left top / 100% auto repeat-y;
    z-index: 0;

}

.bg_small::before {
    z-index: 0;
    content: "";
    border-radius: 0 2px 2px 0;
    position: absolute;
    left: 0;
    top: -8.55%;
    width: 100%;
    padding-bottom: 17.1%;
    background-image: url(../../../assets/images/middle.png);
    background-repeat: no-repeat;
    background-size: 100% 100%;
}


.bg_small_2 {
    background: url(../../../assets/images/bg_small_low.png) left top / 100% auto repeat-y;

    &::before {
        background-image: url(../../../assets/images/electric_middle_low.png);
    }
}

.background_2 {
    background-image: url(../../../assets/images/bg_big_low.png);
    &::after {
        background-image: url(../../../assets/images/electric_bottom_low.png);
    }
}

.electric_number {
    position: absolute;
    width: 100%;
    text-align: center;
    bottom: 20%;
    left: 0;
    /* left: 50%;
    top: 50%;
    transform: translate(-50%,-50%); */
    font-size: 18px;
    color: #fff;
    z-index: 1;
}</style>
为什么要传入skin这个参数值呢,就是为了在父组件中去判断电量的临界值,为了确保组件的可复用性,不同业务需求对于电量小于多少报红的要求是不一样的,例如有时候我要求电量小于20%变红,有时候我要求电量小于5%报红,所以在父组件判断会使代码可复用性增强。
文章来源:https://blog.csdn.net/xiaoxiaoovo/article/details/134993033
本文来自互联网用户投稿,该文观点仅代表作者本人,不代表本站立场。本站仅提供信息存储空间服务,不拥有所有权,不承担相关法律责任。 如若内容造成侵权/违法违规/事实不符,请联系我的编程经验分享网邮箱:veading@qq.com进行投诉反馈,一经查实,立即删除!
本文来自互联网用户投稿,该文观点仅代表作者本人,不代表本站立场。本站仅提供信息存储空间服务,不拥有所有权,不承担相关法律责任。 如若内容造成侵权/违法违规/事实不符,请联系我的编程经验分享网邮箱:veading@qq.com进行投诉反馈,一经查实,立即删除!